Updates
Last of the Seasons harvest.

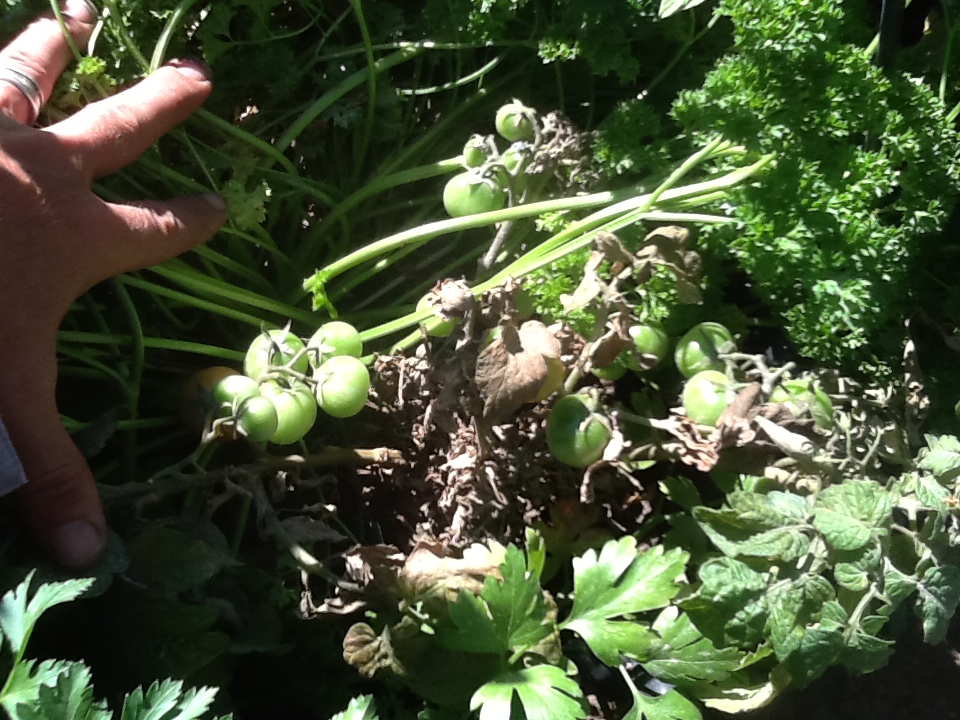
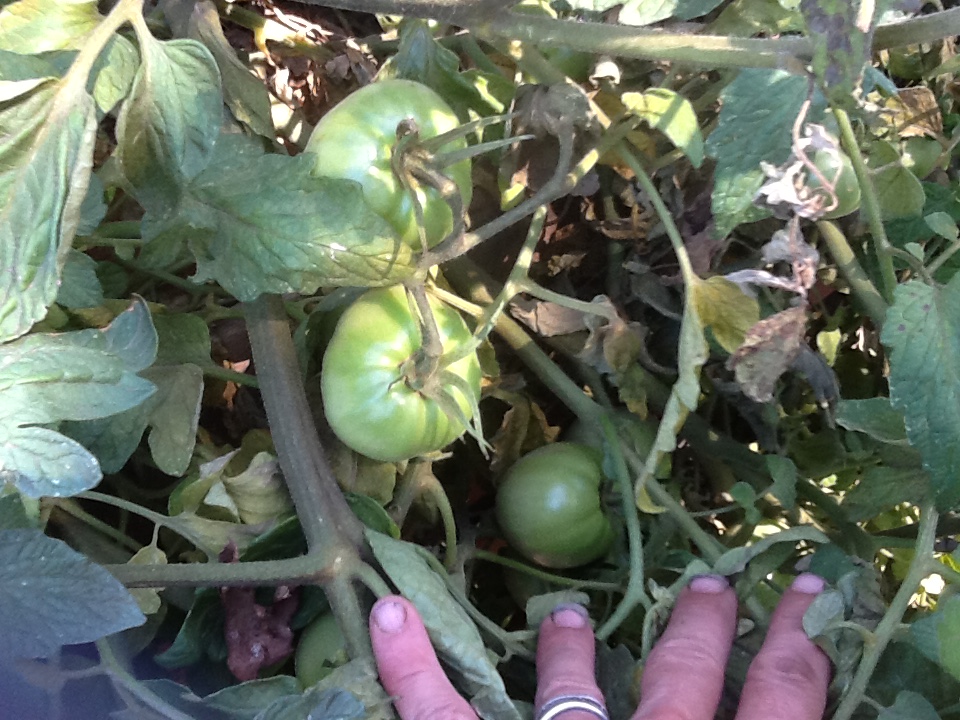
Almost the last of 2015’s plantings. All bar one potted tomato have been knocked off by the last frost two nights ago, last three corn cobs and eggplant picked and composted. Had over two inches in the old language of rain in the past two weeks, nice and cold clear night and only a couple of really windy days. No damage!
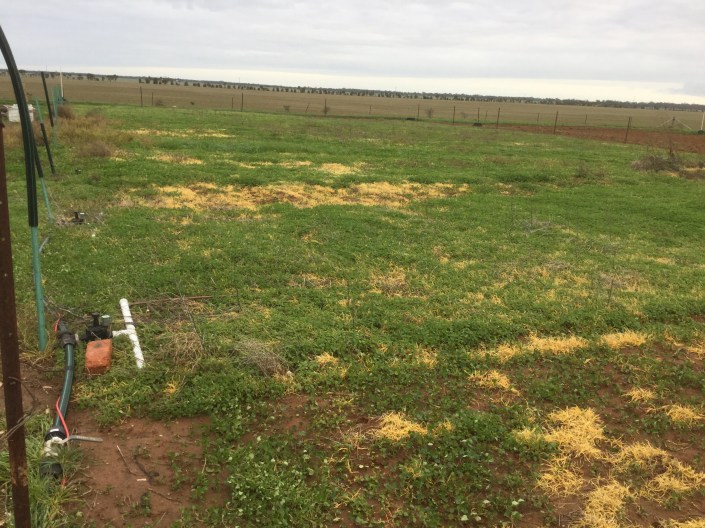
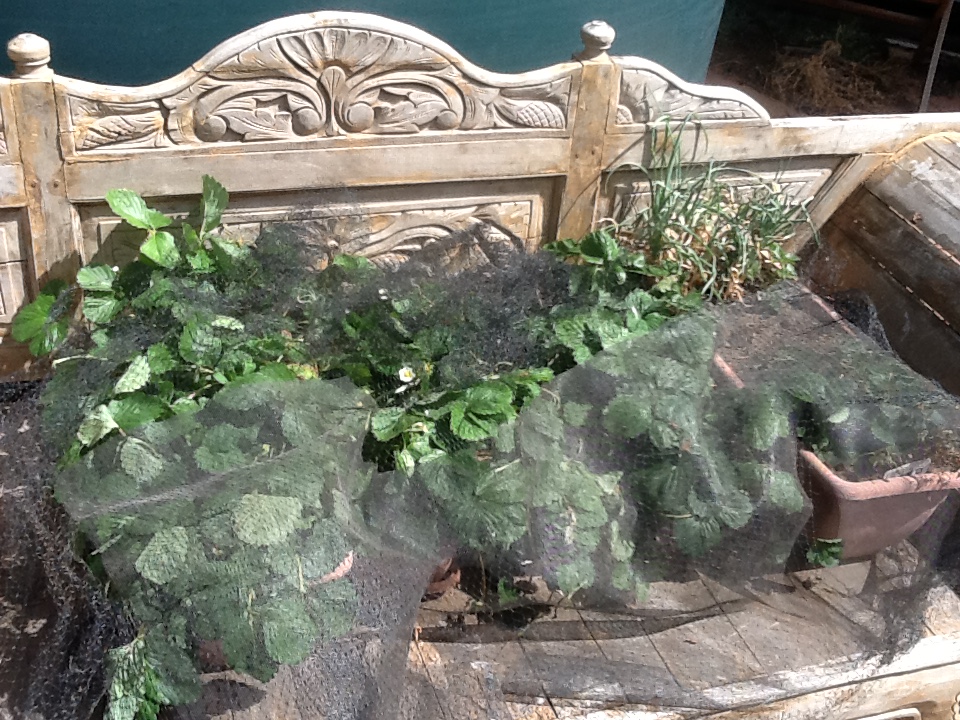
All the garlic and Golden Shallots are in and beds 13 to 24 are plumbed ready for some strawberry runners to go in today. I’ve left a cover of English Nettle as frost protection (see pic below)
Bed 13 (the one closest) now has three rows of strawberries equaling 200 plants! I’m planning to pin down any runners as they appear so I have a self perpetuating bed…
Lake Crest Controller
My 48 station controller died last week and the solution from Lake Crest was beyond description. Play it and see for yourselves.
Avocado from seed!
The Garden of Earthy Treasures believes in food sourced as locally as possible and in season. That shouldn’t mean that you forgo certain luxuries such as avocado. Had bought one years ago before I got into what I’m doing now, it got frosted and died, I gave up after someone told me they won’t grow below Sydney.
Recently I heard someone was growing a banana in Horsham, 35 km south of me, and the thought of an avocado popped back into my mind, I know the Boss would love homegrown avocados! Did some reading and came across the method below. It has worked once, as you can see, and now I’m successful once again. See that little green stem arising from the center of the seed? (Don’t mind the cobweb, did’t notice it when I took the pic).
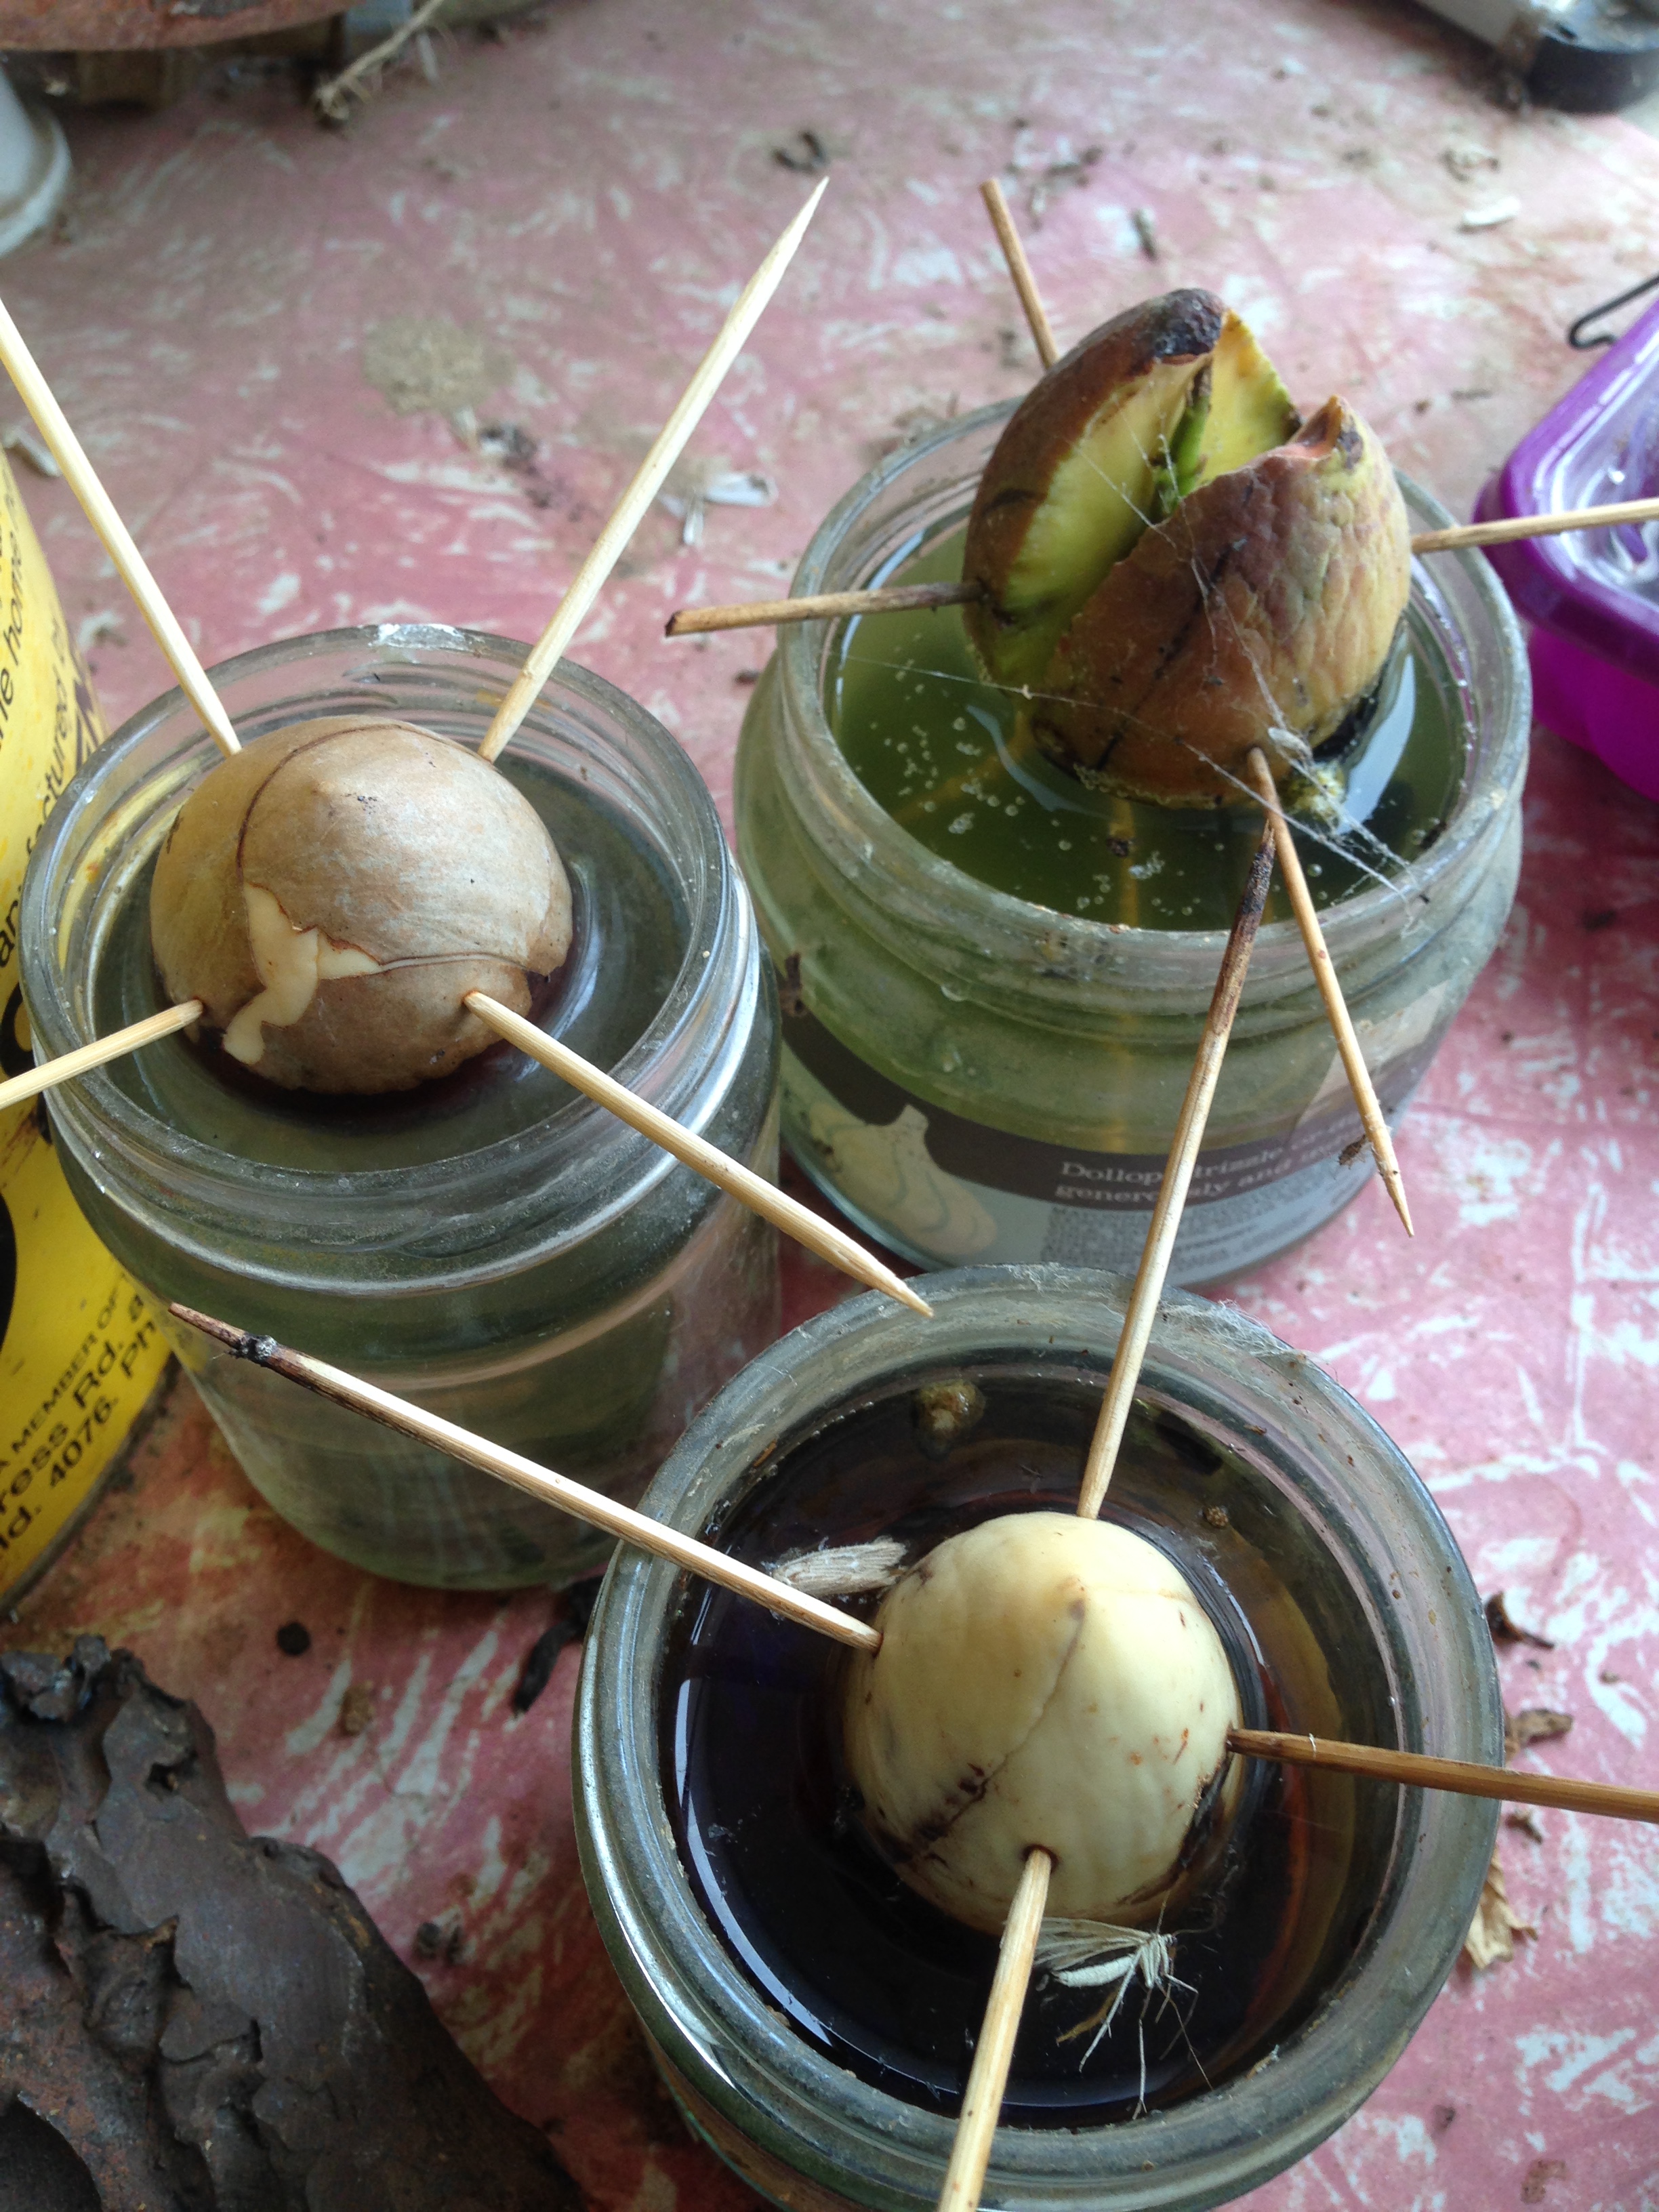
The secret is, as far as I can tell, is to keep the base in water and do not let it dry out!!! When topping up the water do not let the top get wet, it has to dry out, crack open and then shoot. Water at the base and keep the room temperature between 18 and 27 deg C. The constant temperature assists in drying out the seed so it will germinate. I cheated because I have a terradome to use but if you leave it on the window ledge of the kitchen, for example, the heat radiated into the room during the day will be negated by the cool air flowing down the same window at night. This leads to the next secret that is they do not need light to sprout. Therefore to maintain a constant temp you can cover the seed and bottle with a clear plastic drink bottle (top chopped off and turned upside down over it) to create a little micro climate enabling the constant temp and humidity.
A tip on the tooth picks! Make sure you can see the seam that runs bottom to top on the seed. I peeled the lower seed to show it up. This line is where the crack forms to let the shoot through. If you put in the pick on that line one of two things will happen.
- the pick introduces disease into the seed and it dies
- the crack opens and the pick falls out letting the seed drop and drown. Once the top dries out and then it gets wet again it will fail to germinate
Better to leave the seed on the bench top to dry so the thin light brown skin cracks showing you where the germination line is (middle seed in the pic).
After 12 months this is what you get…
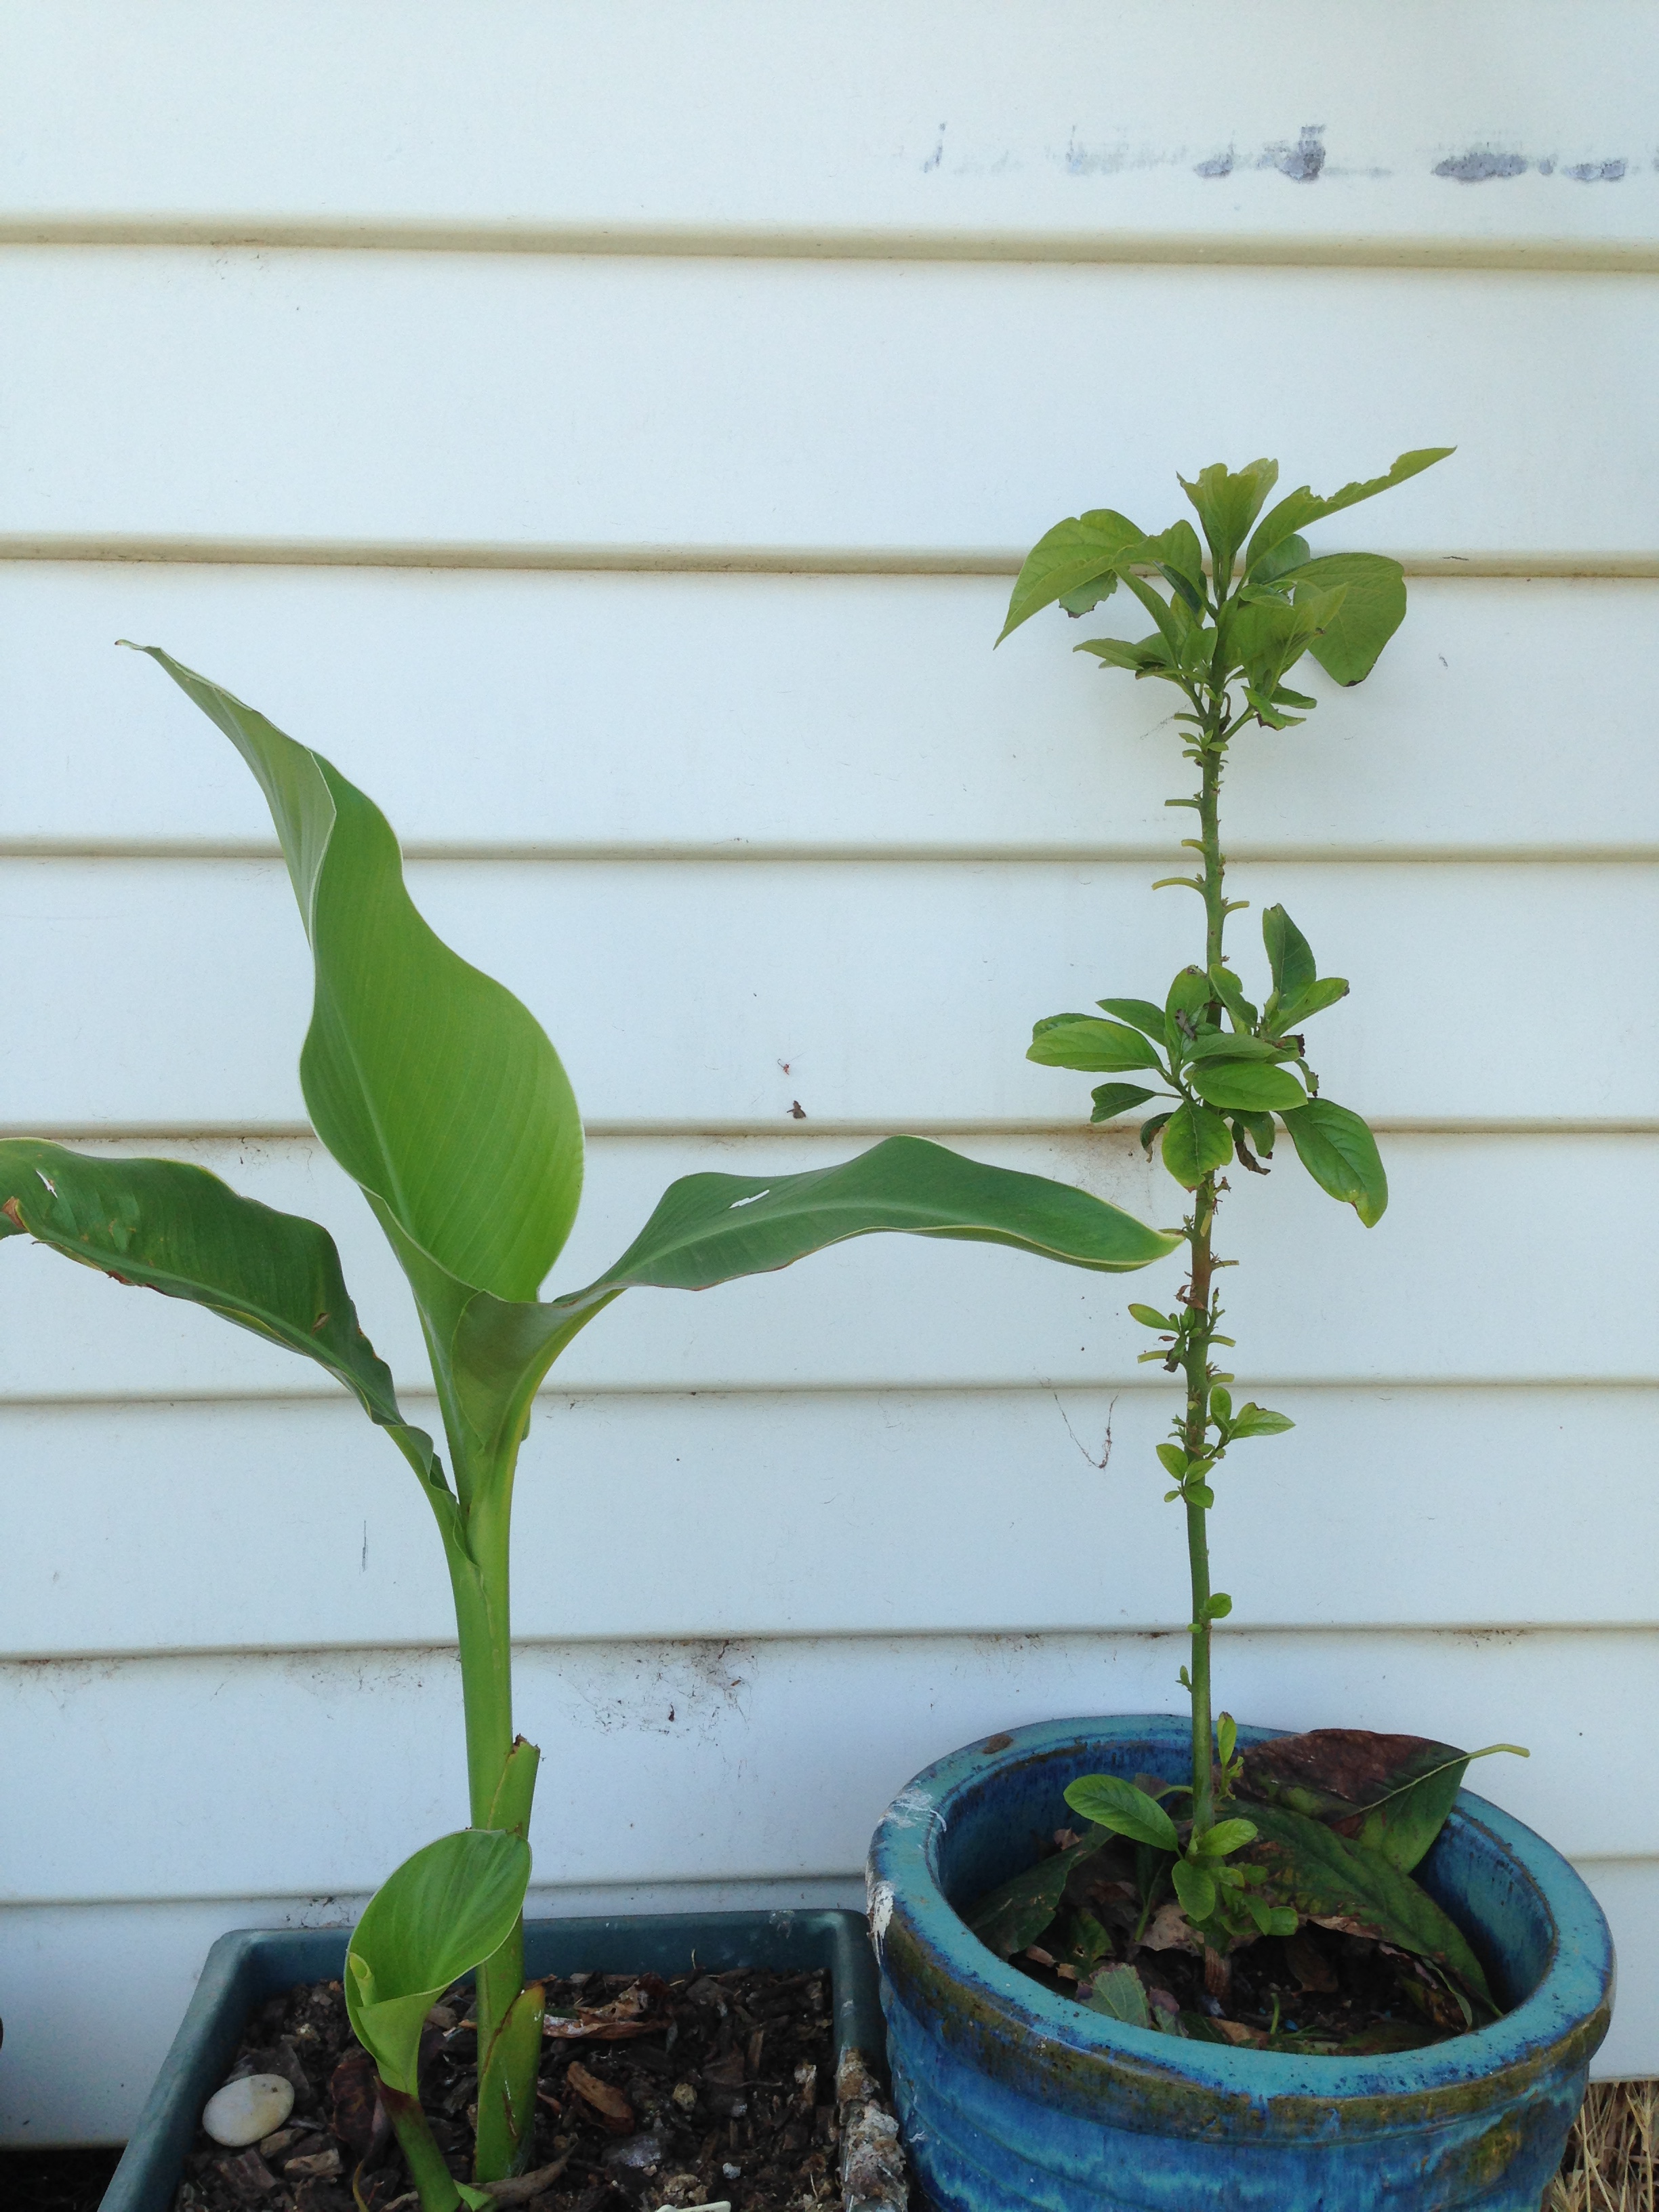
Avocado on the right with some frost damaged leaves snipped off around the base. New shoots are growing so fast you can almost see it! Canna on the left has a new shoot too. Another experiment in growing stuff here that we shouldn’t be growing.
Both were protected by a plastic tree guard and stakes over the winter and placed on the north wall which has full sun in winter and shade in summer, fertilised and mulched now for the growing season. Will monitor how they both do and next spring I plan to graft onto the avocado both Bacon, Tonnage and maybe if I can locate one a Anaheim!!!
It is recommended to pinch out the growing tips to create a bush rather than a tree. Keep in mind there are male and female flowers that open at differing times of the day evidently. We’ll see…
The best single document on growing avocado in Oz is below…
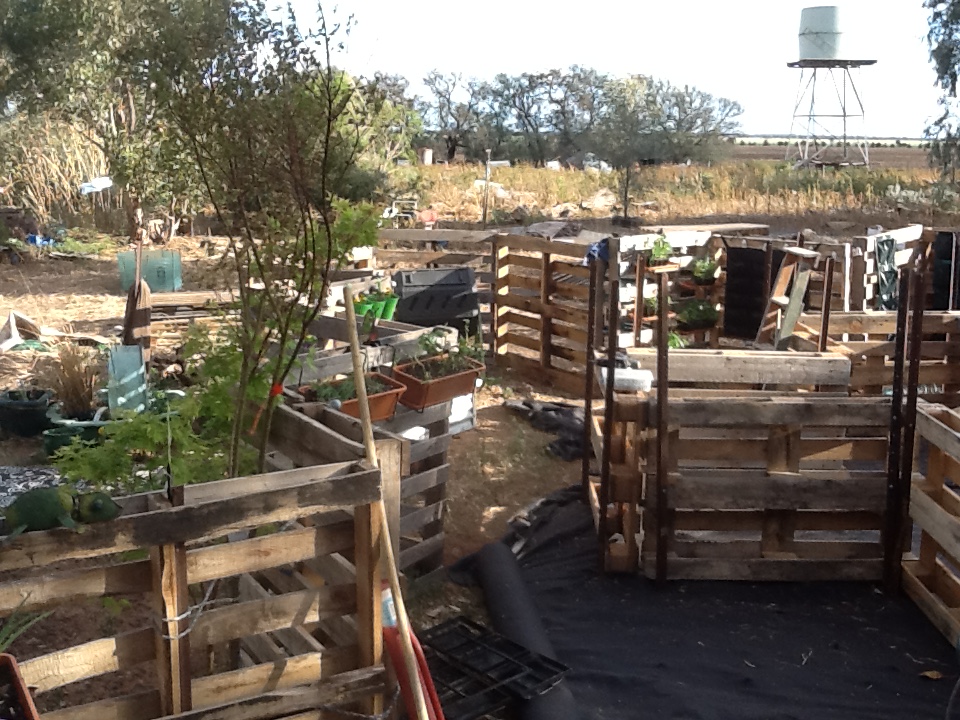
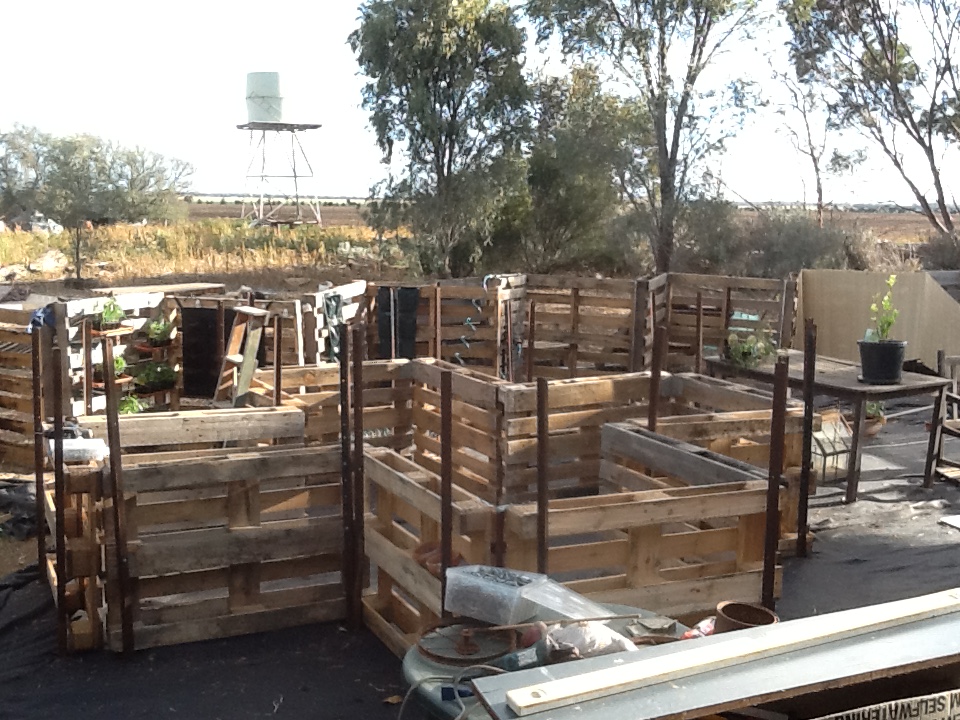
La Vergne’s pallet garden is filled and growing.
Got it done, finally! My wife has wanted a functional proper sized raised bed pallet garden for planting in spring. I have been collecting pallets from around the area for some time and a build up of similar types was finally occurring. It is very difficult to build with different sizes, shapes and strengths so you have to wait till enough of one type accumulate.
Now that has happened her garden could happen.
First we laid out three strips of geotech over the racked ground to level the site and remove sticks and stuff that might pierce it allowing roots through from two close by eucalyptus trees. Then 12 pallets in a cross shape were laid out and leant them against each other to determine exactly where to place it in her garden space. It had to fit close to the pallet wall but not too close and still give enough room for the Japanese styled solitude garden next door.
Once in place two star post were driven in and tech screwed solid. After the initial shape was made a lining of builders plastic 500mm wide was stapled in place along the upper portion of the bed and a geotech strip again 500mm wide behind the plastic and long enough to drape over the ground forming a barrier to letting any soil under the wall.
Pallet wall and east arm of the pallet cross.
The pallet cross and south pallet wall.

Western part of her garden showing basic siting of her three tiered pond, stone pagoda and napping Buddah.
The house from where this pic was taken protects the area from driving hot summer winds and the tank and wormwood hedge with bamboo screens trap most of the damaging westerly winds we get. This spring has been the windiest in my lifetime with damaging wind one day a week at least. Our bush food planting behind the tank are yet to really establish and assist in keeping the winds down so we just have to live with it for now.
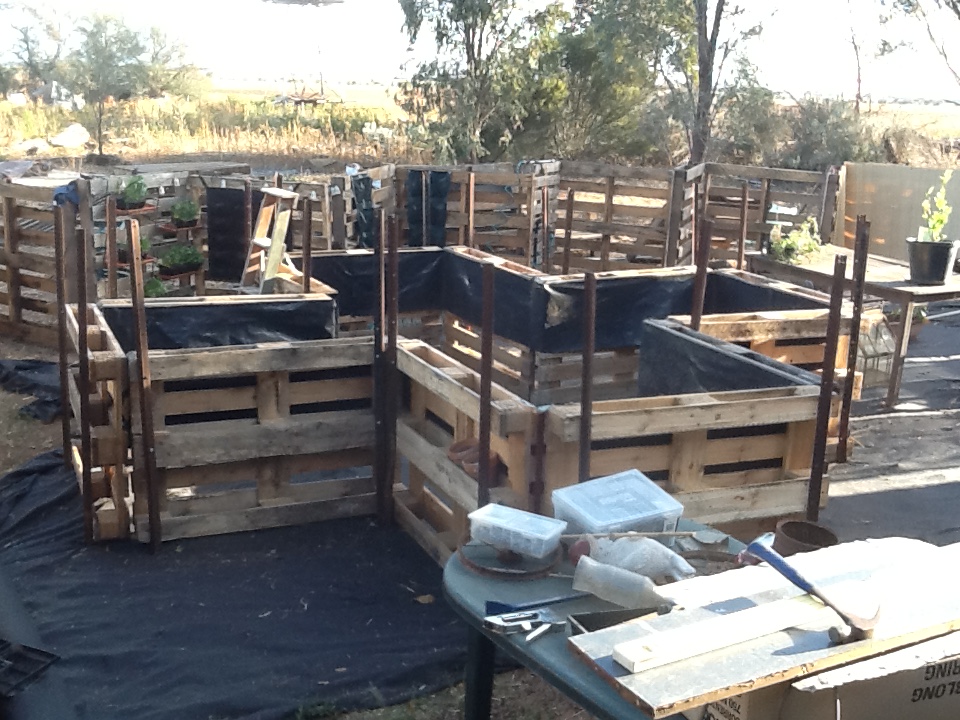
Builders plastic done with the strip of geotech next to get stapled.

Dirt in with Lachlan spreading it out and tamping down.
Finished bed with dripper system in place, plants she wanted in and alls well.
Now to tackle the earwig problem…
Earwigs are not a pest problem till they get up in numbers so much that their regular diet is depleted and they start chewing on things you would prefer they leave alone. Like cherries, young tree leaves, strawberries and even rhubarb leaves which I hope they get a gut ache from.
They leave some things totally alone but ravage others to the point of destruction, like the pot marigold on the left. They hide underneath the pots in all three in equal numbers but only eat the one plant.


This young pear has been stripped of all new leaves, so I started an experiment with two goals.
- To find a way of deterring them from certain plants.
- To find a natural way of trapping then eradicating them.
I made a spray mix of Tabasco sauce, detergent and hot chilli sauce. Strained through muslin and sprayed onto leaves of a tree being torn to shreds. The result being the leaves sprayed were not touched but those below were still being eaten.

As shown here the top is untouched while the two lower branches are eaten, the left branch totally stripped. Note the new shoots at the top are untouched by earwigs and not affected by the hot sauce spray.
That part of my mission is complete. Now to the next challenge.
I placed old blankets, sheets of tin, wood and lino strips in the orchard between trees to provide shelter for the earwigs during the day. The worst one was the tin sheets as it got too hot and nothing stayed beneath it for long. The others all worked well with the best being an old cupboard door as shown below.

Not many shown here as its not easy to flip a door and get the Ipad up to shoot it. Suffice to say it works and now I had to find a way of killing them on the spot.
During one of my workshops that I hold around the place, an older lady was telling me how her mum used soap to kill a lot of bugs she didn’t want in her veggie garden. This was back in the days before off the shelf pesticides were available. Her method was to cut a small piece of soap off a bar, place it in a bottle of water and shake to dissolve the soap piece. She then poured it onto any infestations and re-covered them. Evidently the soap breaks down the insects skin and kills then. So I tried it with the only soap still around from those days, Velvet Soap.

I caught some earwigs and gave them a light spray, within an hour they were dead. Now every morning after the first coffee I patrol the traps or hides and squirt any beasties found there and re-cover. I have found more drop-tail lizards/skinks, scorpions and centipedes in the garden as a result. Not keen on the last one as they can get very large, up to 20cm long and dark olive body with red legs. Nasty!
Will post more of the garden once fully complete…
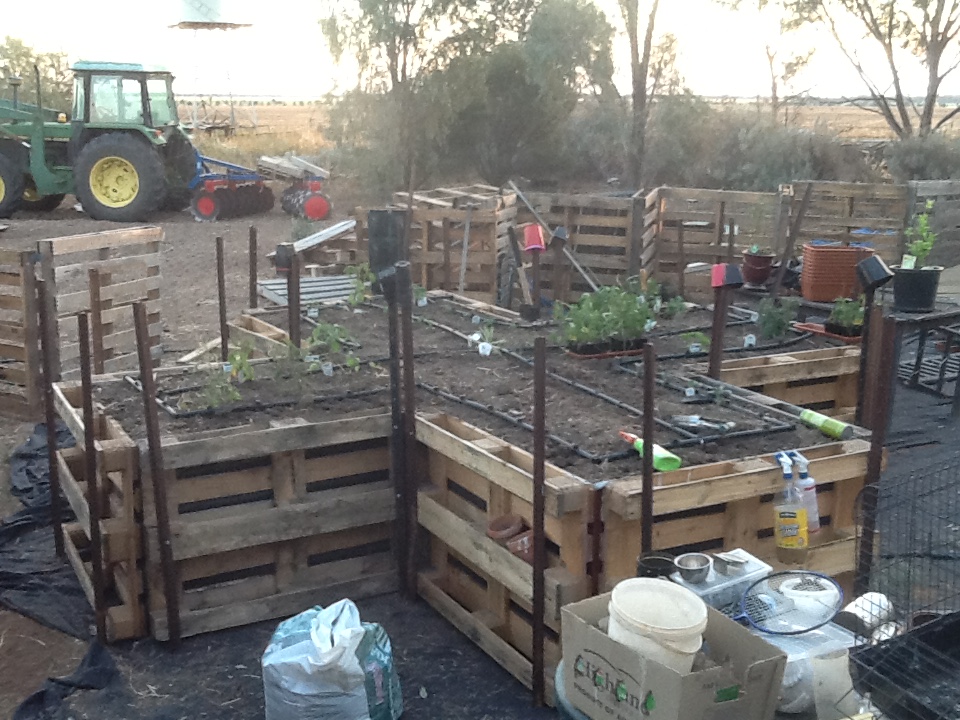
Still working on the scoria base, other projects/priorities keep getting in the way, but this shot shows the lush growth of tomatos, eggplant, chives, strawberries, afro and italian parsley, kale, mini cabbage, zucchini, rhubarb, yarrow and other herbs.

The only additives to the soil was some home made potting mix and a monthly spray of seaweed extract. Some close ups…


There are problems though in LG’s Cross Garden, here is one…

His/Her name is Heckle. There were two we saved from a fallen nest, the other was Jekyll. Jekyll didn’t make it but Heckle makes up for that. Heres his/her contribution to gardening…

Childs bracelet, gutted green tomatos, marbles, golf balls, brass bath plug, small bottles, belt buckle, wire slingshot, molten aluminium, old key set, solar light bulb cover, blue stones and glass and brass cutlery. The solar lights are now denuded of covers completely. This is the best find so far…
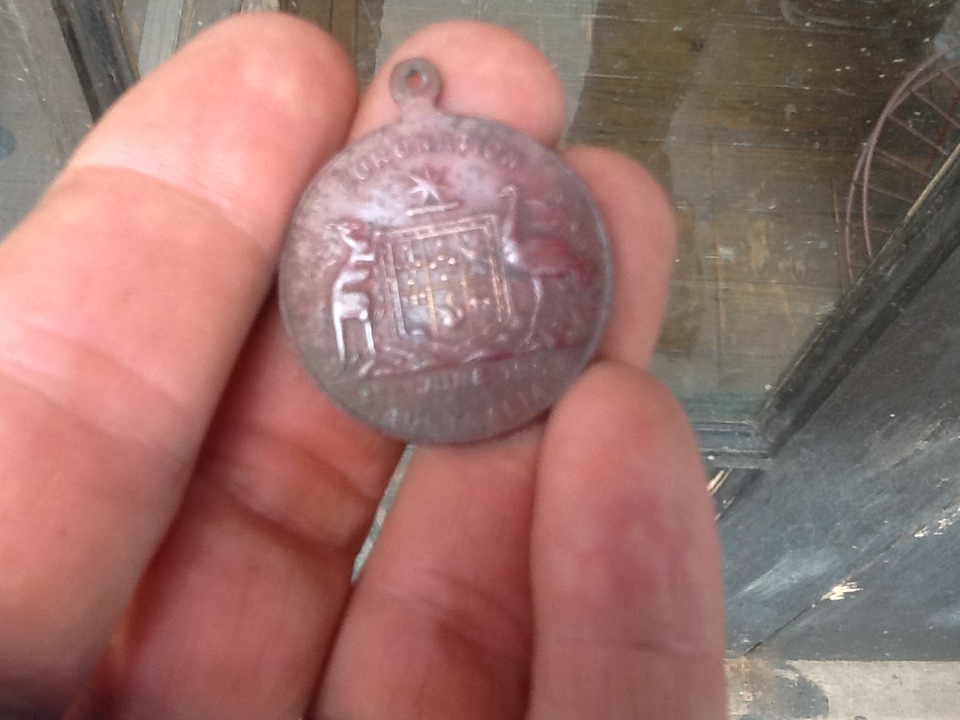

A 1953 coronation medal! Buffed it up a bit and showed Father who reckoned it was on of his siblings who lost it way back when. He also said there is an engagement ring in the vicinity that was lost when one of his sisters was playing with Nannas ring. Hope he finds it!
Any ripe red tomatos Heckle claims as his/hers so they have to be picked early and strawberries are now covered with bird netting which foils him/her.

Might have to rethink gardening methods with Heckle around…
New chook house from second hand materials.
School holidays are a boon when you want a bigger project started which has turned out to be an education for the boys. They have learnt small things like how to de-nail salvaged wood and bigger picture things like how to orient a building to maximize heat retention in winter and utilize cool draughts in summer.
Building the chook run was a challenge as wire and myself do not have a happy relationship. Simply put I hate wire in any form. It does not do what I want it to do and seems to follow its own path thumbing its nose at me. Still it is up and functional with a dripper line around the outside watering Jerusalem artichokes on the south side and berries on the north.
The wood mainly comes from leftover wood used to pack piping from the installation of the Wimmera Mallee Pipline, salvaged timber from the transfer station, steel posts from an old pig sty, galvanised roofing iron and nails from a windbreak fence that succumbed to wind, an old wire grain field bin, scrap netting and weld mesh from the farm rubbish heap.
The site was chosen as it has some elevation to ensure good drainage and mud free living for the chooks. Any manure and nesting material is close to the veggie beds and excess vegetation from the beds is easily thrown over the fence to them to scratch through.
Lachlan, Gordon and myself constructed it with advice from Father and took a month to complete.

Showing construction method used and one of the two nesting box inspection and egg collection windows.
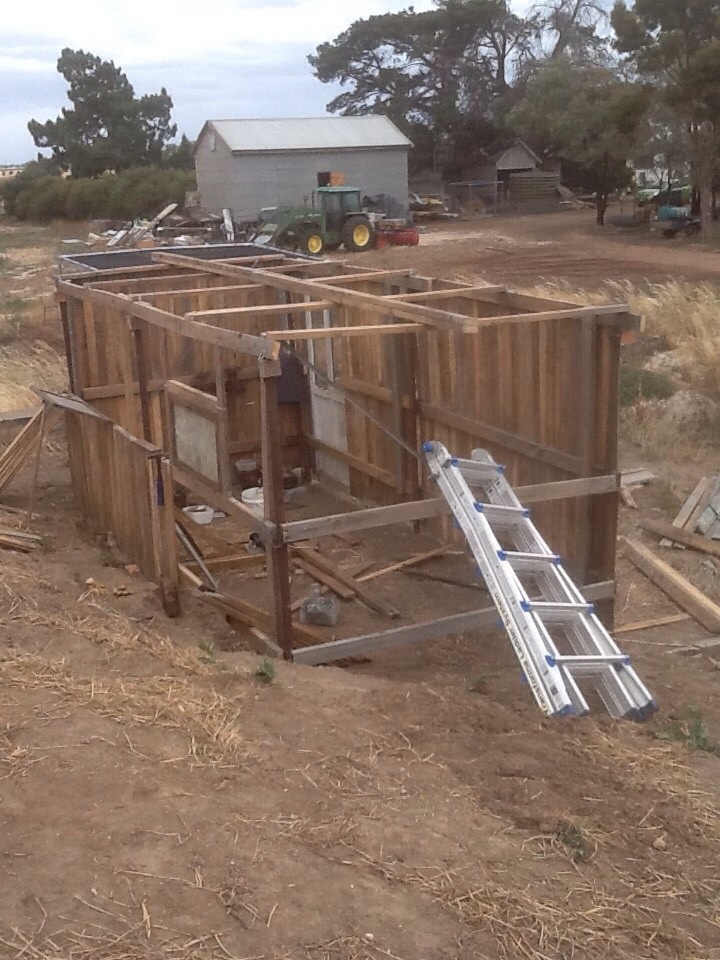
Floor, door, windows and three walls up. Roof trusses made up and ready to go on with old gal roofing iron and nails. All recycled from stuff around the farm. Veggie beds are between the chook shed and barn in the background with the tractor.


Lachlan and Gordon making the brick and mud stepping stones. They had to measure the distance from the chooks shed door to level ground, work out how many steps, cut the steps into the gradient and mud cement them in place. Did a good job and looks great at night with solar lights next to each one.
Detail of run fence with dripper line and solar light. All our pots and trays are stored in the run so bugs move around at night and take cover in the morning. When chooks get fed you turn over the pots letting the birds do a clean up. Earwigs historically have been a big problem here with slugs running a close second. Will see what changes.
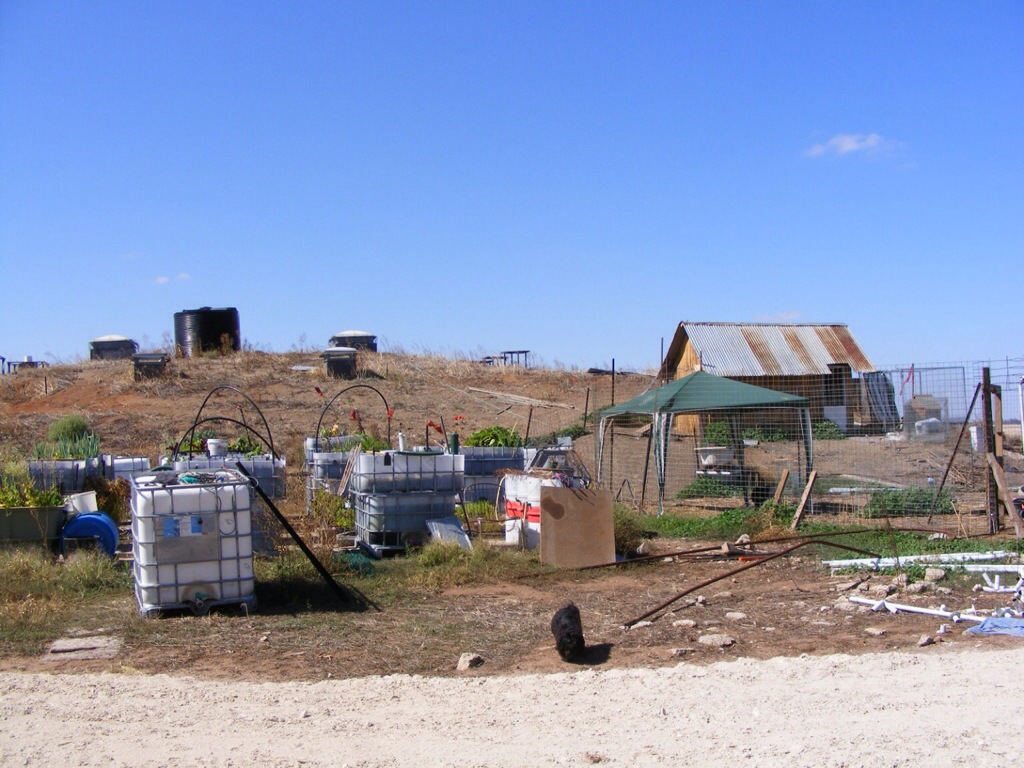
Last middle pic shows the chook run with summer shade hut. Also leaves one dry spot in the run in winter. Next door is the aquaponics where any excess plant material gets thrown over to the chooks for them to pick thru. Terradome in background with the breeding tanks for the Silvers and Yabbies.

In the height of winter the marshmallows are over six feet tall and provide the best wind protection during our frosty nights. Was going to lop them off but I couldn’t have planted a better windbreak as it turns out. The runoff from the roof and highly matured soil have given them a huge boost. Other marshmallows around the farm are only four foot tall like around the strawberry plot.

The implementation of planting by the Moon.
Been a lot happening recently with a major change to our planting operations, a revisit to Melliodora and David Holmgren, my wife La Vergne (LG) graduating with another degree, rain rain and more rain topped off with a localised mouse plague. But back to the beginning…
We have been mulling over the best way to optimise our planning and planting regime that gives better results on the ground and in the beds. Rather than doing what you can, based on when best you can do it depending on the weather, we thought about moon planting and how it works.
Looking around for a credible knowledgeable source in the Southern Hemisphere proved difficult, confusing and very time consuming. After a lot of question asking and comparing conflicting answers we found there to be only one satisfactory result. Astrology Solutions Network designed by Monika Barbour.
Monika provides a comprehensive and detailed calendar that once you get your head around how it works frees up time and effort. The way it works is by knowing when to prepare to plant, what to plant and when, when not to do anything and plan ahead. It is similar to following a timetable. Everything is laid out maximising your efforts and endeavours leaving some free time available once used to the system.
Planting now is undertaken with two thoughts in mind. First is to plant something in an ad hoc manner on one side of the bed and the other according to Monika’s moon calendar. The difference is remarkable with some varieties and still noticeable in others.
A new strawberry bed was dedicated to the concept and the plants put in in opposition to the moon and with the moon. The result was few berries and short runners in the off moon side and punnets of fruit on the on moon side with runners having up to three or four new plants on each.
Companion lettuce and onion seed were thrown around in both beds with some germination but it is believed most of that was consumed by mice that have moved in in big numbers. They don’t eat the berries but will chisel off the seeds on the outer skin. Makes for interesting picking with smooth fruit and the chooks love the extra treat. No way I’m eating anything that a mouse has crawled over.
All peas, beets, carrots, lettuce, thyme, wheat, oats, barley and more are in using the method with varying results but all in favour of planting with the moon.
Monika gives the best advice in either email or on the phone to get you started and is available most of the time to clear up any confusion. Her explanations are easy to understand and she does try to get you into the moon cycle yourself and understand why it works the way it does. As said before, you end up with stuff completed more comprehensively sometimes leaving a bit of free time which we didn’t have before.
The calendar consists of a timeline for the month with 11 lines of info some of which is colour coded. There are only two lines not applicable to gardening, those being the tide and void of course moon lines. Each line is then explained in very detailed notes Monika has compiled accompanying the calendar. Our advice in following the calendar is to not get too caught up in the detail, just let Monika guide you through each line of info and it will fall into place after a couple of months.
As for the mouse problem we have experimented with more sustainable methods of eradication while using commercial baits as little as possible. Our three bait variants are commercial wax blocks, homemade mix with borax and homemade mix with baking powder. Any mice left laying around after a wax block baiting are removed to eliminate any pets or native animals eating them and getting sick. The borax and baking powder mixes are natural material and have had no effect on our dogs, cat or natives to date. The home crafted baits are tasty and mice love them but will get used to the additives and become bored not eating any more. Time then to change to the next mix which they hoe into. Keeping the rotations going has removed huge numbers of mice and the farmhouse is now largely rodent free. With colder weather coming the expectation is numbers to plummet and the smell of dead mice in the Terradome to subside, not that the Silvers and Yabbies have complained.

Strawberry bed, left is moon planting and right is ad hoc.
Next pic is from the gateway showing a section of both beds weeded. Loose seed lettuce and onion were thrown over both beds but the lower bed clearly show strawberries that were planted on moon and the upper bed though hard to see are only four runners that took. They were planted a fortnight prior to the lower bed. The same amount of lettuce and onion have freely germinated but the strawberries have not taken in the off moon bed. Bloody mice are not helping by cleaning up most of the lettuce shoots.

An update since we got the upper hand on the mice, as you can see above how the lettuce was being nibbled as it came up.
Our baits are perfected with nothing left but natural ingredients. We used three alternating baits consisting of castor sugar, borax and baking powder, not soda, with the common ingredient being plain flour or rolled oats. Equal parts rotating daily so they don’t get too used to it and look elsewhere for food. The plain flour and castor sugar gets them interested then you swap it over with plain flour and borax, back to the sugar bait then onto the plain flour and baking powder then back to the sugar.
What happens is the mice can’t pass wind which the ingredients cause leading to them dying of a massive gut ache. By changing over the baits everyday does not allow the adults to return to the nest and feed the young creating a generational gap breaking the breeding cycle.
This bait is not for pets or kids to play with, I used margarine type containers, the clear ones, with a hole cut out of the top large enough for an adult mouse to enter, feed then go away and die. Being clear you can see if there is anyone in there, how many and how much bait is left.


Big difference in what the mice were eating before to now.
Just got to find a cure for excessive numbers of earwigs. Velvet soap suds kills them if you can trap them but I need something to stop them from eating everything except tomatos. Going to experiment with garlic, tabasco and other stuff in the kitchen…

You must be logged in to post a comment.