Month: July 2015
So permaculture doesn’t work in a dry environment eh? Then try Xericulture!
It seems every book on permaculture and every expert that uses the principals of permaculture, center around there being a heap of water available and the site has a slope to utilise. So what if you don’t have these two aspects, does permaculture work? Evidently not as well as it should and in some circles who think not at all.
So we are coining a new phrase and concept taking the best permaculture has to offer and fitting it into a dryland environment, calling it Xericulture. Xeros from the Greek meaning dry and the Latin cultura which is growing or cultivation. The concept of xeriscaping was developed years ago by Denver water in the USA and has seven basic tenets which we incorporate into the twelve tenets of permaculture as follows.
Permaculture tenets.
1. Observe and interact.
2. Catch and store.
3. Obtain a yield.
4. Apply self regulation, accept feedback.
5. Use/value renewable resources/services.
6. Produce no waste.
7. Design from patterns to detail.
8. Integrate not segregate.
9. Use small slow solutions.
10. Use/value diversity.
11. Use edges/value the marginal.
12. Creatively use and respond to change.
Xeriscaping tenets.
1. Analyse the site.
2. Classify the zones.
3. Select the appropriate plants.
4. Fill large areas with lawn.
5. Group water needy plants near structures.
6. Soften boundaries.
7. Mulch.
As you read the two, similarities standout but by and large the Xeriscaping side are biased to dry environments as you would expect. The only points that can meld are observe and interact with analyse the site, use edges value the marginal and soften boundaries. Scrap the lawn idea entirely. The others are added to each other to make a total of 17 tenets. No need to reinvent the wheel here but just accept that living in a dry environment poses more challenges and more attention to detail is needed.
Having said that I’m sure that over time some others will be redefined and incorporated as this concept is still new and under development. I applied these principals to my new spud bed this week…


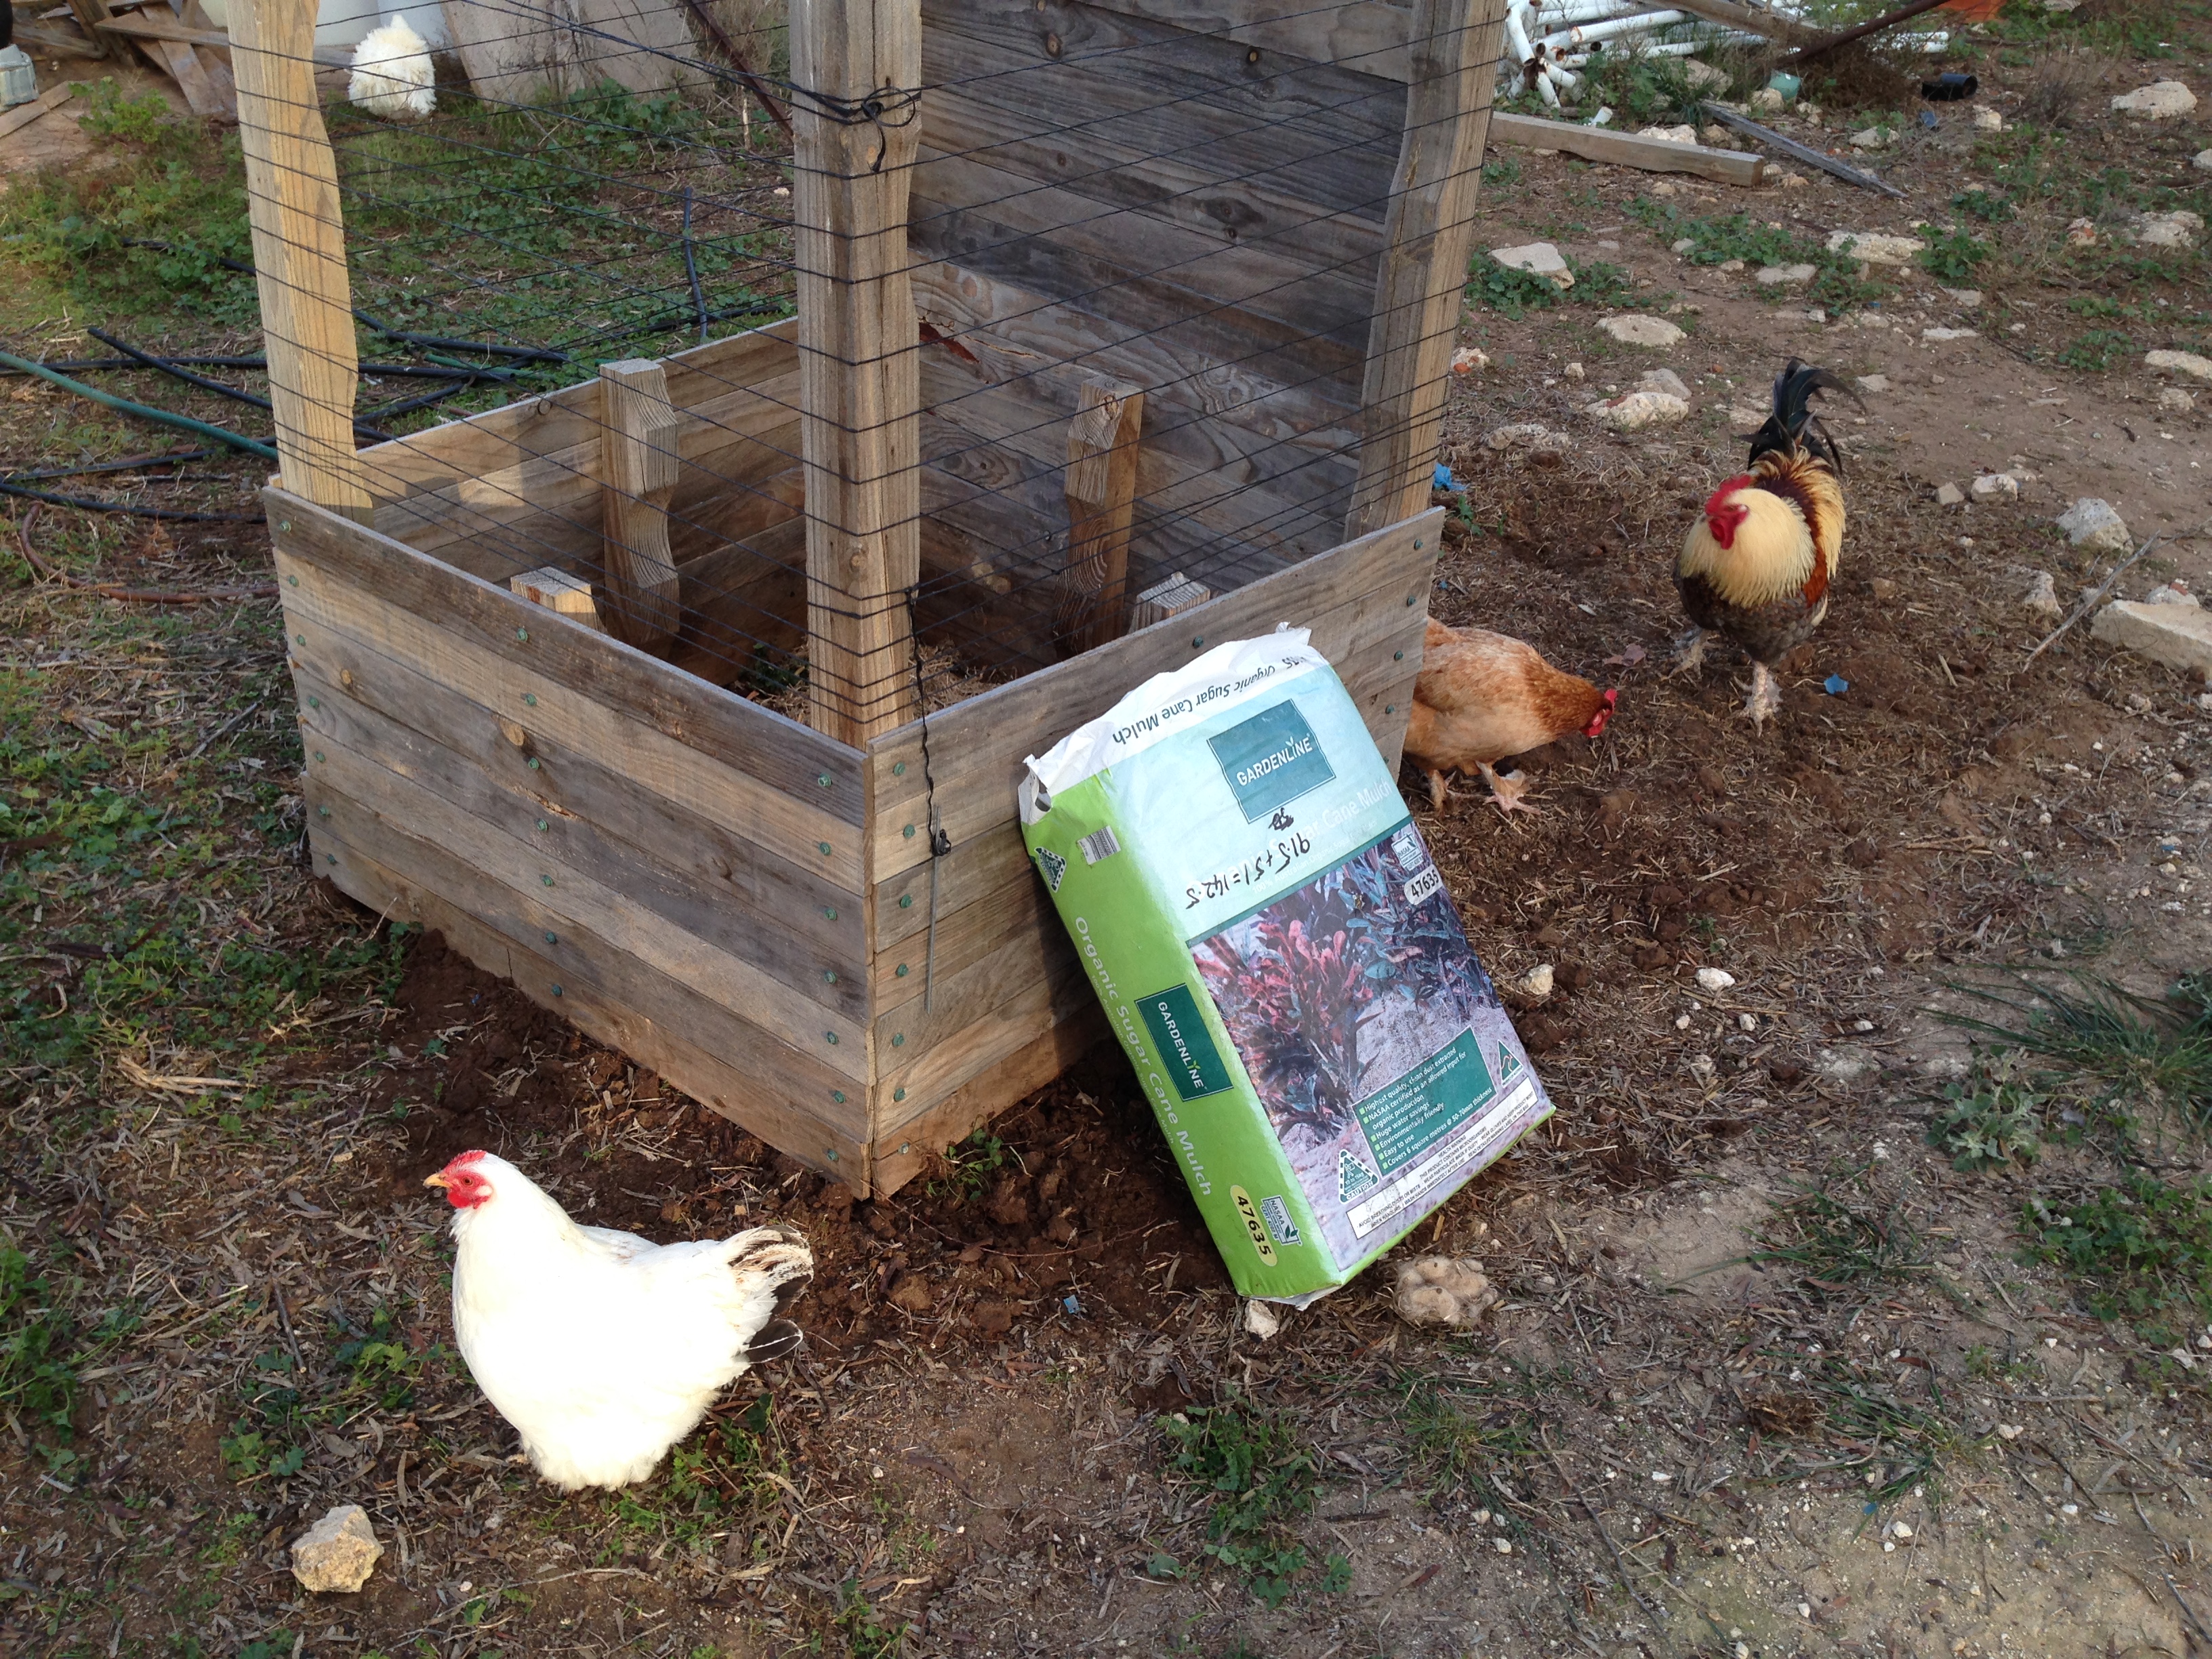
Here we have an example of spuds on dead dry soil, barely got the fork in a half a tine deep! This particular spot has not been cultivated for over 50 years and was part of a dirt track. The idea is to throw the seed spuds on top and cover with mulch.
Keep the water up and chooks out (bailing twine wrapped around the frame). As the spuds emerge thru the mulch cover to the top leaving a tip showing. If the box gets filled I can add more boards to increase the mulch height.

I experimented with 6 seed spuds last year with very good results, as you can see…
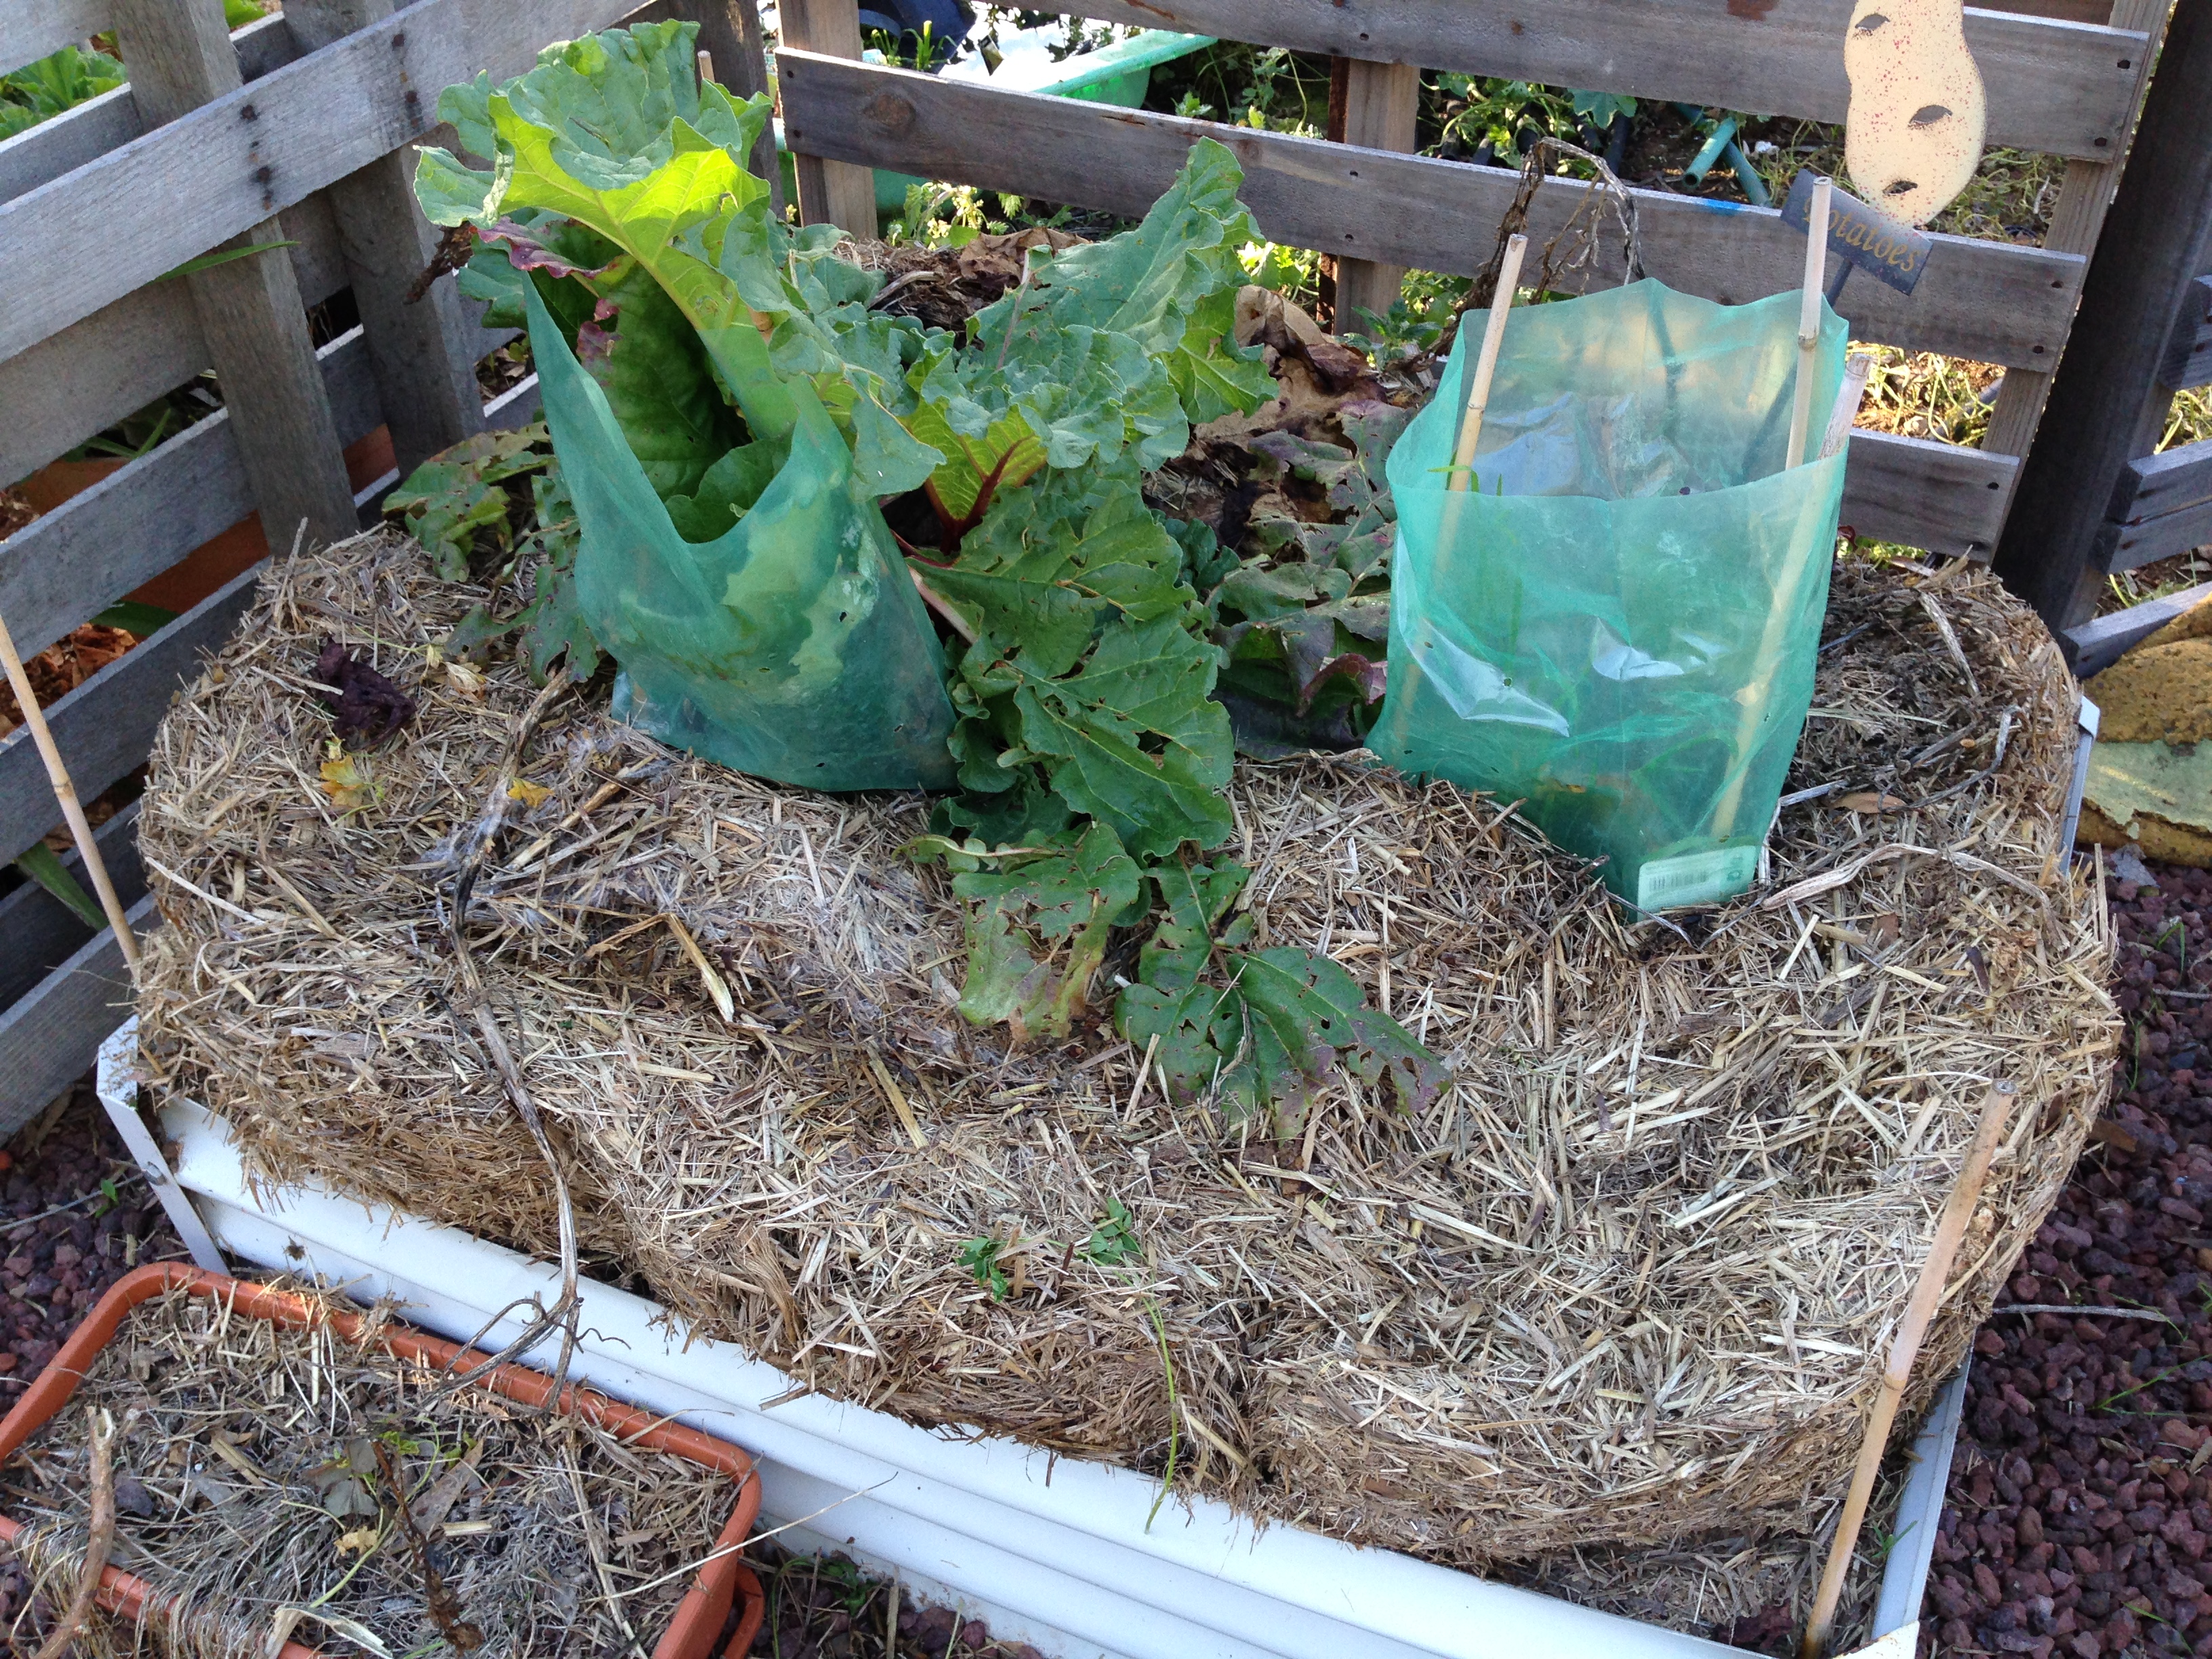

The bed was surrounded by tree guards to keep the mulch in the bed so chooks couldn’t scratch it out. Middle pic shows the mulch being lifted and bagged with new spuds being removed as we go. They fell out of the mulch onto the raised bed and collected. The last pic shows the result. From 6 seed spuds weighing around 250 grams to a basket and pail weighing in total 9 kg! Granted there were some very small ones left in the bed as I didn’t want to disturb the rhubarb too much, Ah well, spuds as weeds is a good thing…
More later …
Grow your own from the rubbish bin
I have noticed more in my news feed about growing veggies from the rubbish or bokashi bin recently.
My Grandfather taught me this when I was about 5yo, I’m still doing it with all that comes through our kitchen waste…

In these three trays (recycled meat trays from the supermarket) pour 5mm water in and add carrot off cuts, beetroot, celery, pal choy etc etc and grow not for root re growth but seed! Harvest then plant out your own seed from multi coloured carrot, chard and the list goes on…
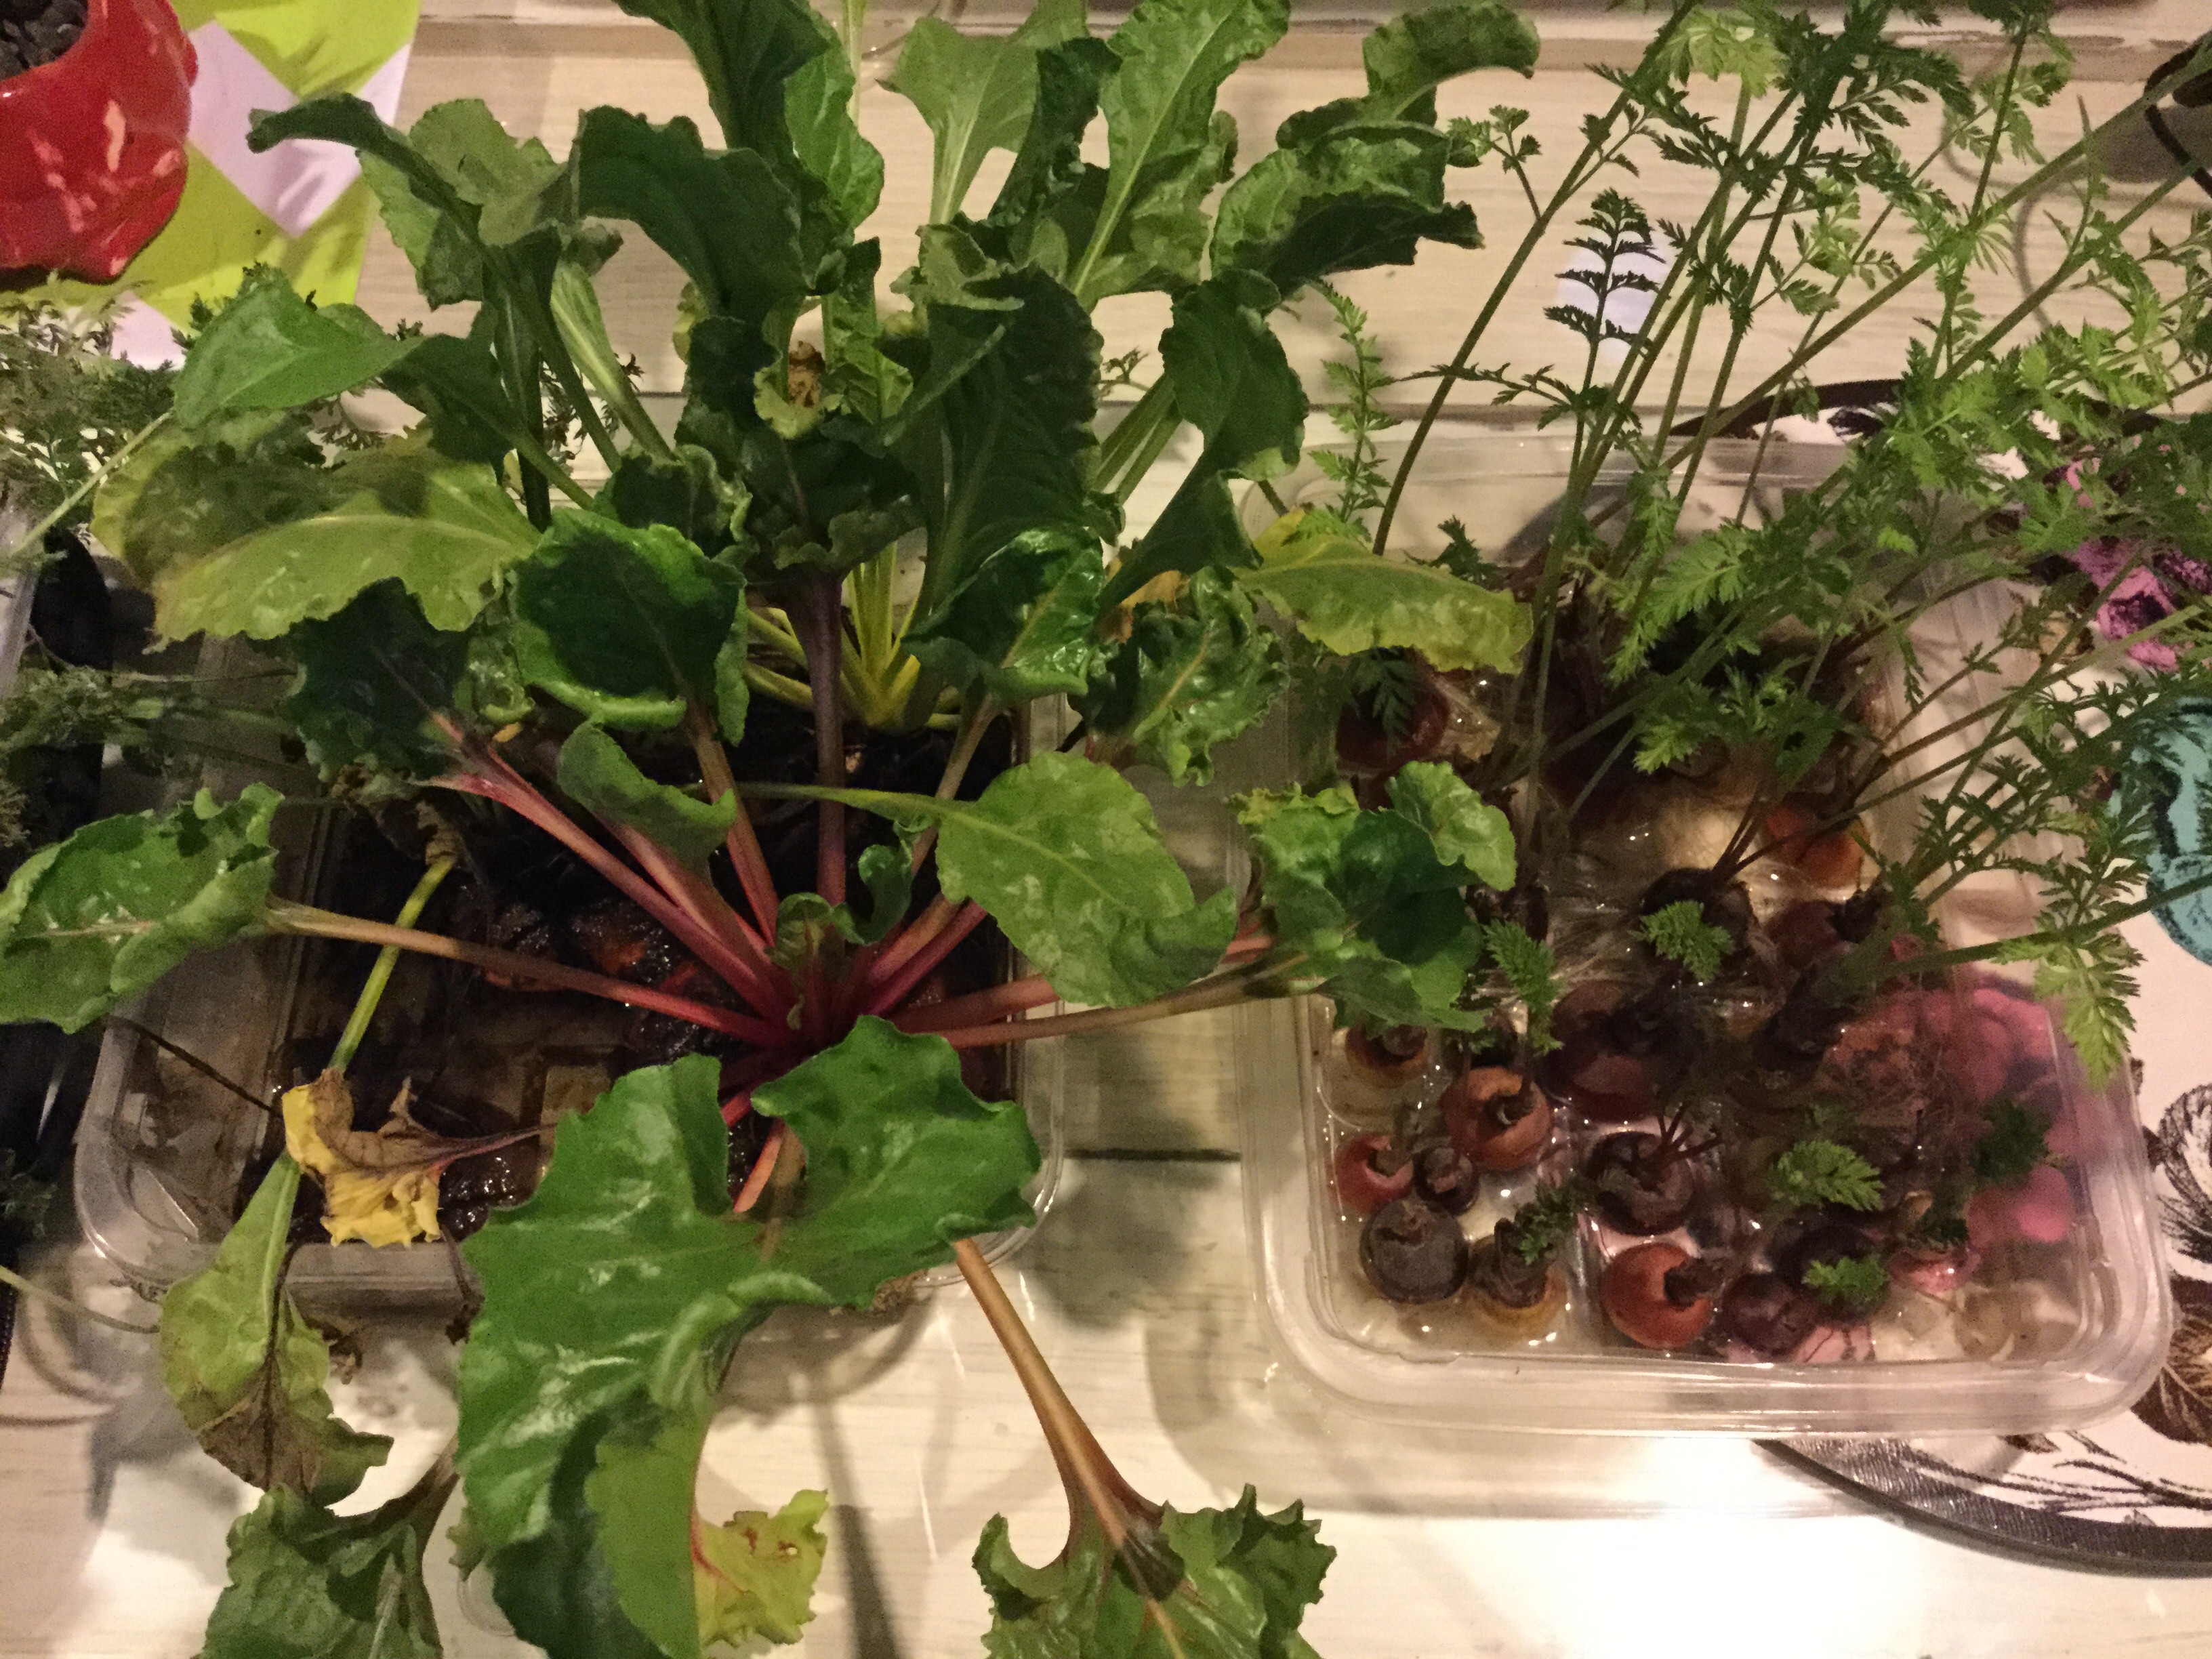
As you can see in the tray on the right, the most recent coloured carrots have been placed with the ones from the roast from last week behind them. Between four to eight inches, 10 to 20cm of growth, with no effort, time or expense needed.
I suppose old is new! Bring it on!!!
More pix for those who asked…


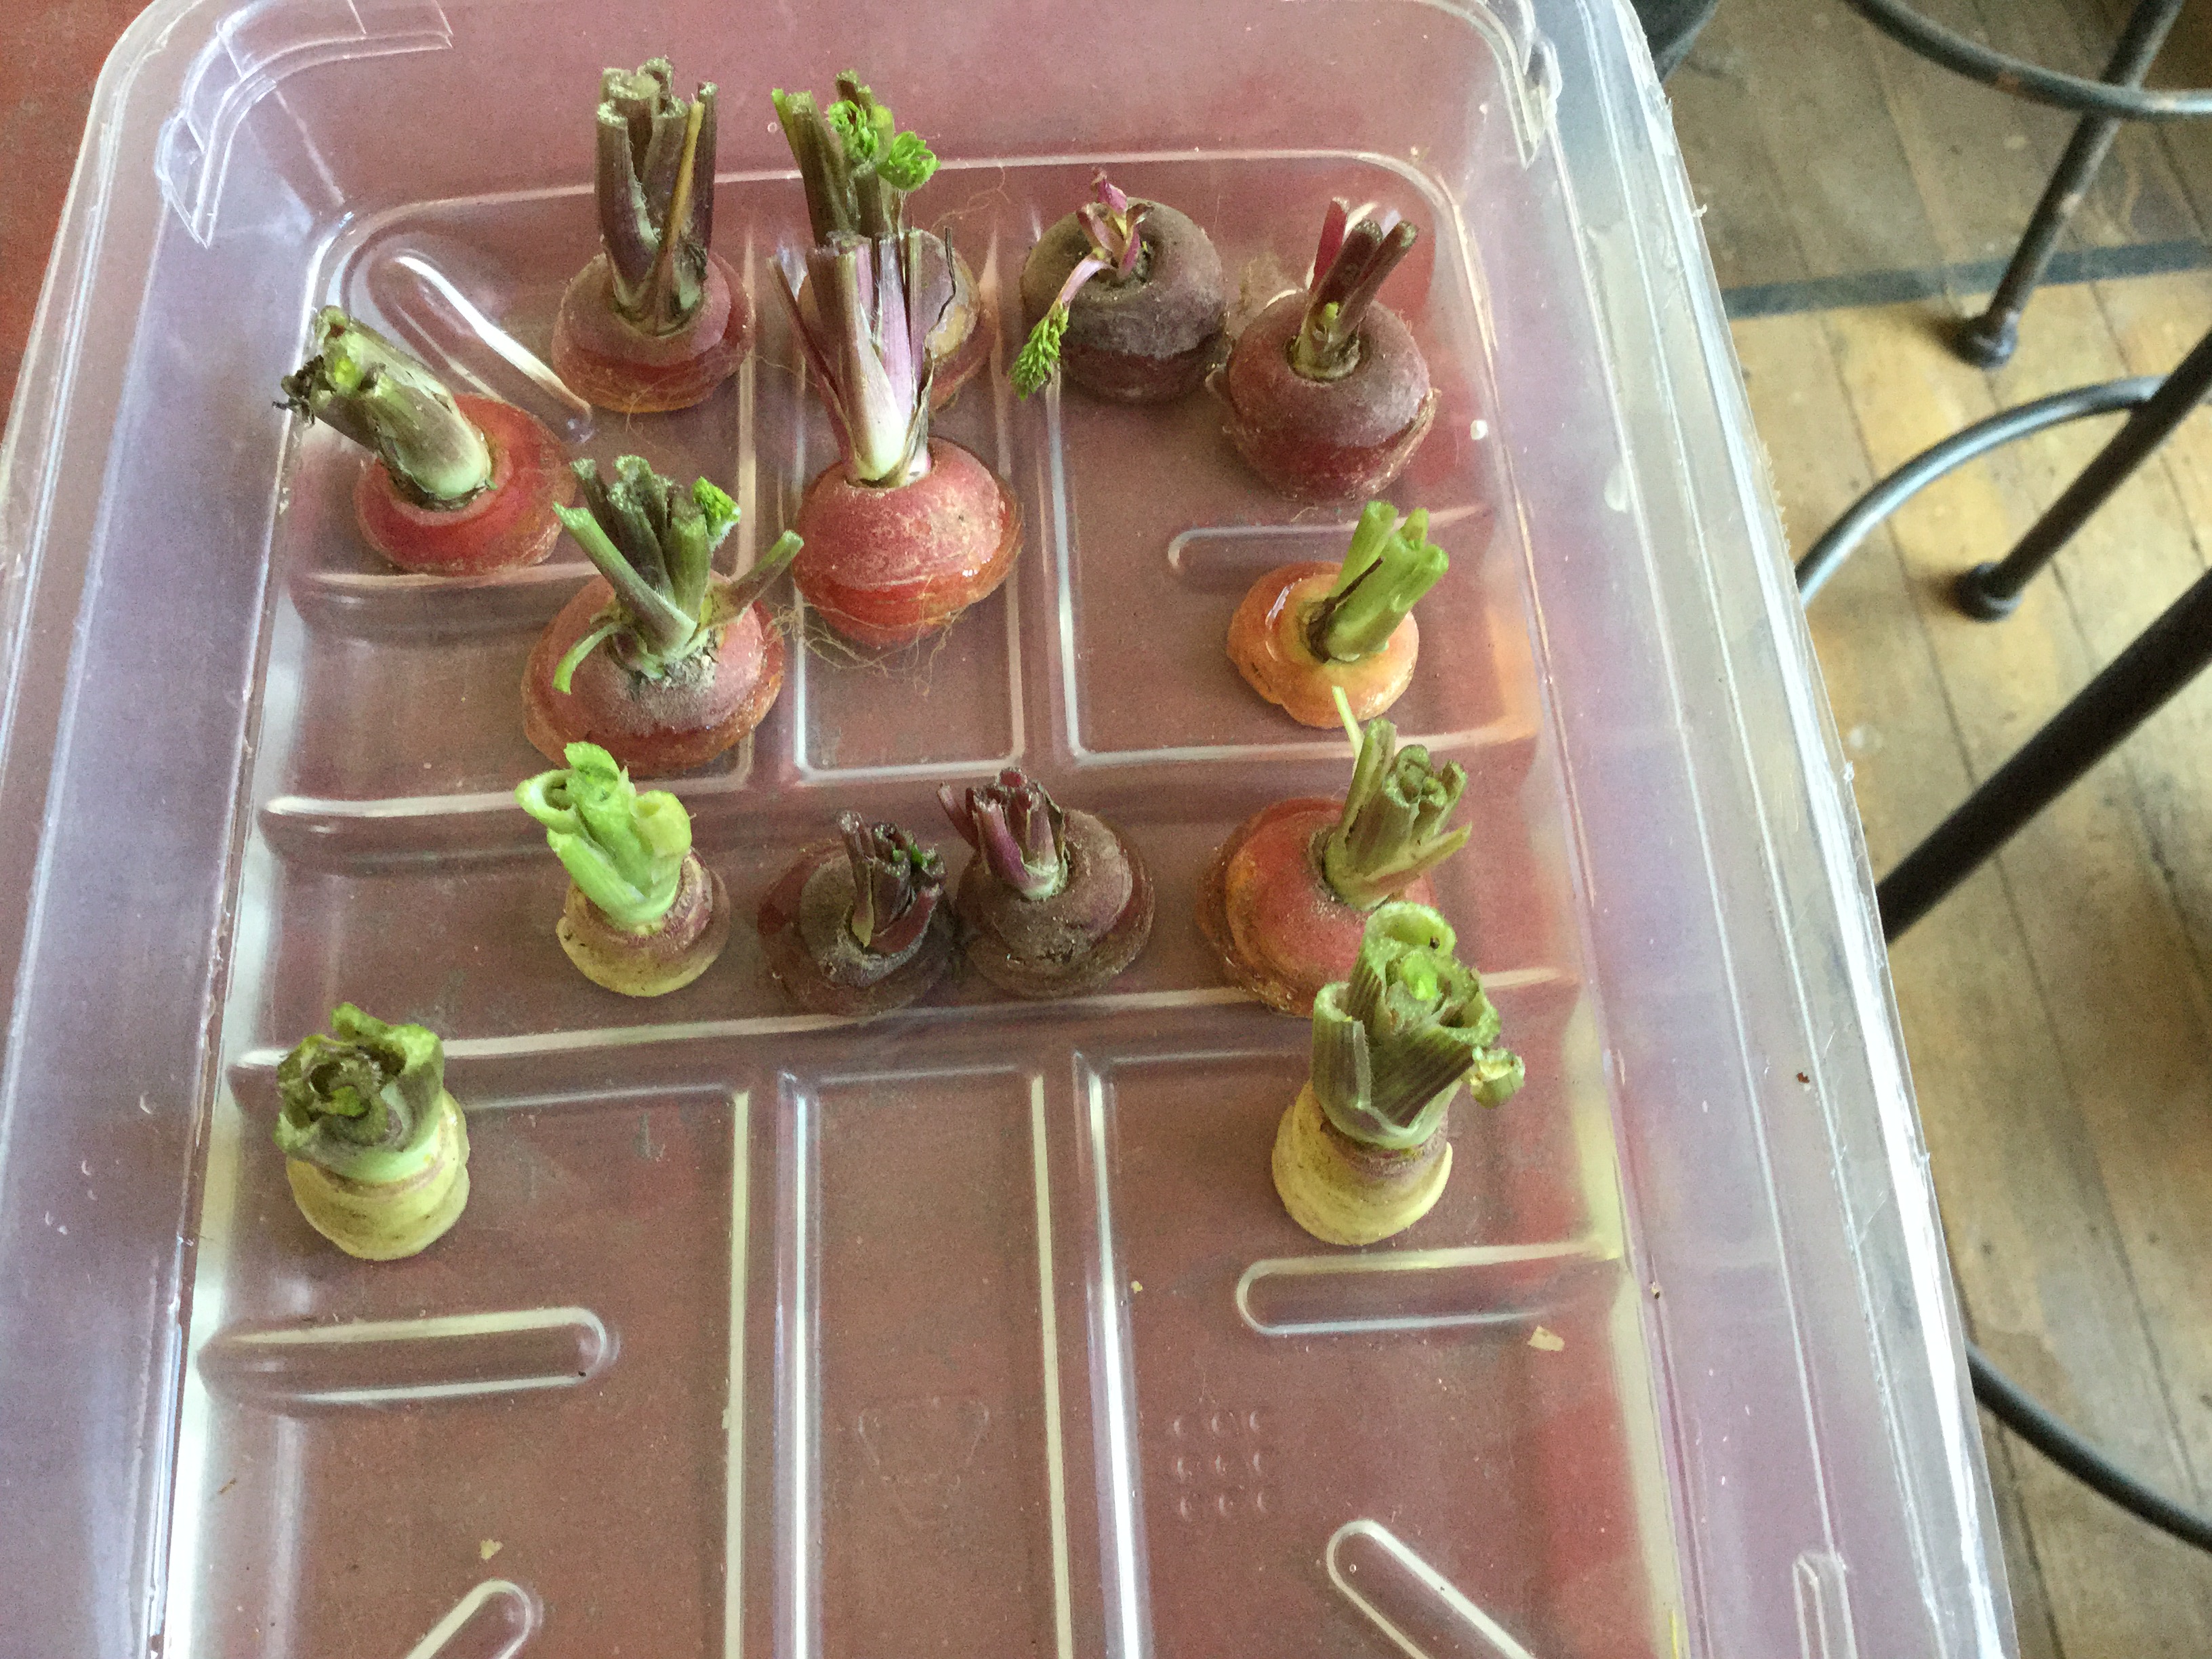
The last pic is colored carrots, why would you buy expensive seeds when you can do this? Ok it takes a few weeks of patience to see flower heads but worth it in the end.
Warracknabeal Community Garden
The Warracknabeal Community Garden (WCG) asked me to help out getting their garden off the ground late last year and now I can show the progress with the first beds being prepared with the assistance of the Secondary College year nines.
There have been many meetings and lots of planning and finally the first raised beds are in. Over the next four Saturday mornings there will be working bees to fill them and plant.
Master Gardener Bruce (MG) and myself have talked long and hard over what should go where and with what level of difficulty we should start from.
We got some brassica seedlings and peas and carrots and held a short discussion on seed planting and the relevance of “tilth” and seed size, a word kids have never heard of!

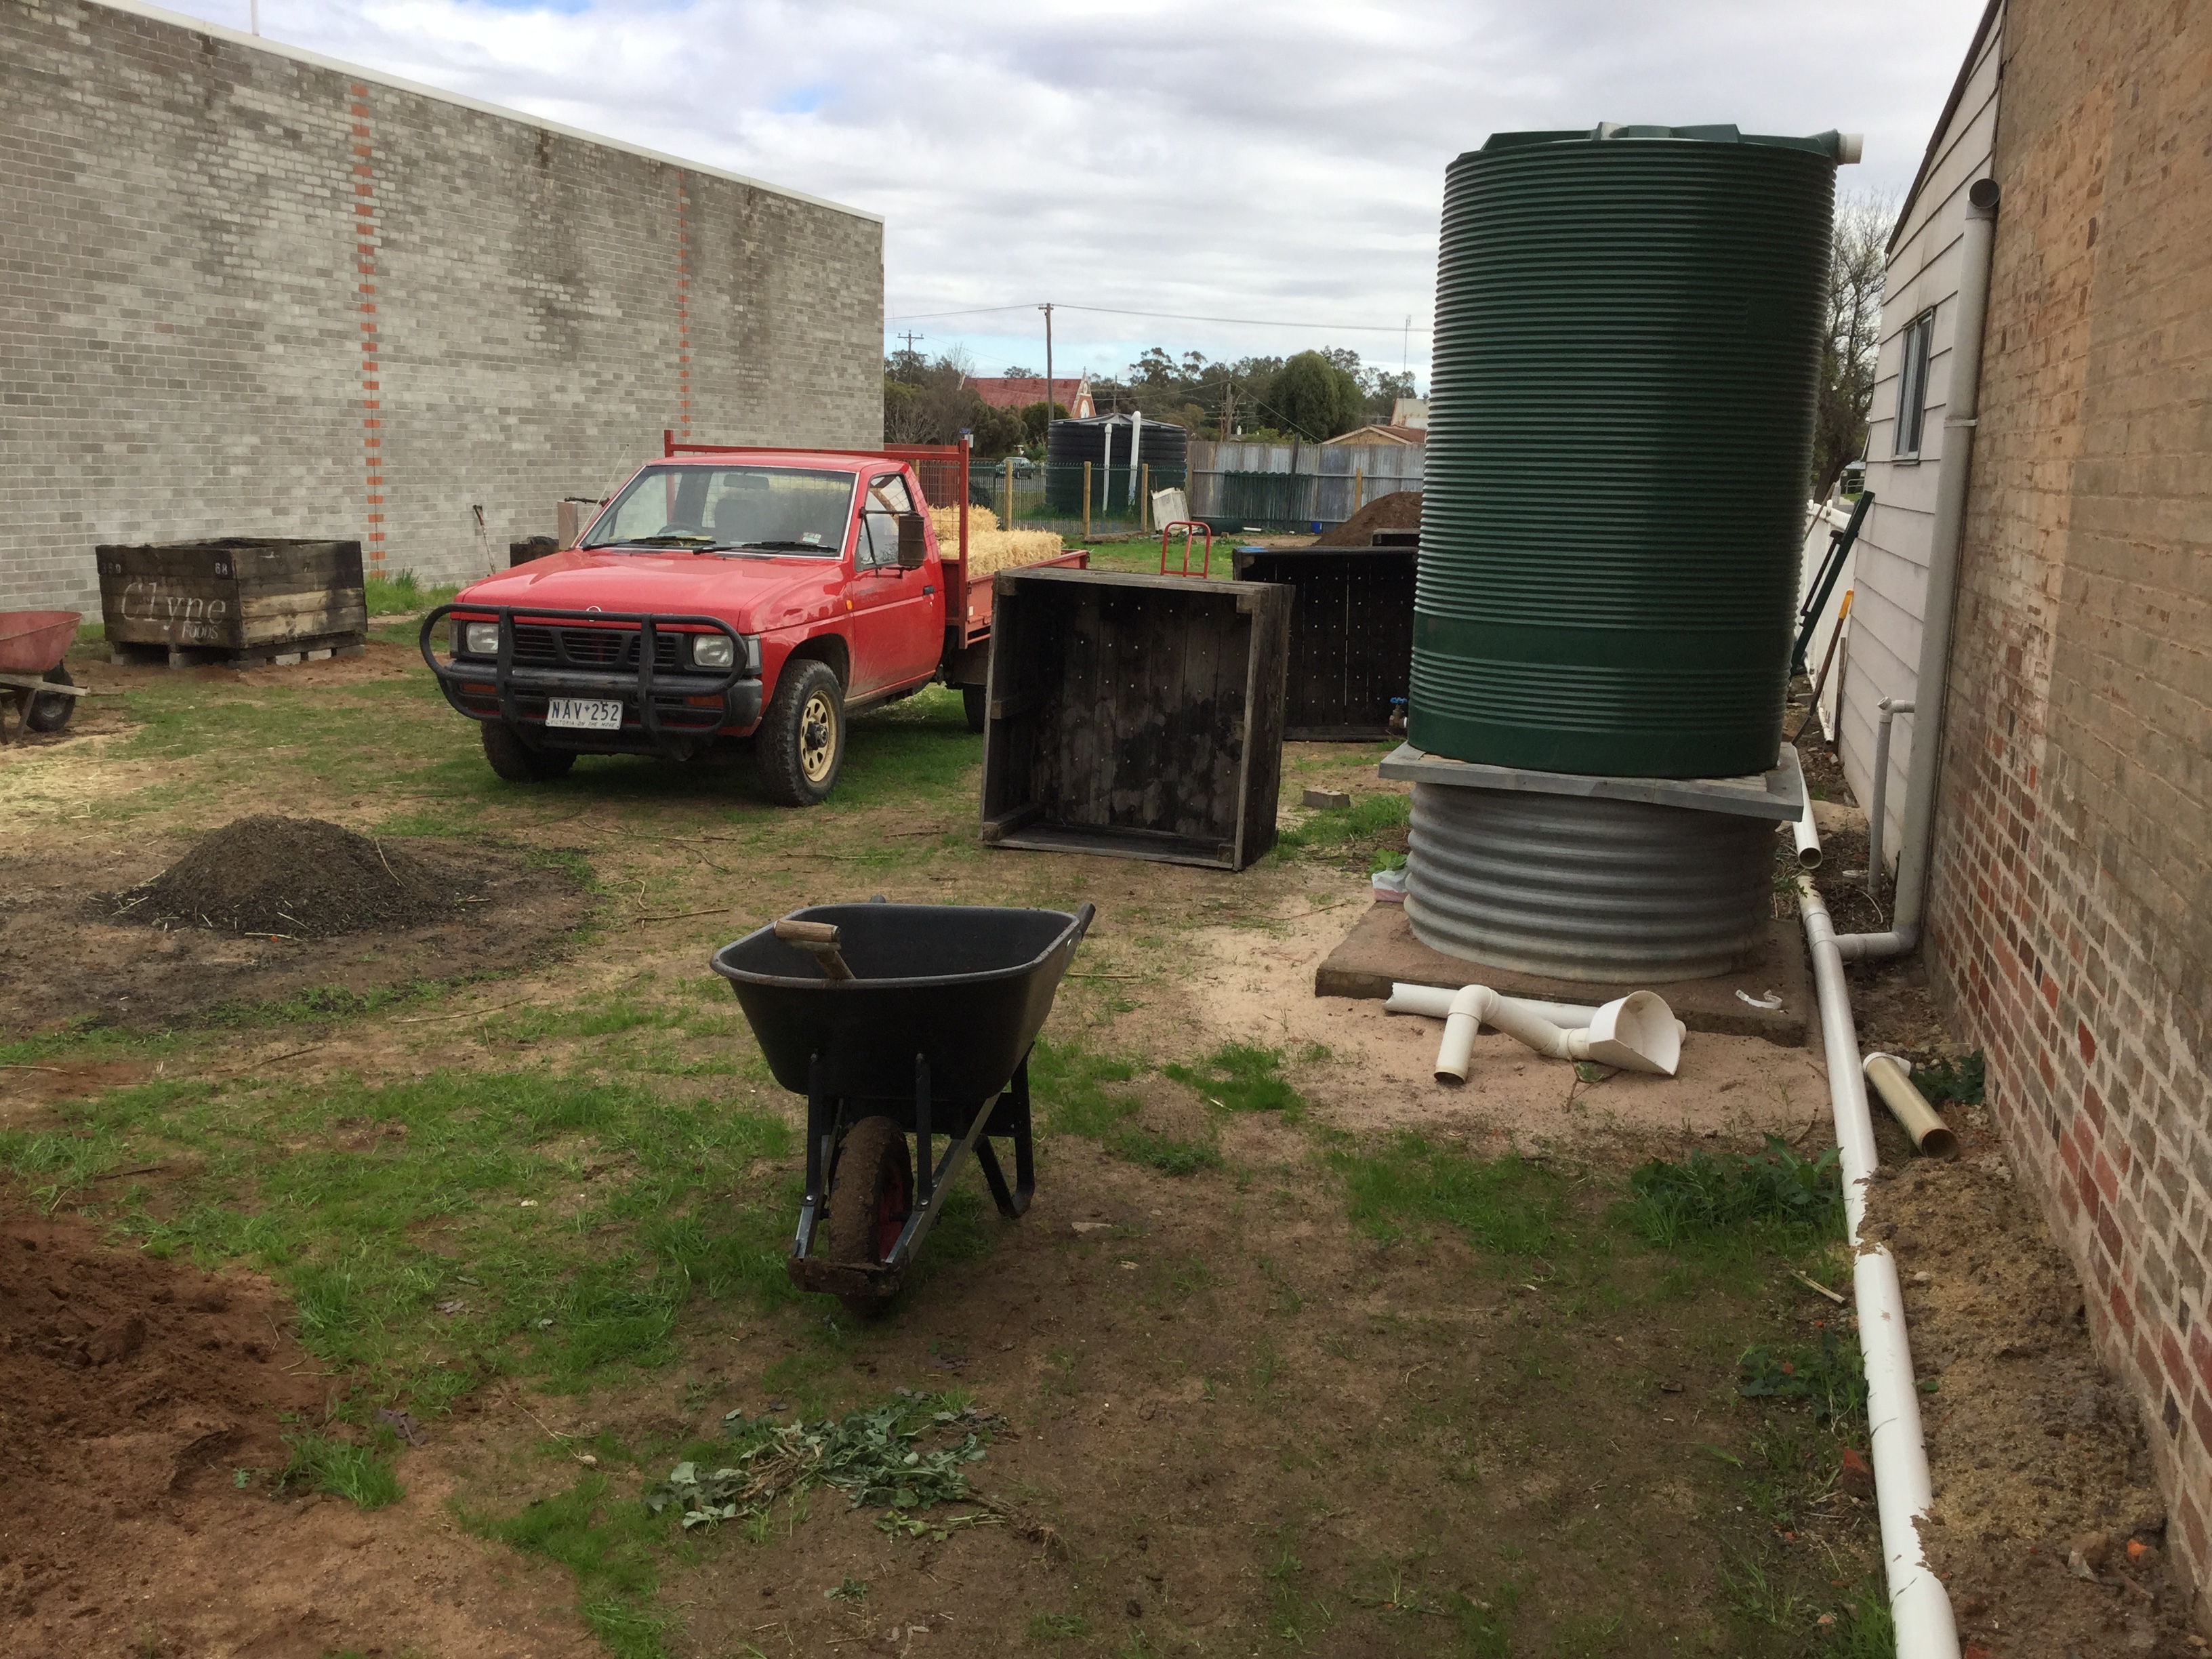

The MG ute ready to off load the next straw bales for another raised bed at the entrance. Second one shows the fruit transportation crates bought ready to have geotec stapled in over the drainage holes. The tank was donated and has been plumbed into the shop next door letting the Warracknabeal CG use that water. From the back of the plot in pix 3 and 4 look toward the main street showing the donated pool fencing erected by Mr. Inkster, a local farmer and quiet achiever.

The first bed made by the WCG MG with one course of fencing wire around to keep shape. Planted by the Warracknabeal Secondary Kids inter-spaced with peas and row of multi colored carrots. Heather H donated to protective cover.

Janelle I’s handy work on the North wall advertising to one and all whats going on and when! Get involved!
The garden has a weekly working bee with a focus on opening day some time soon.
This is what it looked like six months ago, a green field site…
 And the new fence and gates installed!!!
 Bruce Hein’s creation from fruit boxes, now filled with an apricot and herbs
 The new shed attached to the newly laid donated pavers.
  Straw bale beds are thriving…
 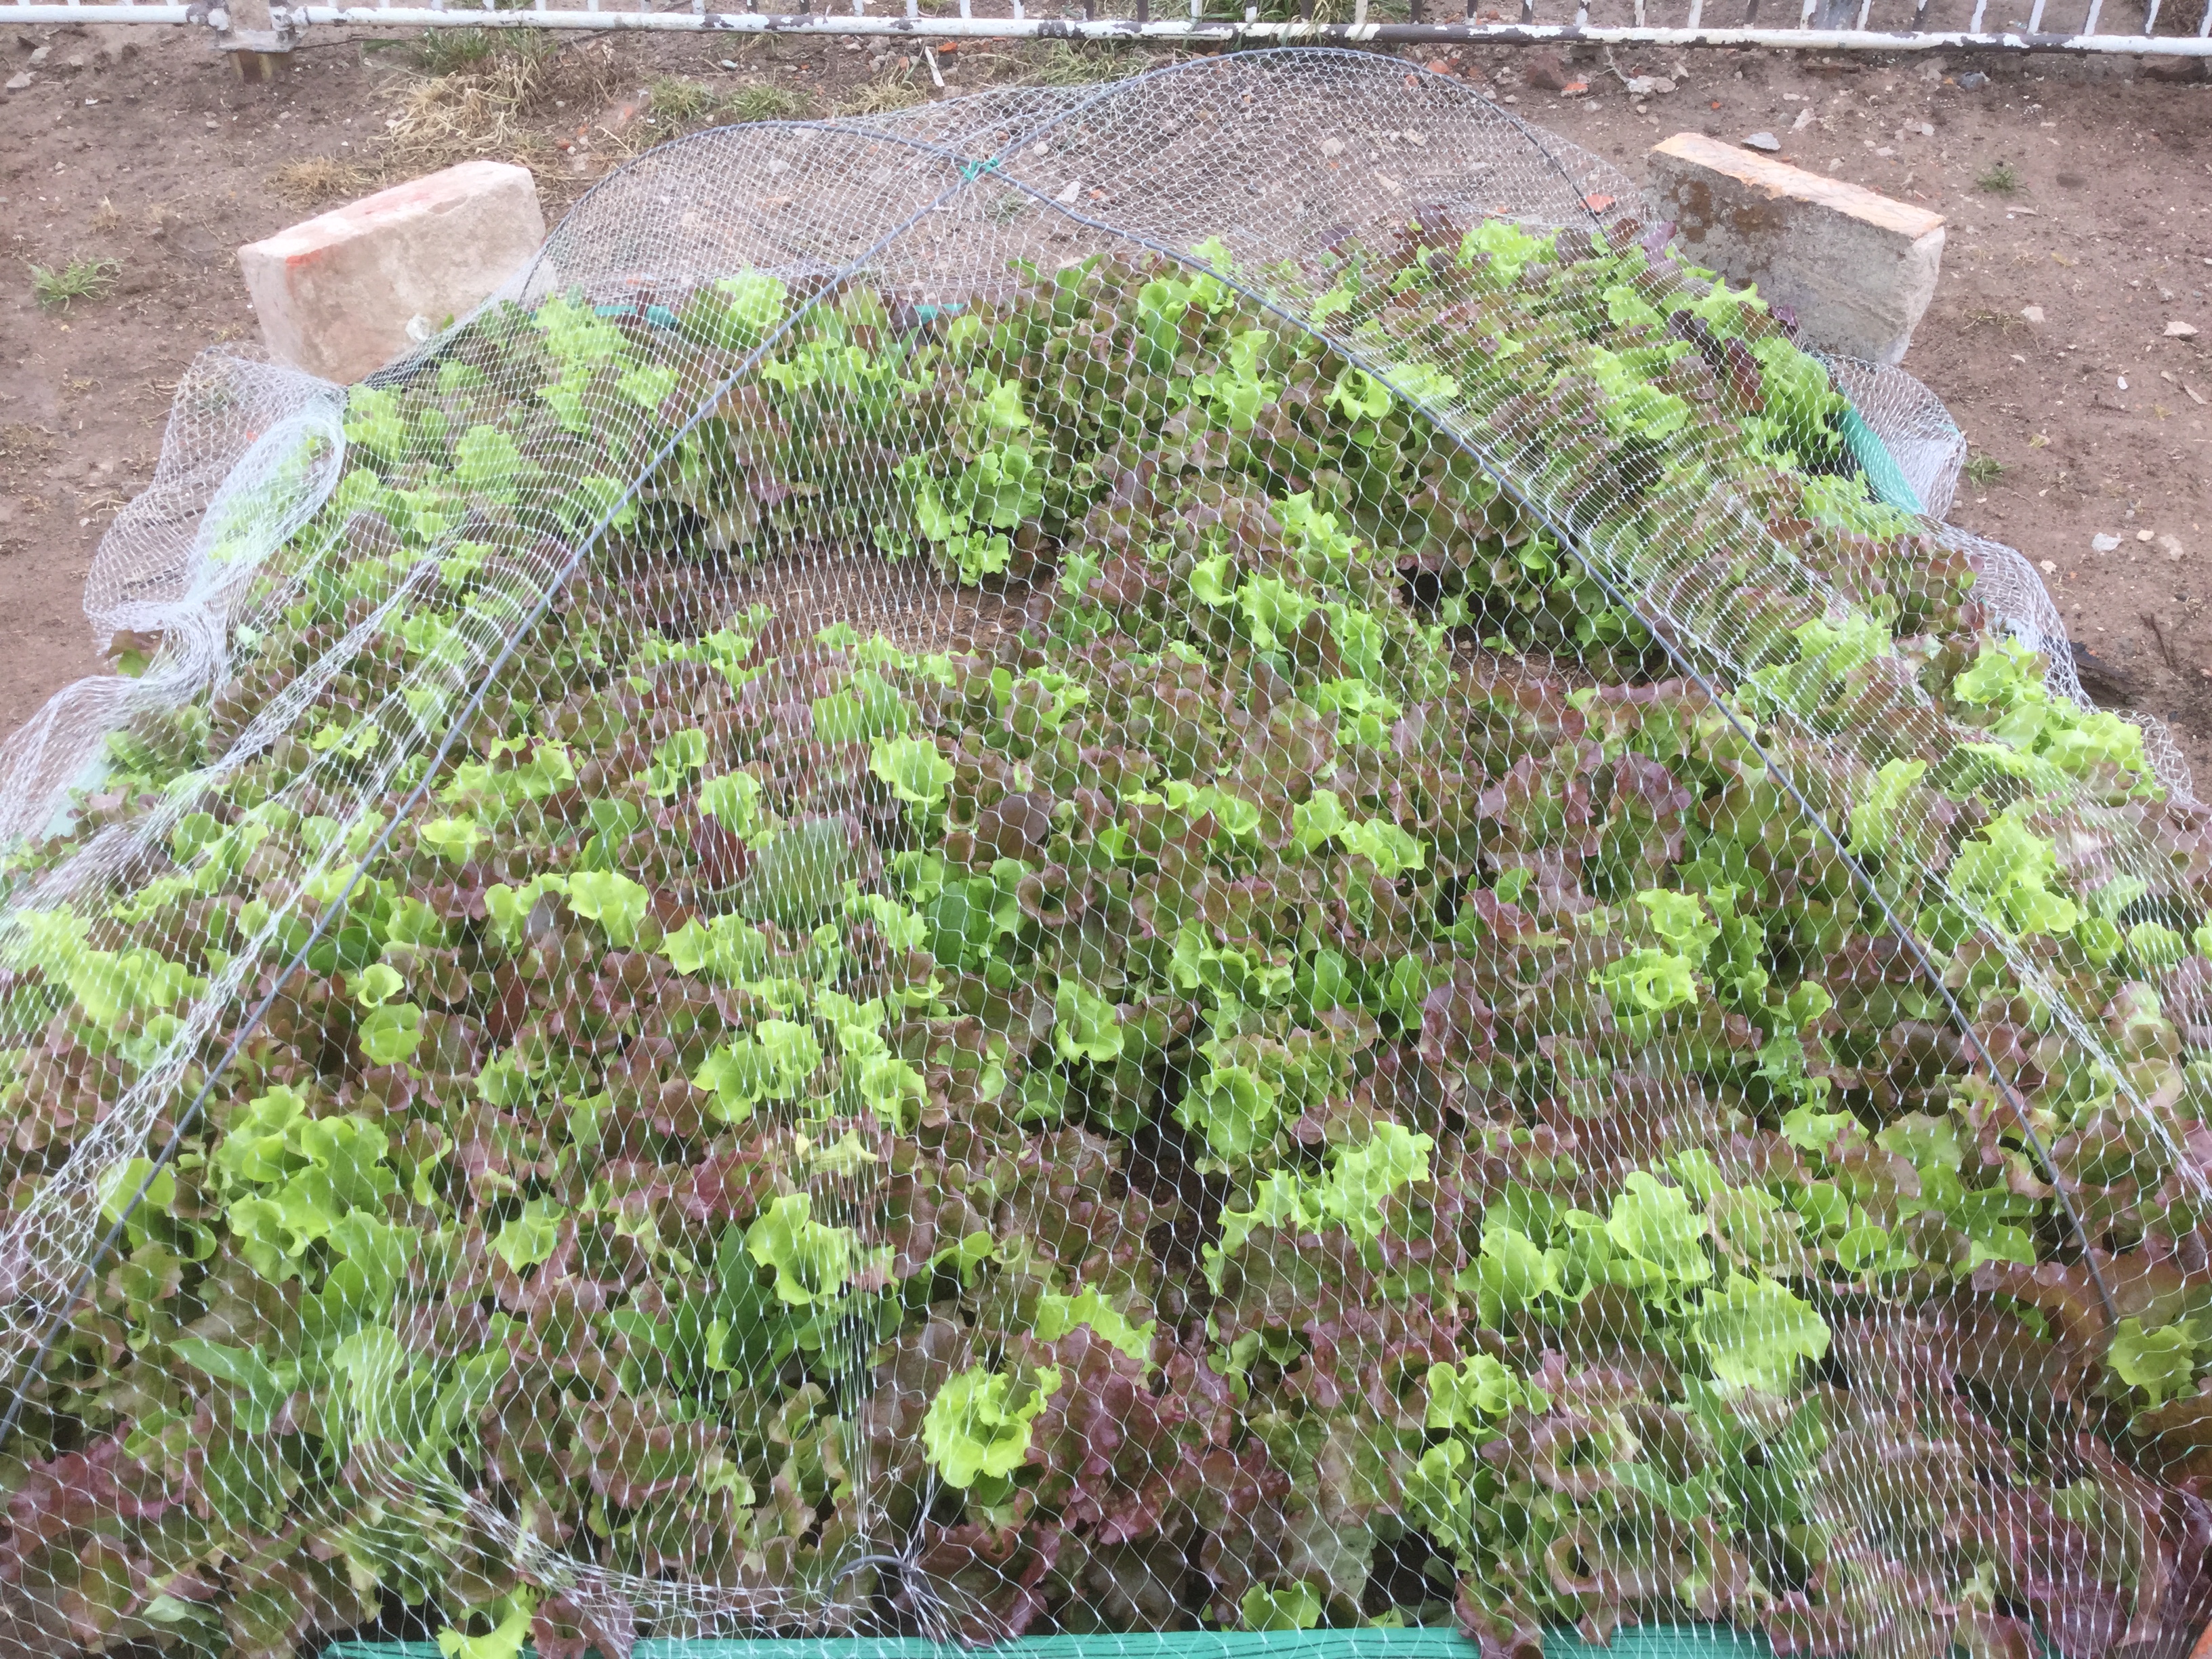 Lettuce galore!
 Donated info stand planted…
  Looking west across all the beds.
  Seed planting workshop success…
  Members painting the boxes and lining them with geotech.
Working bees are held every Saturday morning from 9:30am, see you there!!!
Growing season 2015 begins
All the planning and measuring is done.
Bed prep is done.
Plumbing and drippers done.
Now the work begins…

From the NE corner looking south. Bed 1 of 48 next to the tire corner post. All plumbed and wired up to the controller which has its own shed.

Made from recycled tin and 4×2 hardwood from our extensive wood pile of salvaged timber and old sheds on the property.
The wood heap is in the wrong location on the place and needs to be moved but I’m not touching it till the weather gets real cold. That way if there is a Joe Blake in there I stand a better chance of surviving the encounter!

Poly and 13 strand control wire together in the trench. The first Tee goes of left to 12 beds and right to the next 12 beds. The second Tee takes off to plumb the next 24 beds at the last Tee. The feeder lines are buried to allow vehicular movement around each of the 4×12 bed groups wit 5m track allowance.

The controller I’ve had for a few years and decided based on the fact I had it I would create the whole 48 bed project. Added to this was the talk recently locally there was thought of creating a Food Festival based on local producers. So why not become one too! Combined with our facilitating with other local Community Gardens and work with schools veggie gardens it was time to get really serious and ramp up the scale of committment and production.
This Lake Crest 48 station controller LED screen was not showing full resolution unless being looked at from directly below. I contacted the maker who promptly sent be a replacement and board! Unbelievable! No quibbling over warranty or replacement cost! Nothing! I have become an unabashed spruker for Lake Crest Controllers needless to say.

Each 12 bed set is isolated with a ball valve, individual solenoids are also able to be manually isolated to enable weeding or disking in.

Looking now at the first photo but a month later after 2 inches of rain over a three week period. NE corner looking south. The location for this 48 bed planting has not been used for any growing for about 100 years. It has had building, pig sty’s, barn, machinery shed, tracks and trees on it over that time but no growing. That means every week known to the Wimmera has now germinated and wants to take over. Stinging nettle, marshmallow, amsinckia, barley grass, skeleton weed, cape weed and the list goes on. While wanting to be as organic as possible some glyphosphate had to be used to get on top of the situation.
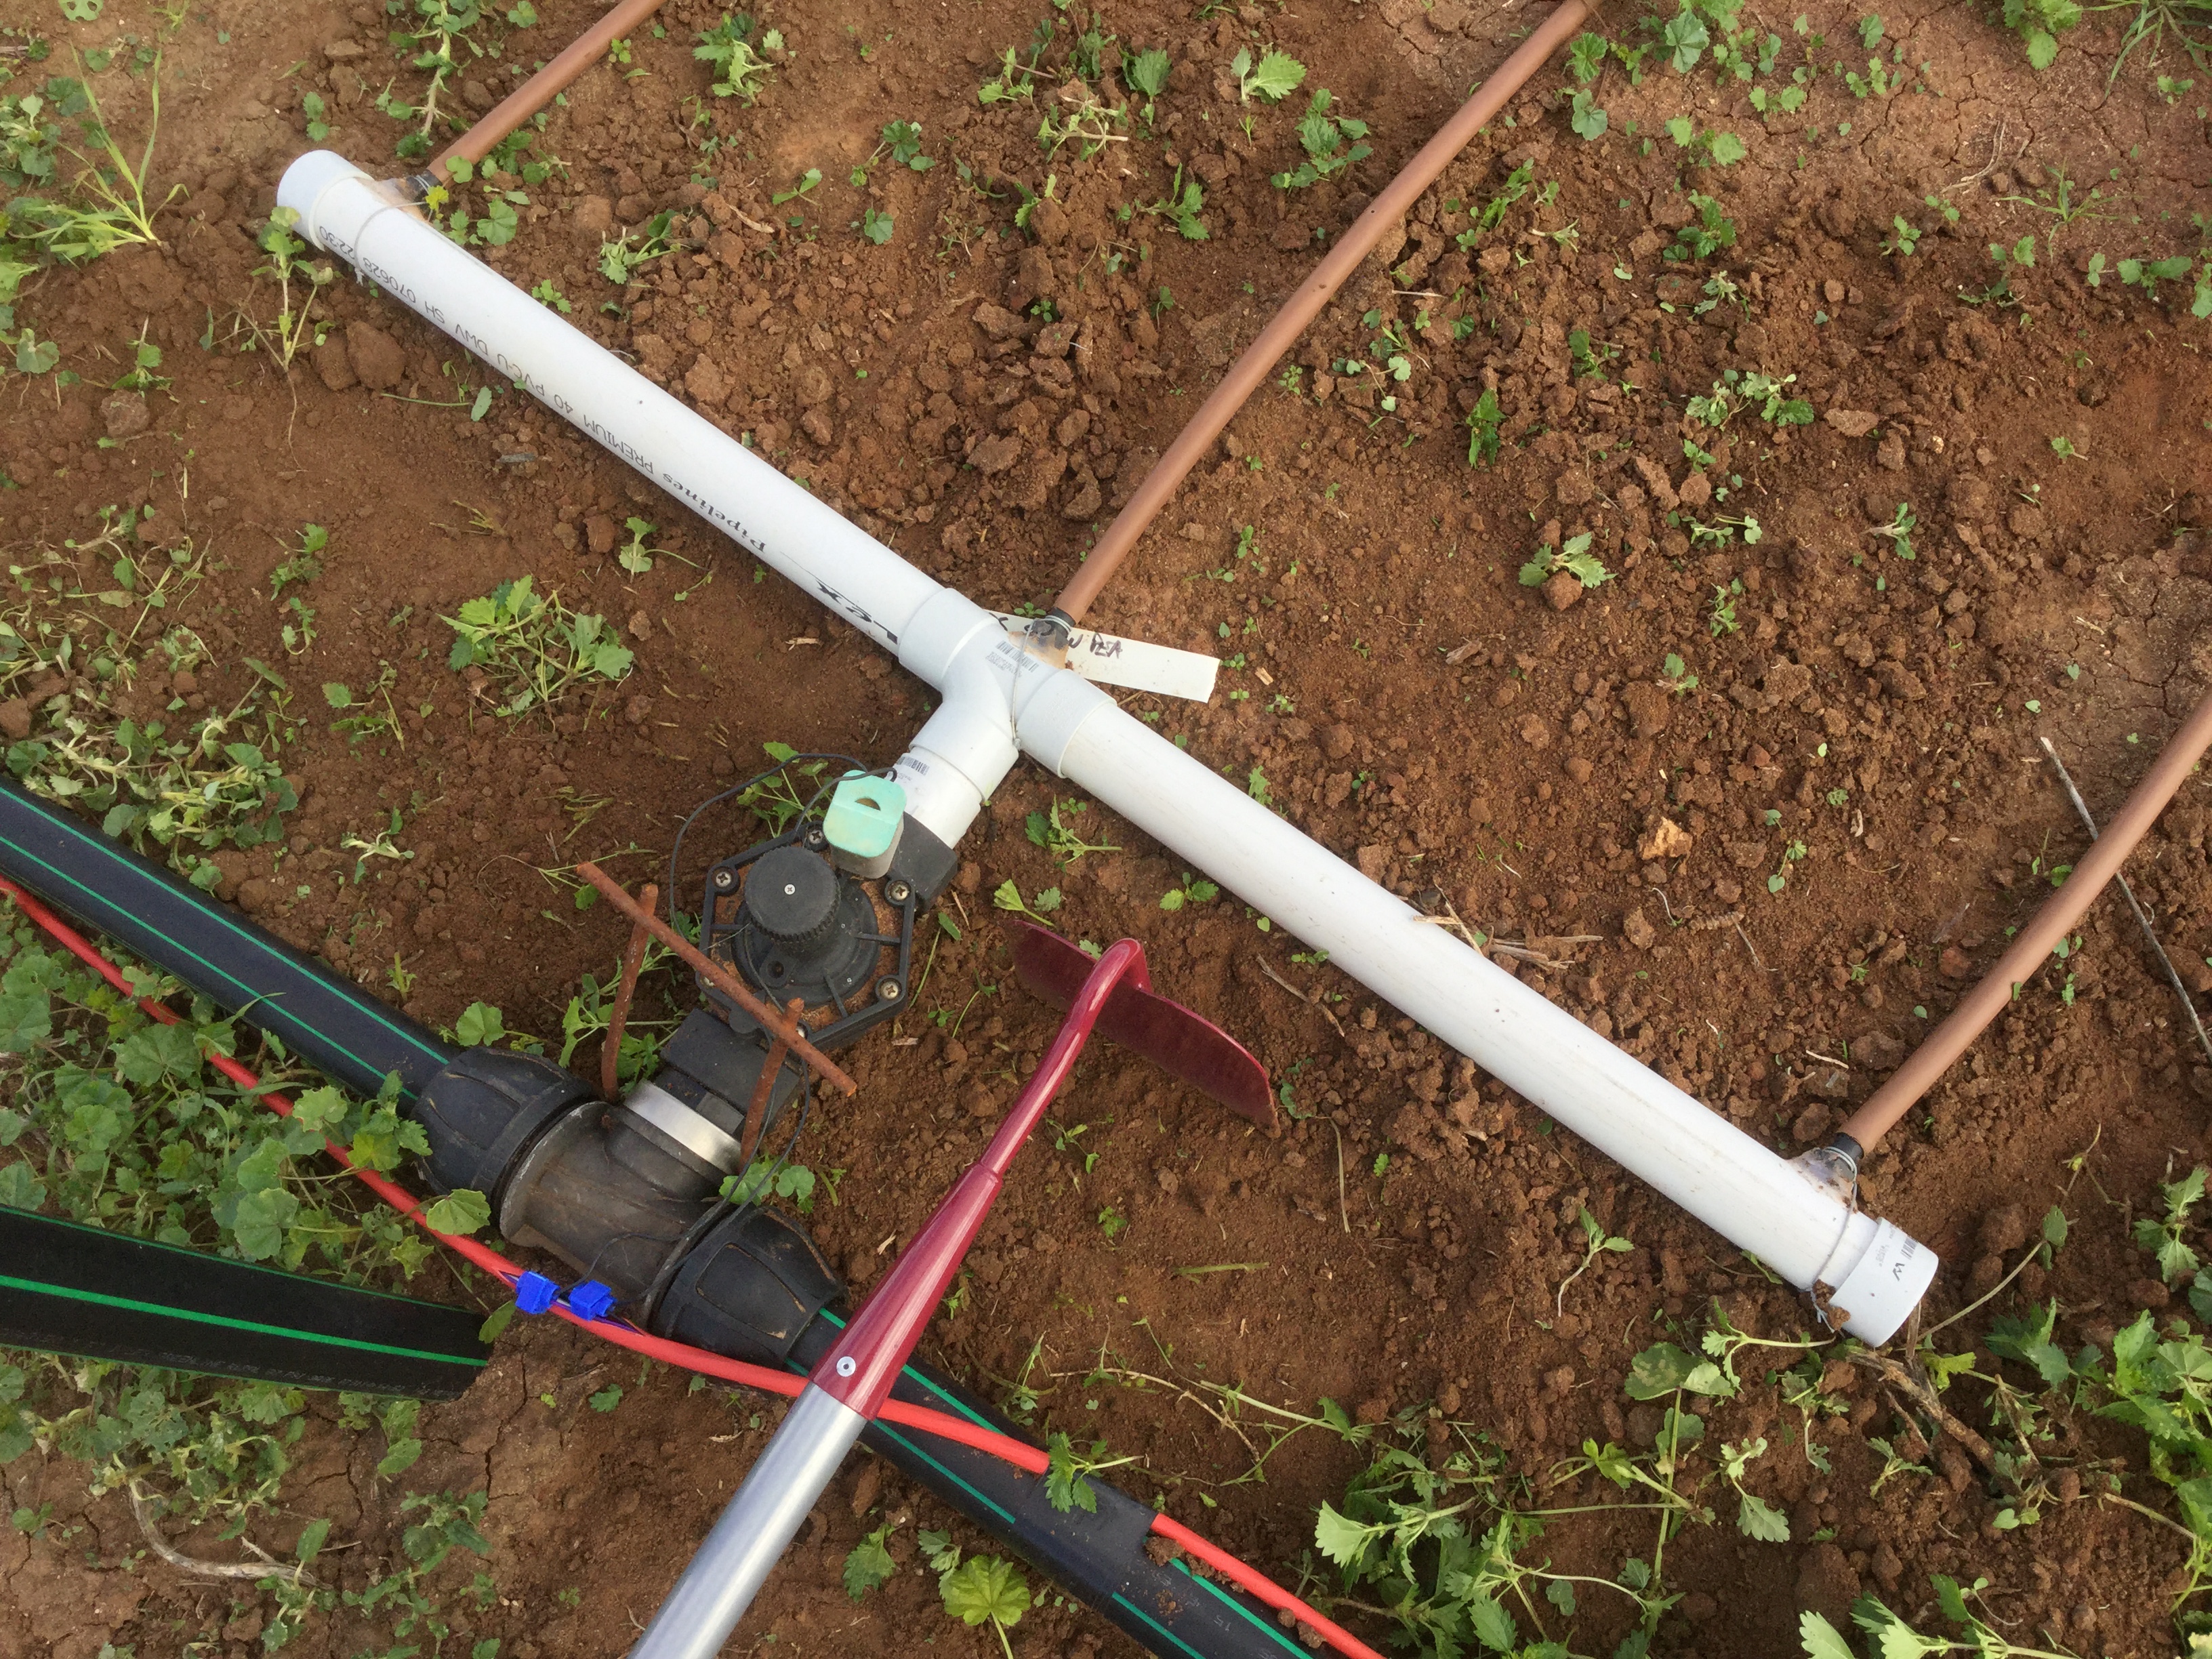
Close up of a solenoid with the black manual isolation knob on top, PVC tee and three directors connected to Drip Eze 13mm dripper line from Toro with regulated output of 3 lt per hour. Each bed is 23m long and about 1m wide, dripper spacing vary from 30cm to 50cm.

To keep on top of what is where is the controller room white board and companion planting chart, the best one I have ever used! Drop me a line and I’ll send you one for nothing. No more searching around for a comprehensive guide, this one has it all with no BS!
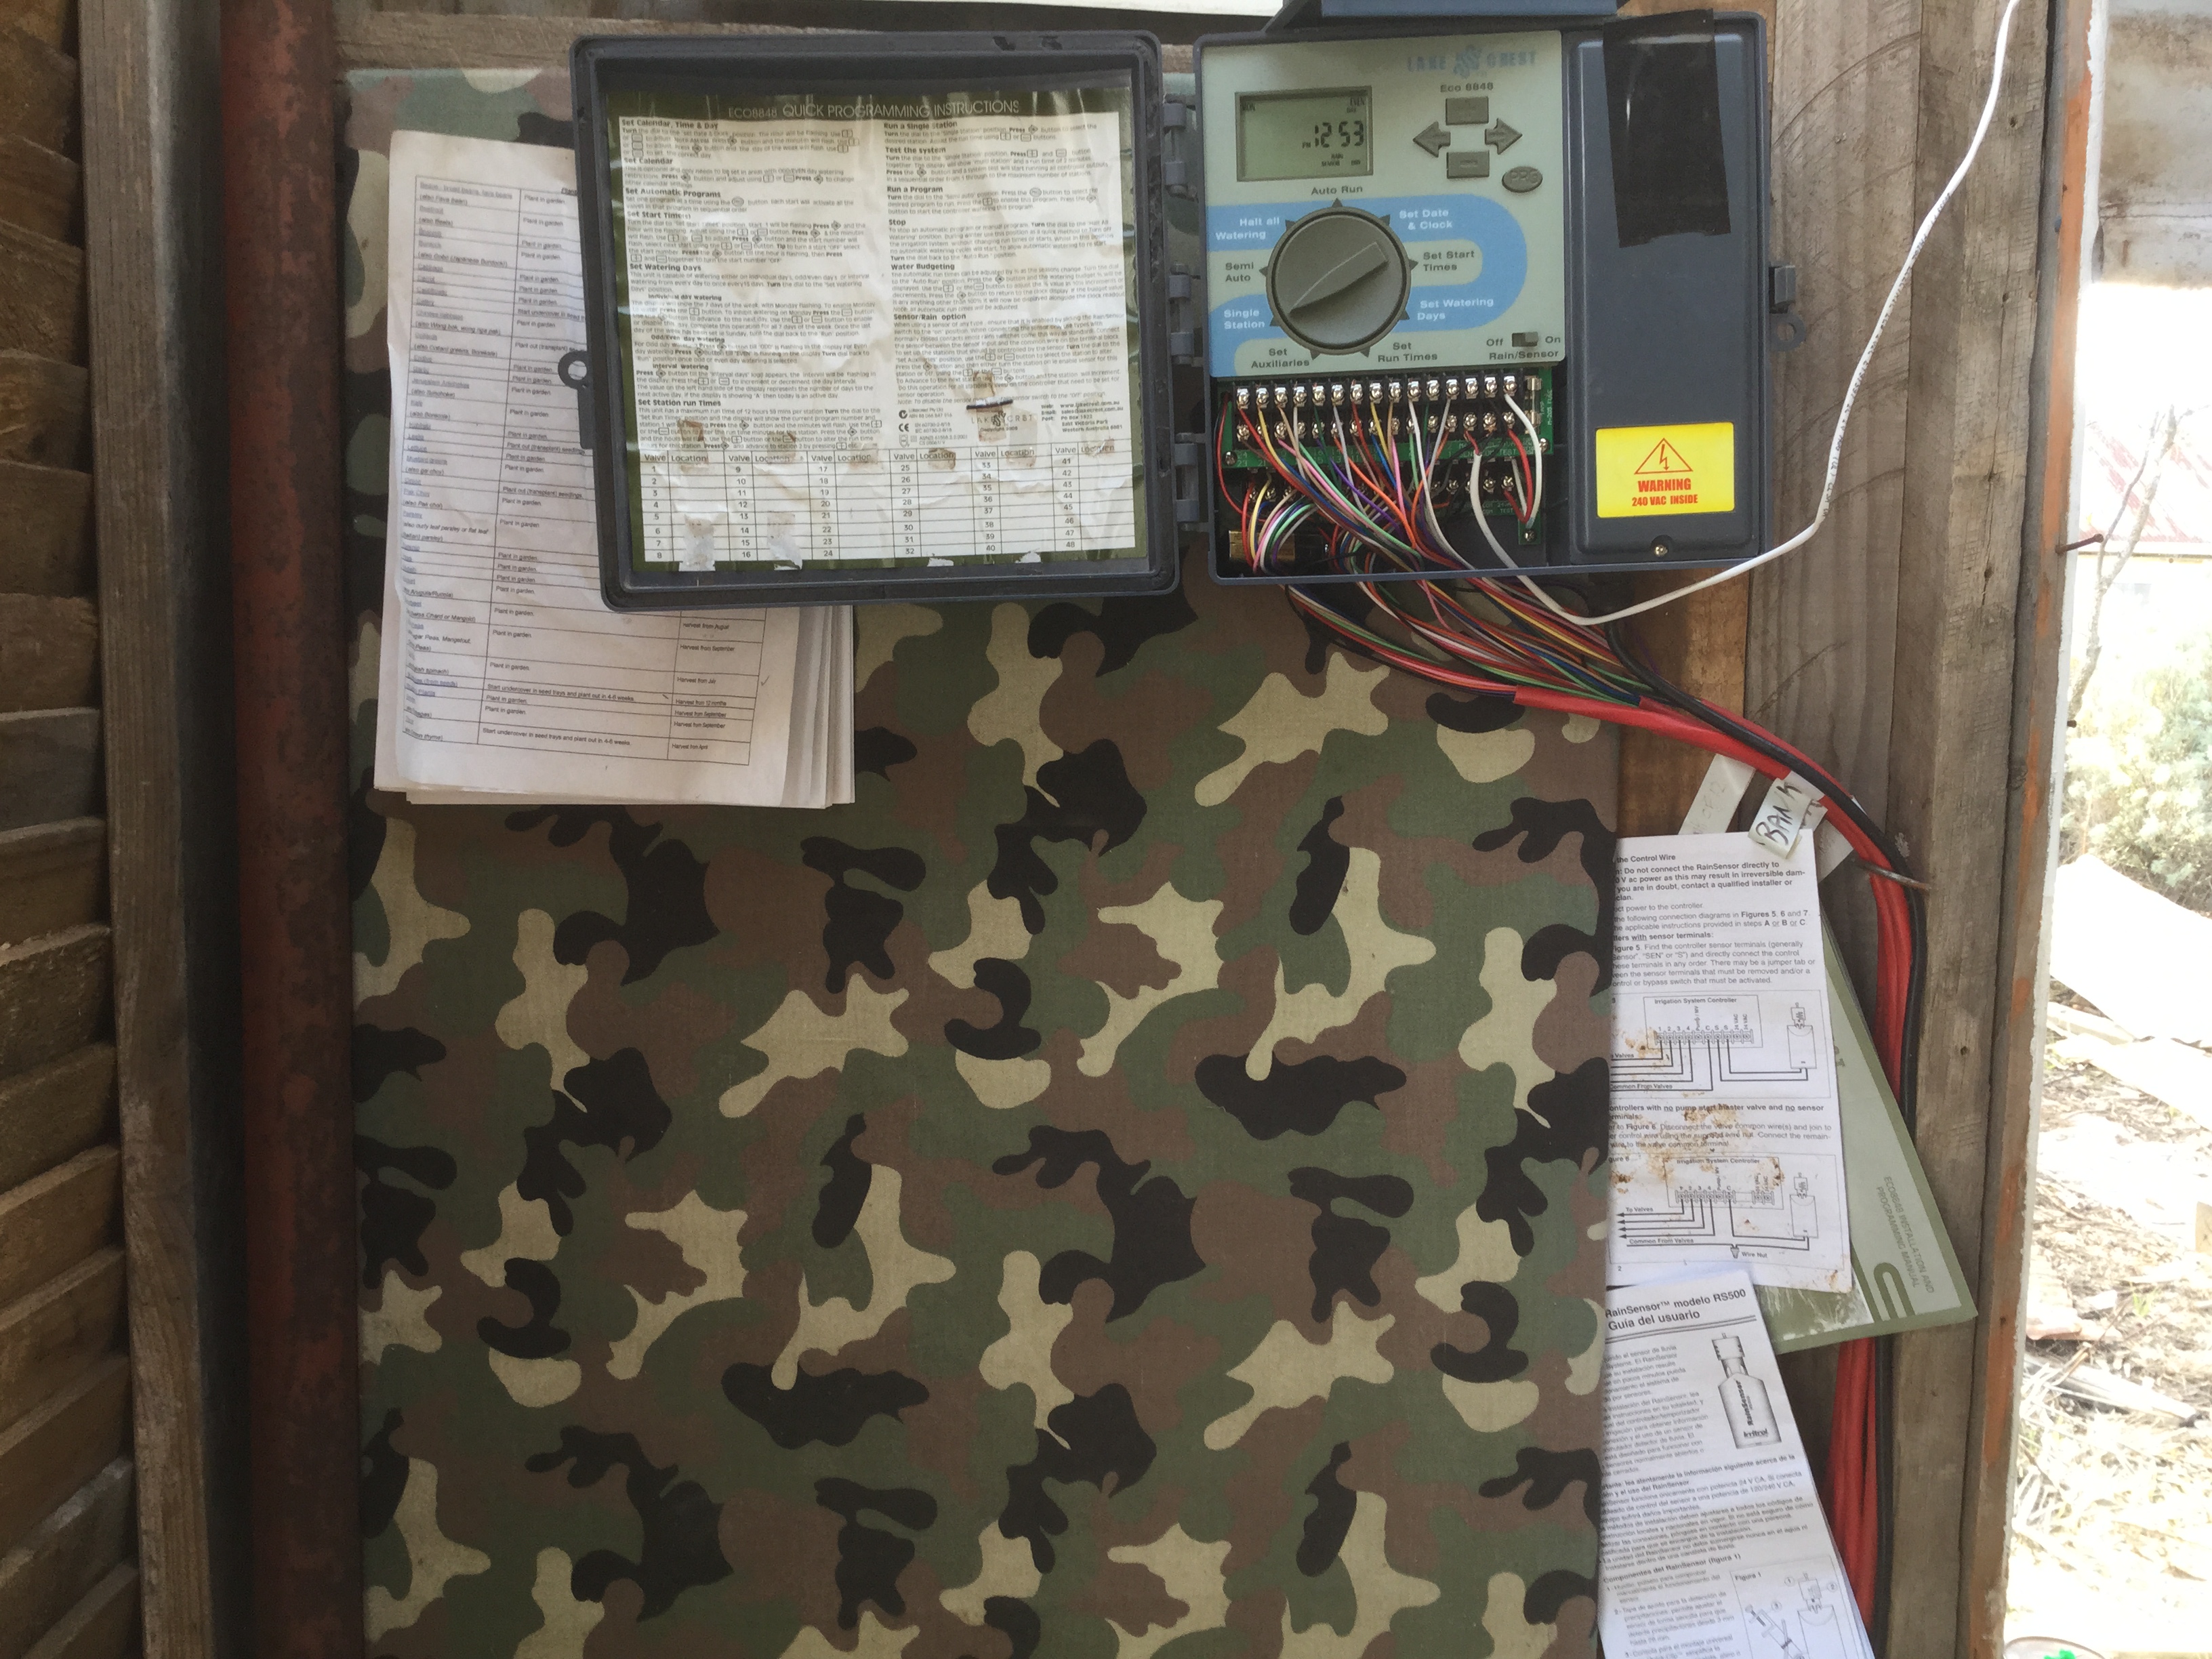
Controller board with instructions for handy reference as well as a yearly planting seasonal planner from Gardenate. Sign up with them for the best AU planting notes for your region.
Update later when it rains……………..

You must be logged in to post a comment.