Aquaponics for everyone
So permaculture doesn’t work in a dry environment eh? Then try Xericulture!
It seems every book on permaculture and every expert that uses the principals of permaculture, center around there being a heap of water available and the site has a slope to utilise. So what if you don’t have these two aspects, does permaculture work? Evidently not as well as it should and in some circles who think not at all.
So we are coining a new phrase and concept taking the best permaculture has to offer and fitting it into a dryland environment, calling it Xericulture. Xeros from the Greek meaning dry and the Latin cultura which is growing or cultivation. The concept of xeriscaping was developed years ago by Denver water in the USA and has seven basic tenets which we incorporate into the twelve tenets of permaculture as follows.
Permaculture tenets.
1. Observe and interact.
2. Catch and store.
3. Obtain a yield.
4. Apply self regulation, accept feedback.
5. Use/value renewable resources/services.
6. Produce no waste.
7. Design from patterns to detail.
8. Integrate not segregate.
9. Use small slow solutions.
10. Use/value diversity.
11. Use edges/value the marginal.
12. Creatively use and respond to change.
Xeriscaping tenets.
1. Analyse the site.
2. Classify the zones.
3. Select the appropriate plants.
4. Fill large areas with lawn.
5. Group water needy plants near structures.
6. Soften boundaries.
7. Mulch.
As you read the two, similarities standout but by and large the Xeriscaping side are biased to dry environments as you would expect. The only points that can meld are observe and interact with analyse the site, use edges value the marginal and soften boundaries. Scrap the lawn idea entirely. The others are added to each other to make a total of 17 tenets. No need to reinvent the wheel here but just accept that living in a dry environment poses more challenges and more attention to detail is needed.
Having said that I’m sure that over time some others will be redefined and incorporated as this concept is still new and under development. I applied these principals to my new spud bed this week…


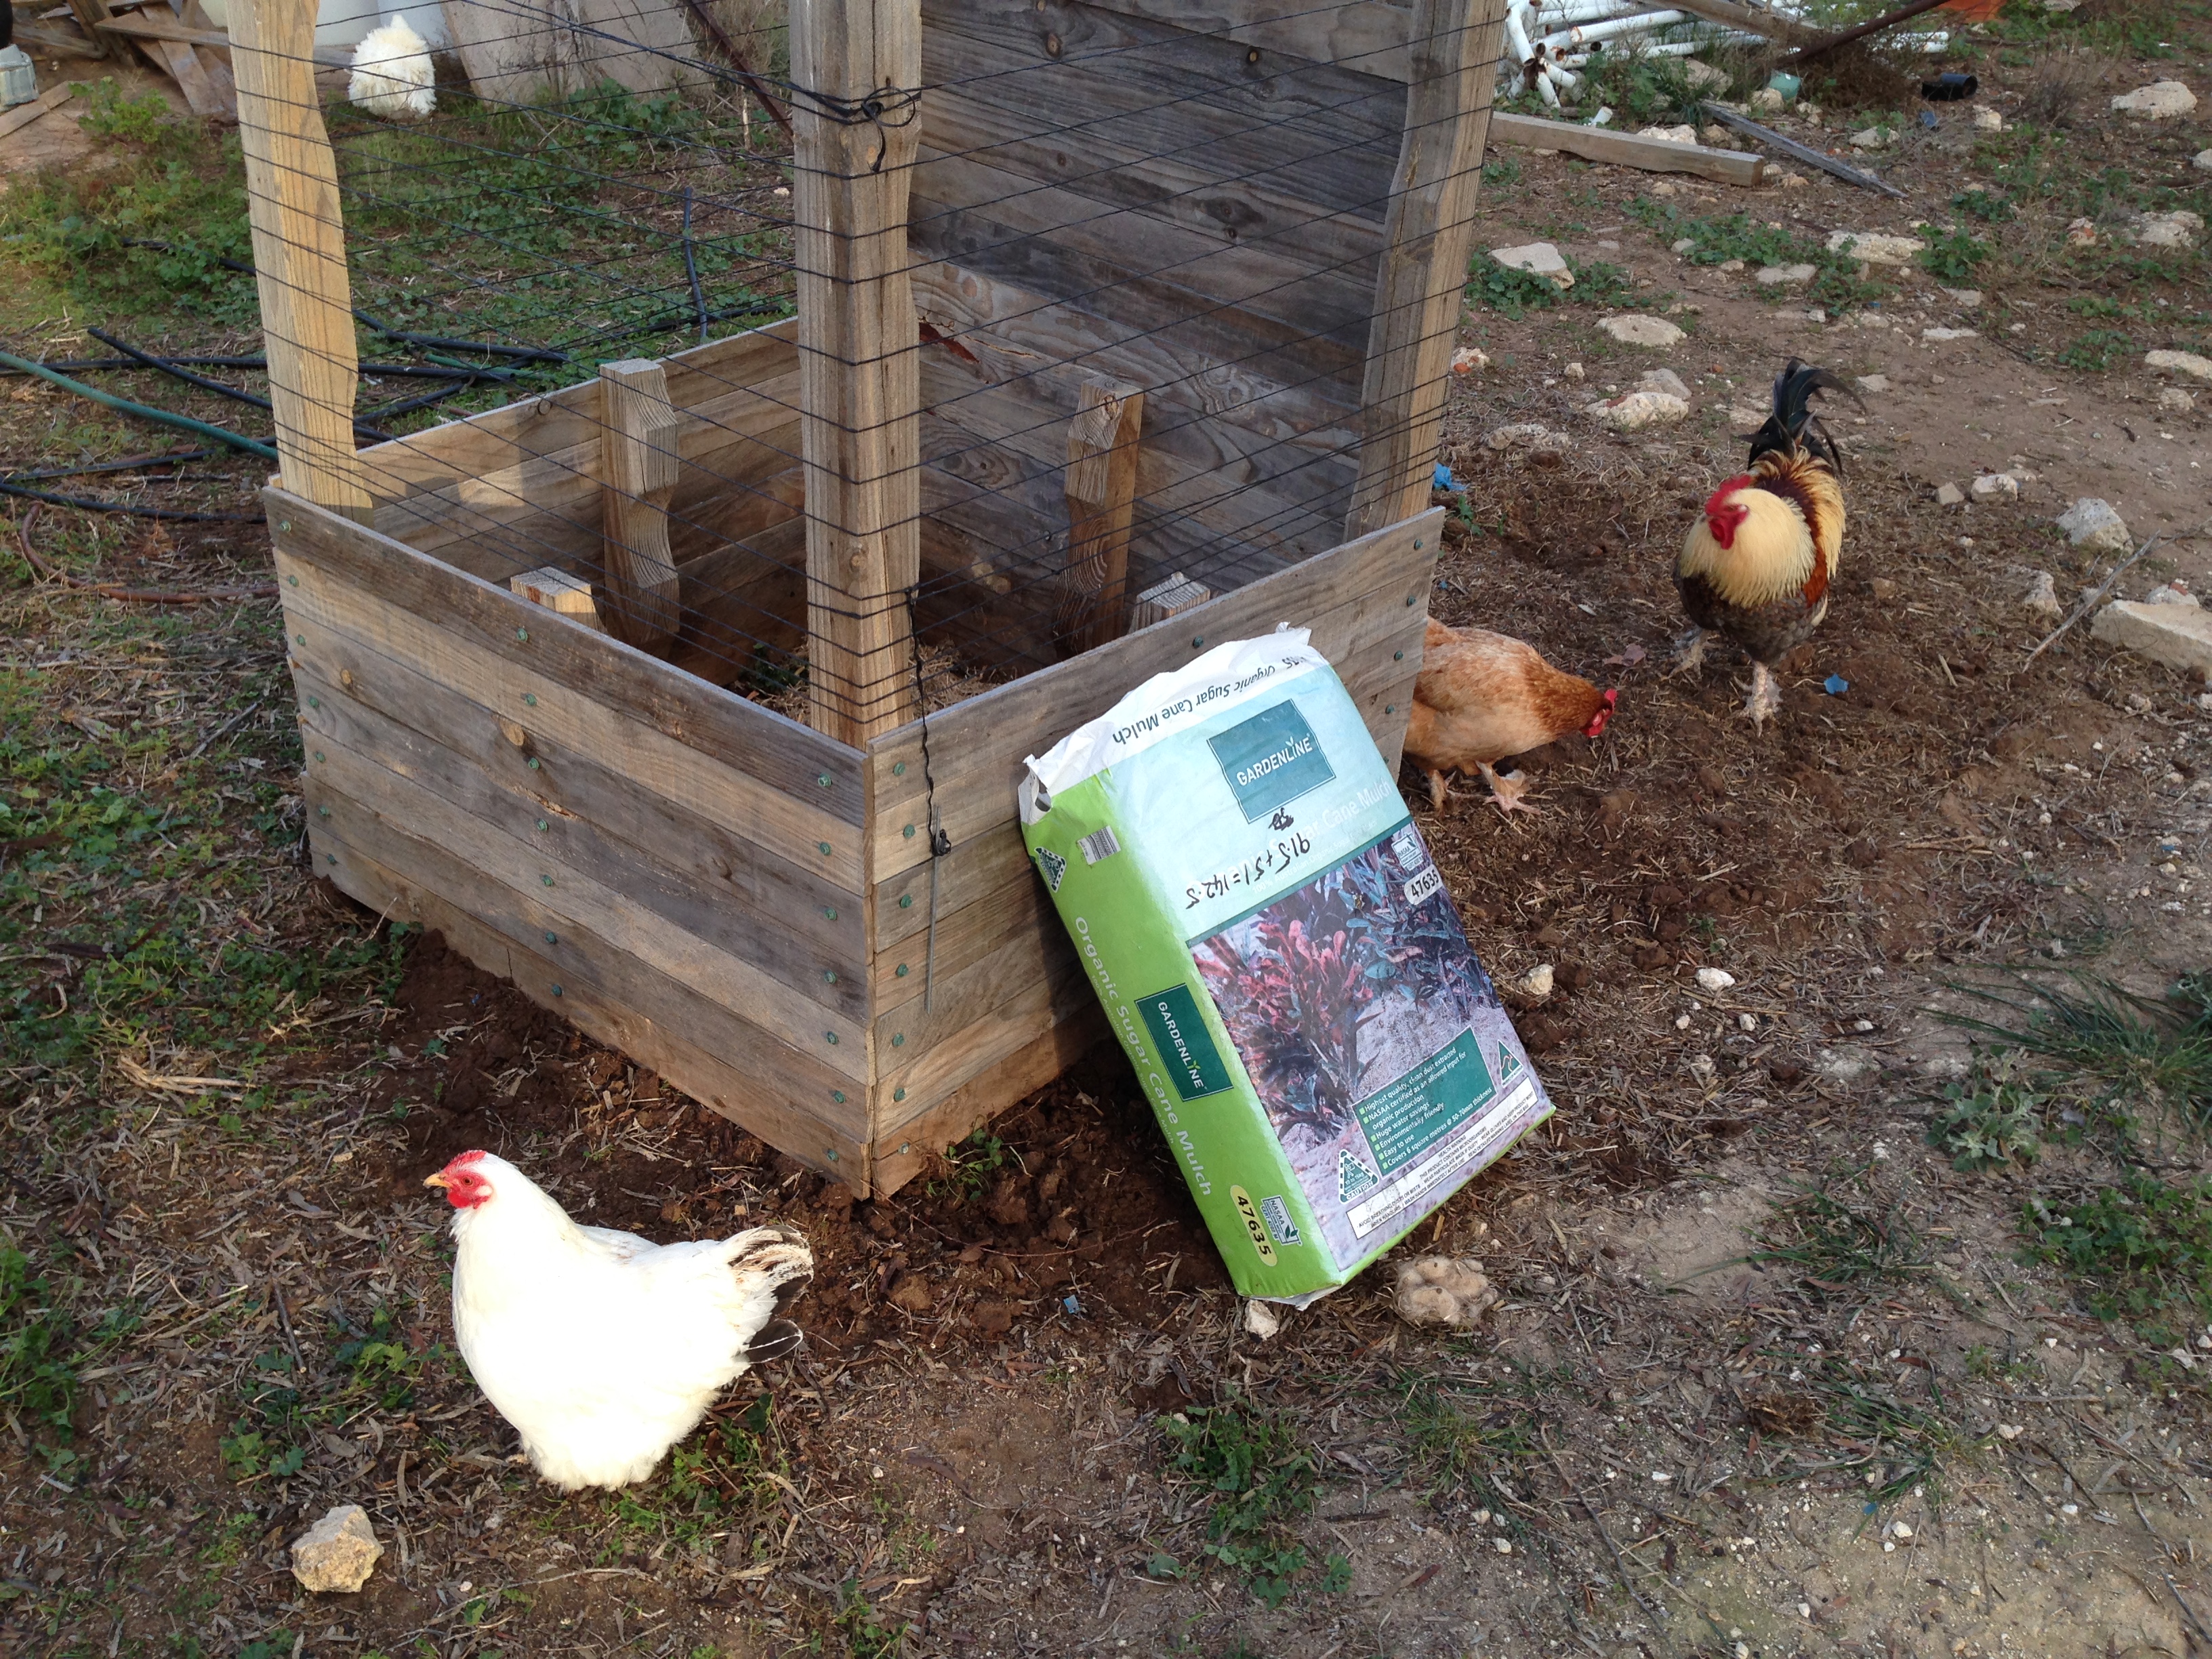
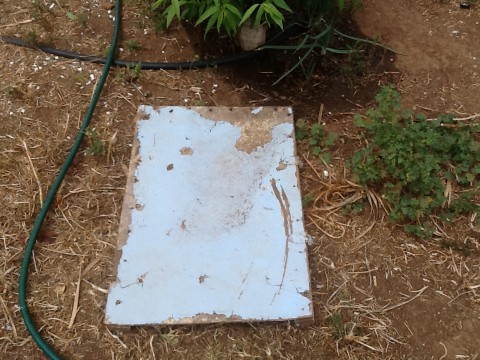
Here we have an example of spuds on dead dry soil, barely got the fork in a half a tine deep! This particular spot has not been cultivated for over 50 years and was part of a dirt track. The idea is to throw the seed spuds on top and cover with mulch.
Keep the water up and chooks out (bailing twine wrapped around the frame). As the spuds emerge thru the mulch cover to the top leaving a tip showing. If the box gets filled I can add more boards to increase the mulch height.

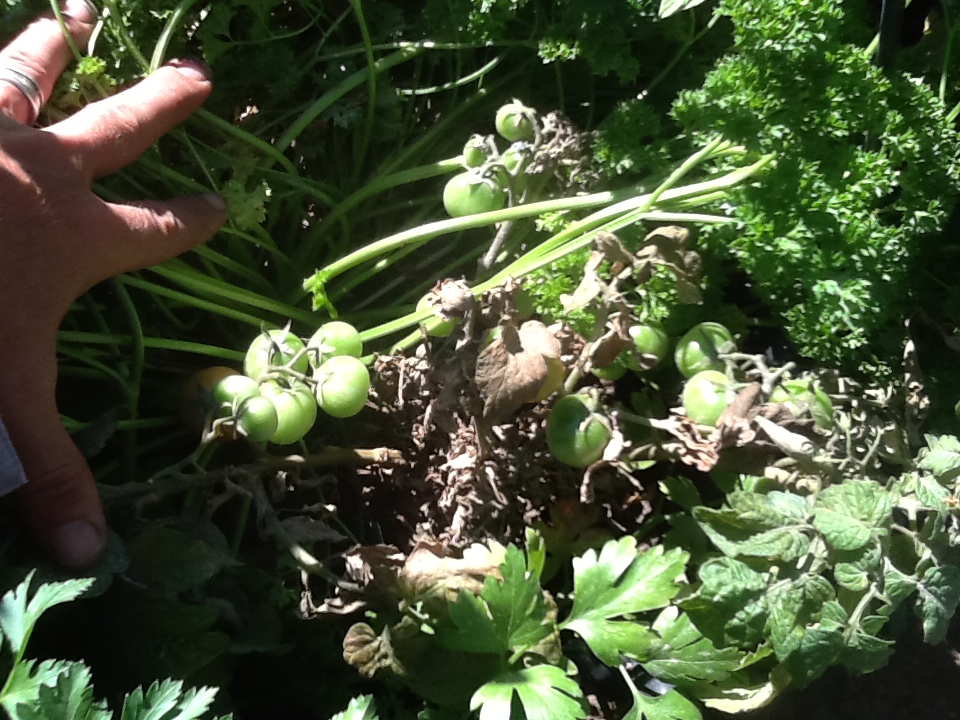
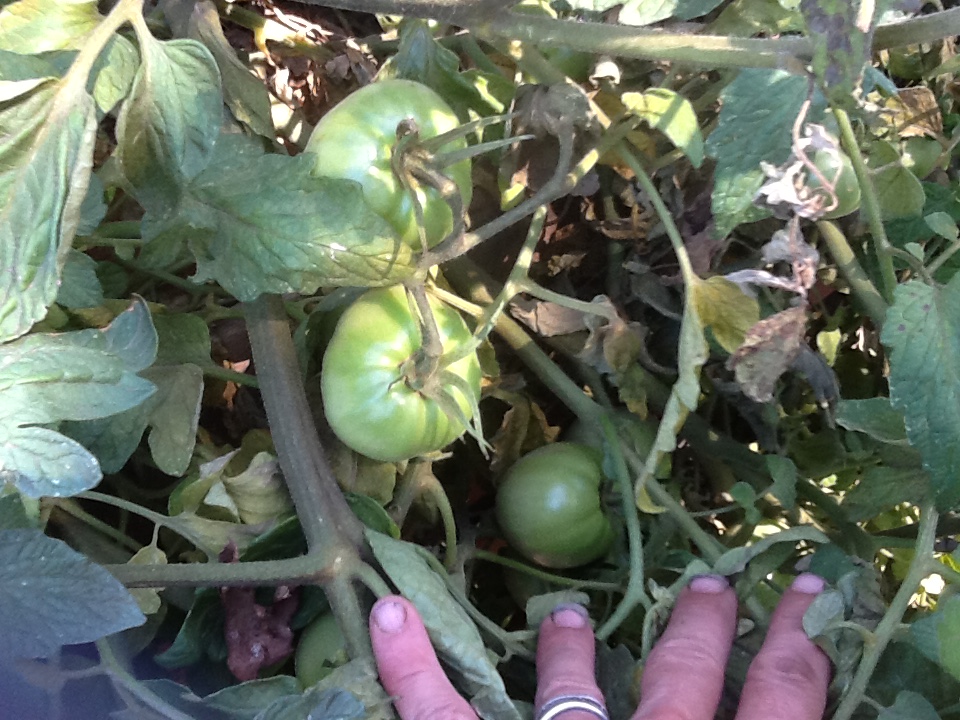
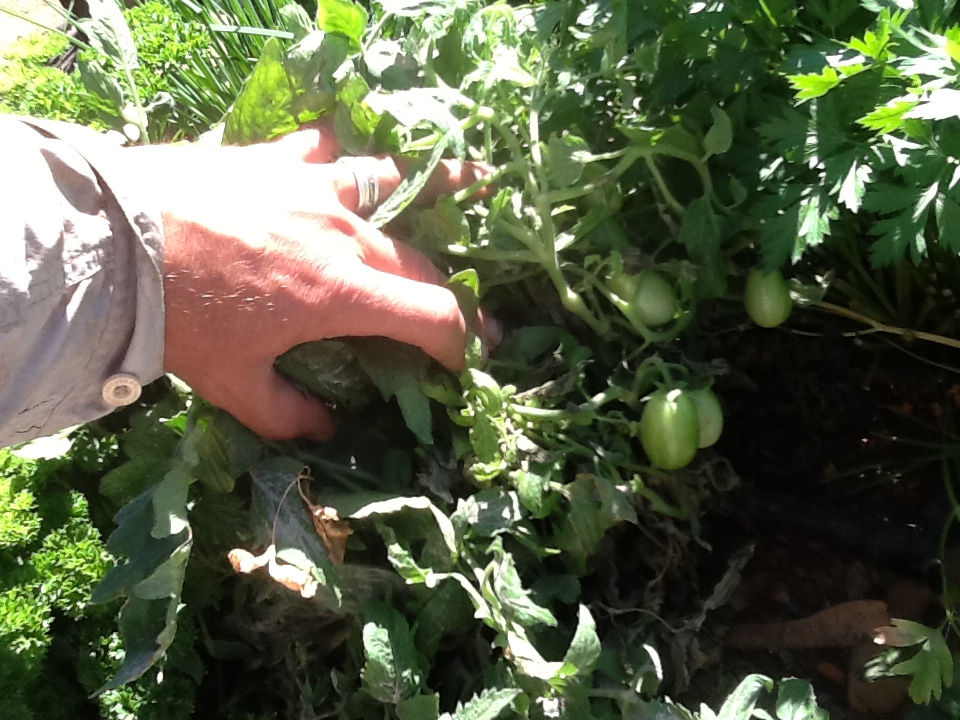
I experimented with 6 seed spuds last year with very good results, as you can see…
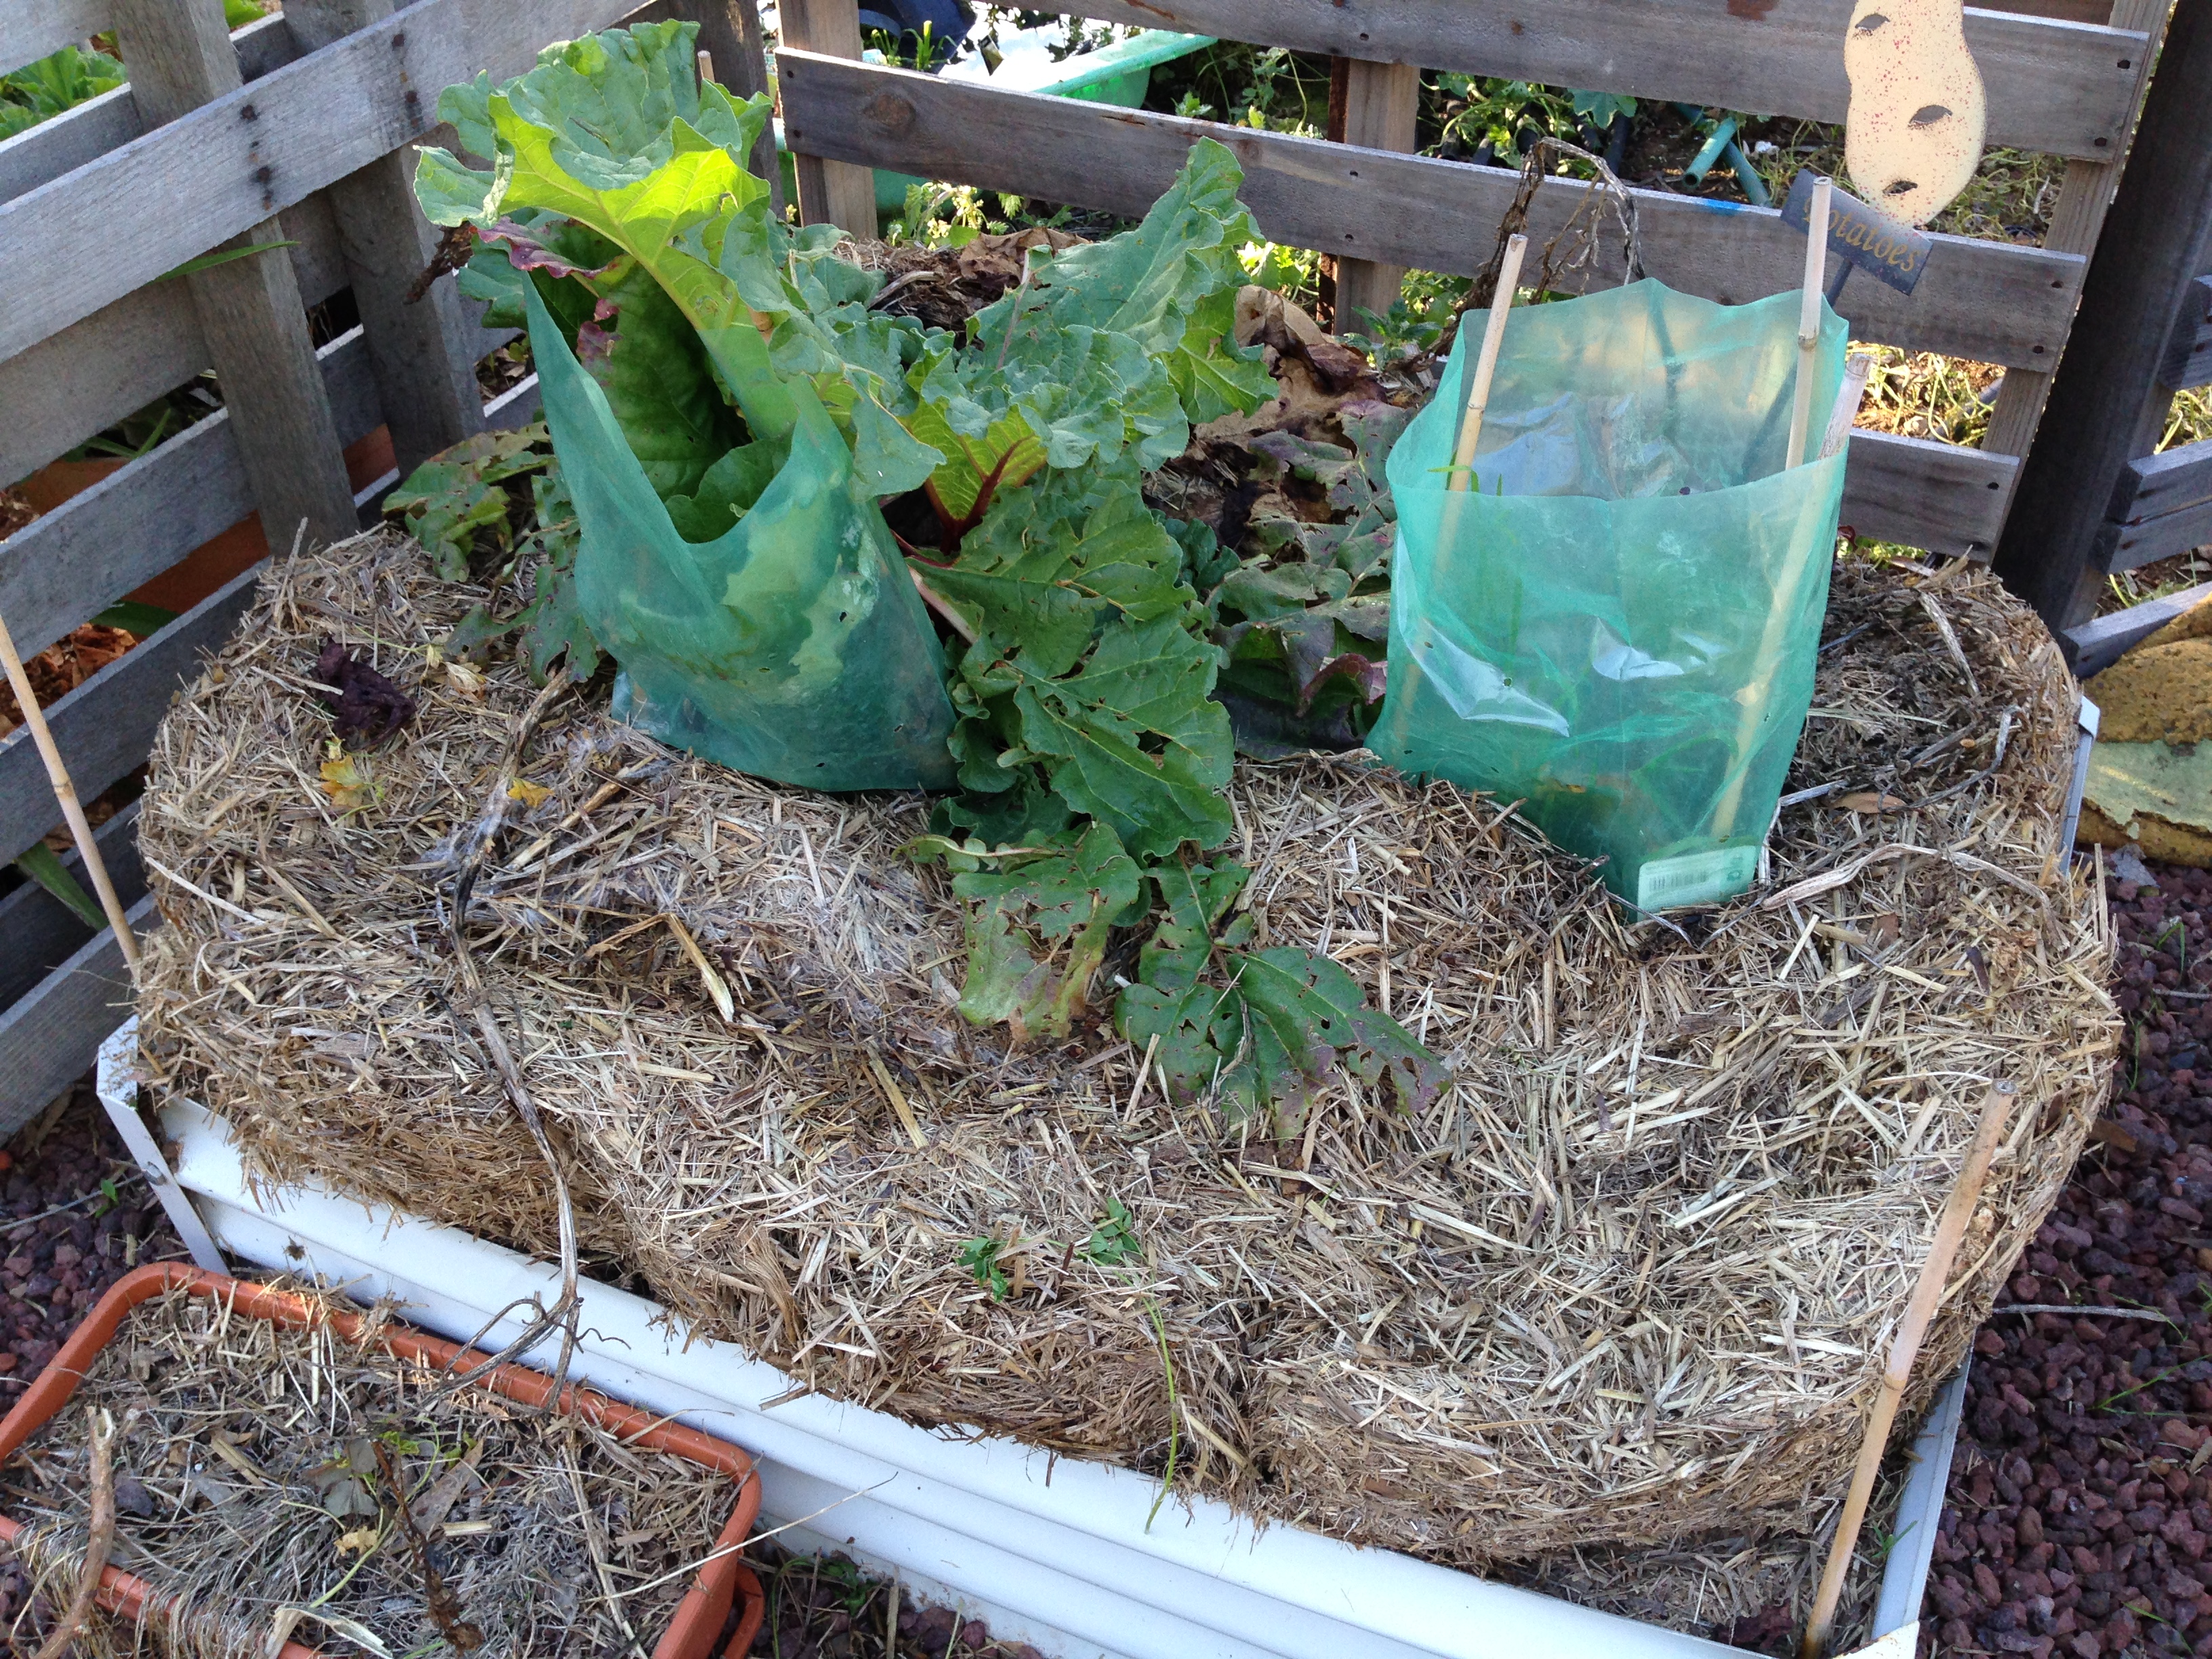

The bed was surrounded by tree guards to keep the mulch in the bed so chooks couldn’t scratch it out. Middle pic shows the mulch being lifted and bagged with new spuds being removed as we go. They fell out of the mulch onto the raised bed and collected. The last pic shows the result. From 6 seed spuds weighing around 250 grams to a basket and pail weighing in total 9 kg! Granted there were some very small ones left in the bed as I didn’t want to disturb the rhubarb too much, Ah well, spuds as weeds is a good thing…
More later …
Grow your own from the rubbish bin
I have noticed more in my news feed about growing veggies from the rubbish or bokashi bin recently.
My Grandfather taught me this when I was about 5yo, I’m still doing it with all that comes through our kitchen waste…

In these three trays (recycled meat trays from the supermarket) pour 5mm water in and add carrot off cuts, beetroot, celery, pal choy etc etc and grow not for root re growth but seed! Harvest then plant out your own seed from multi coloured carrot, chard and the list goes on…
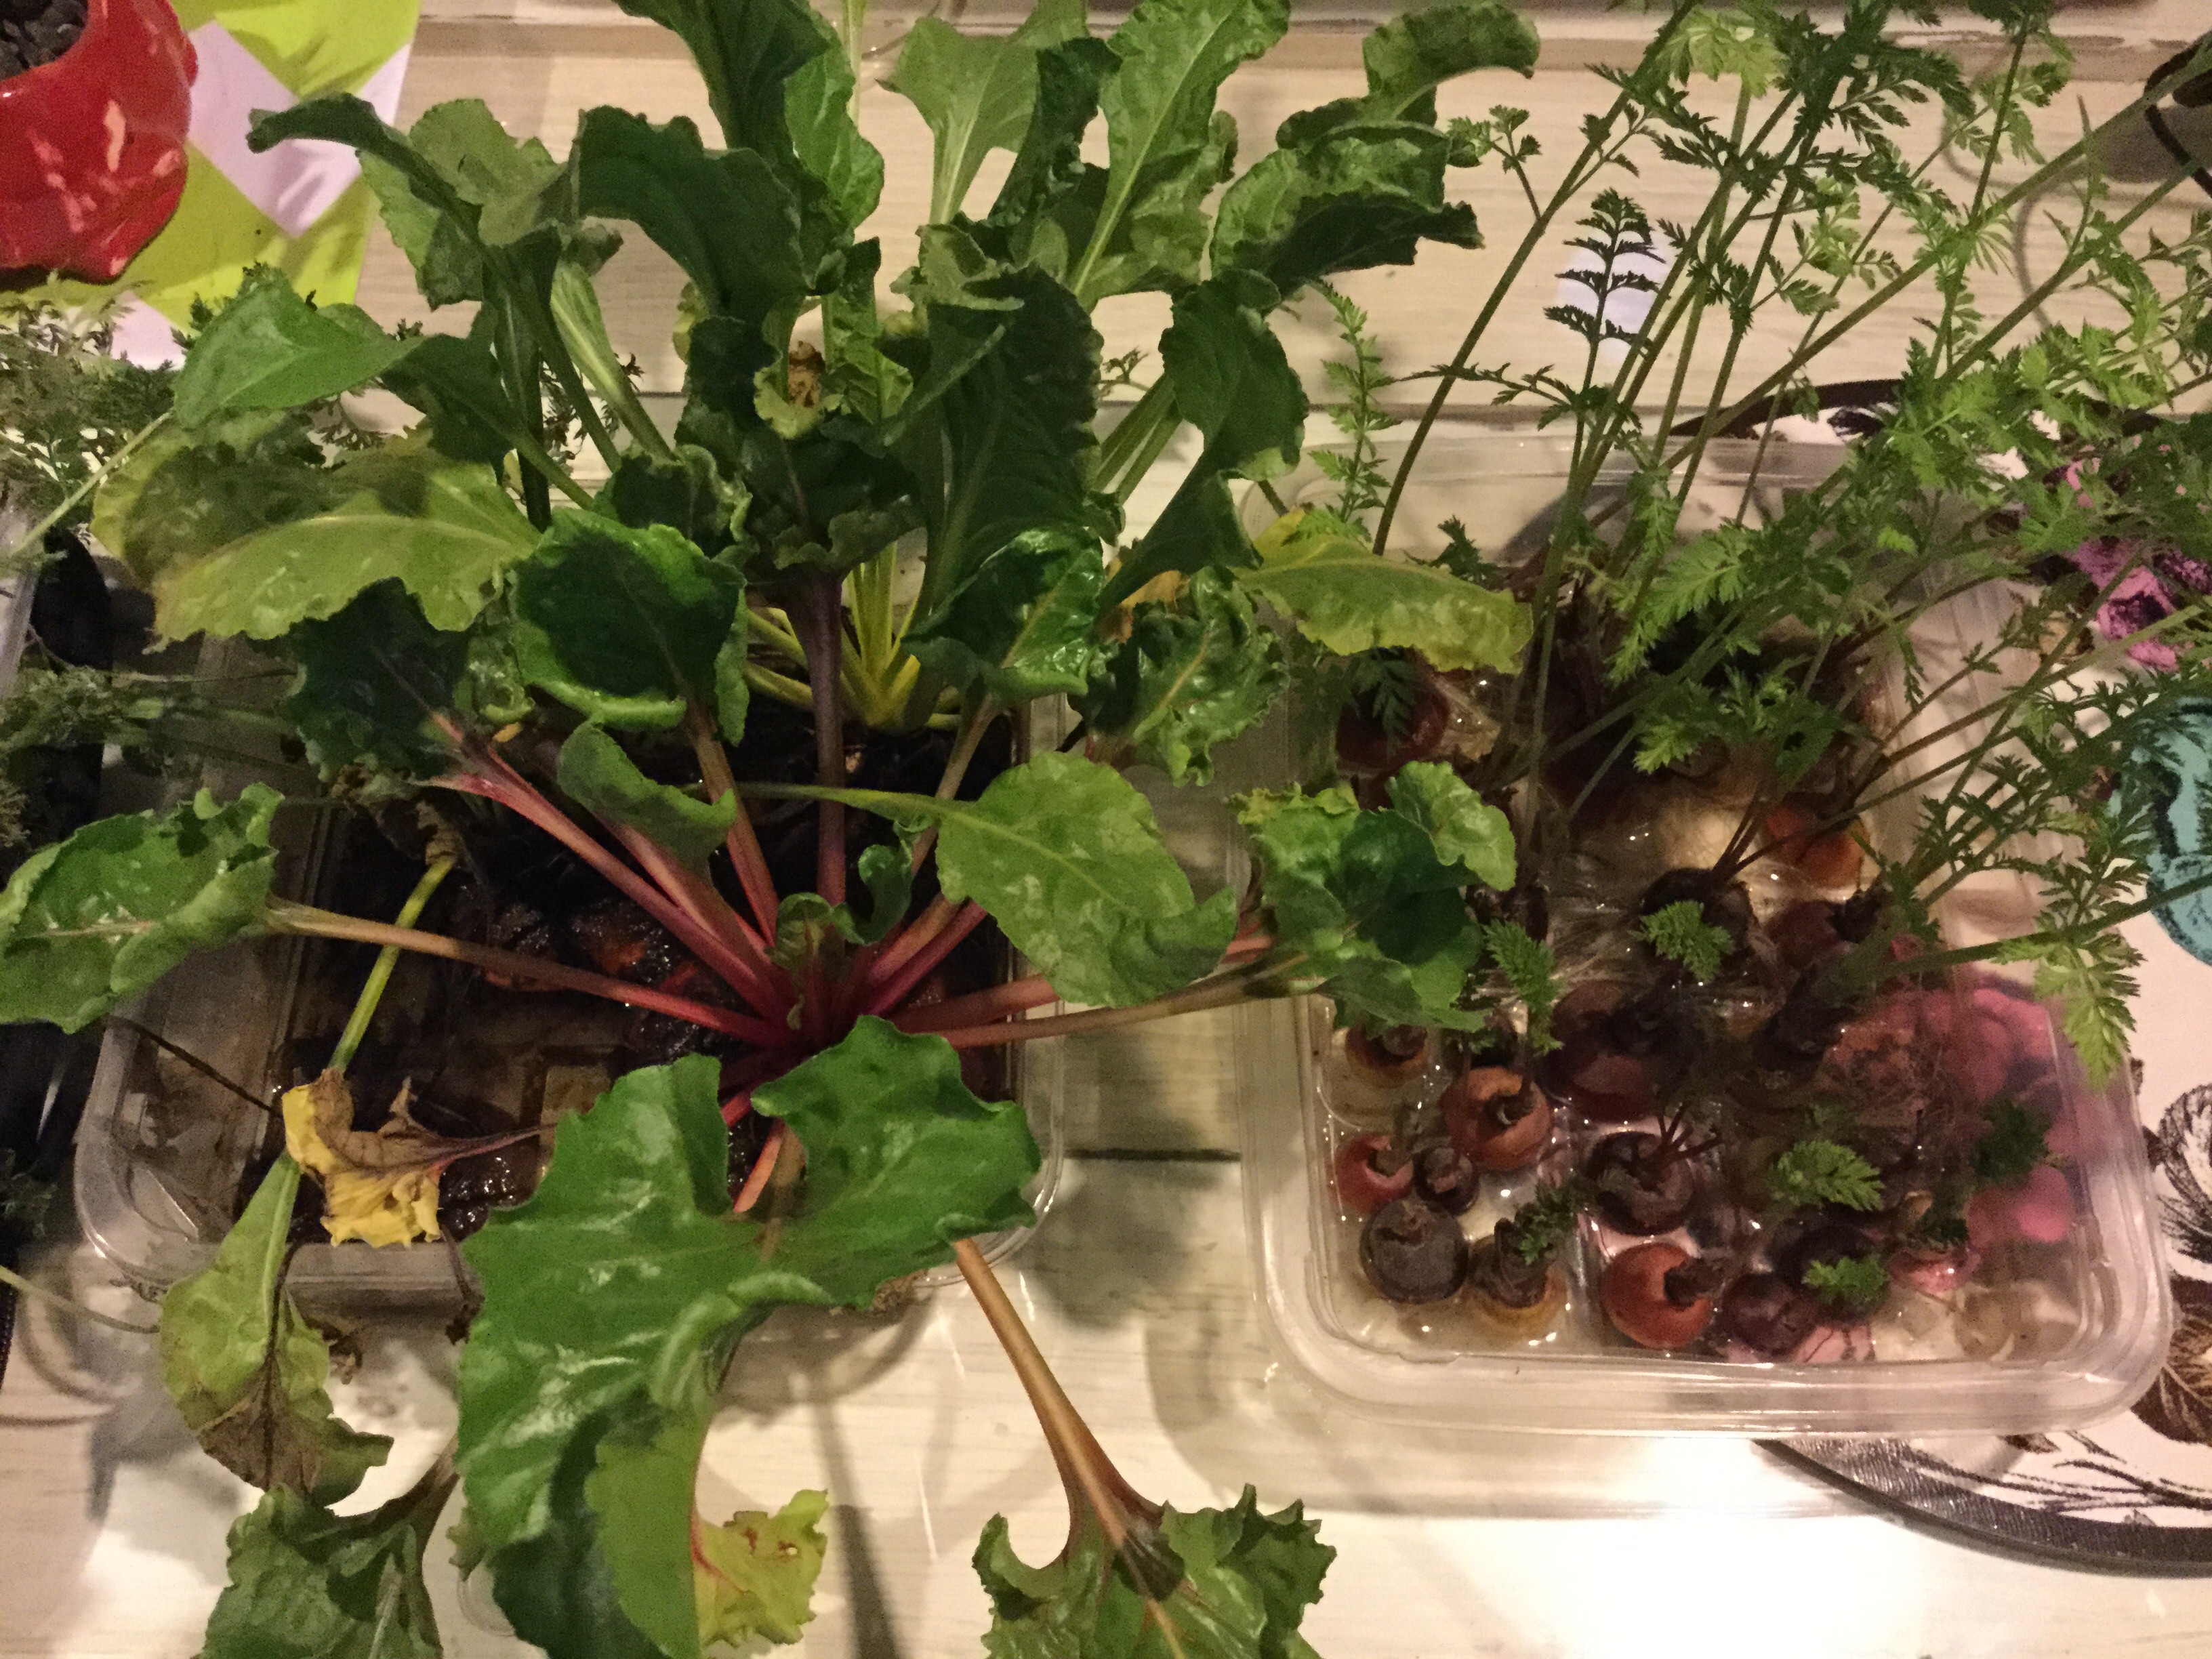
As you can see in the tray on the right, the most recent coloured carrots have been placed with the ones from the roast from last week behind them. Between four to eight inches, 10 to 20cm of growth, with no effort, time or expense needed.
I suppose old is new! Bring it on!!!
More pix for those who asked…


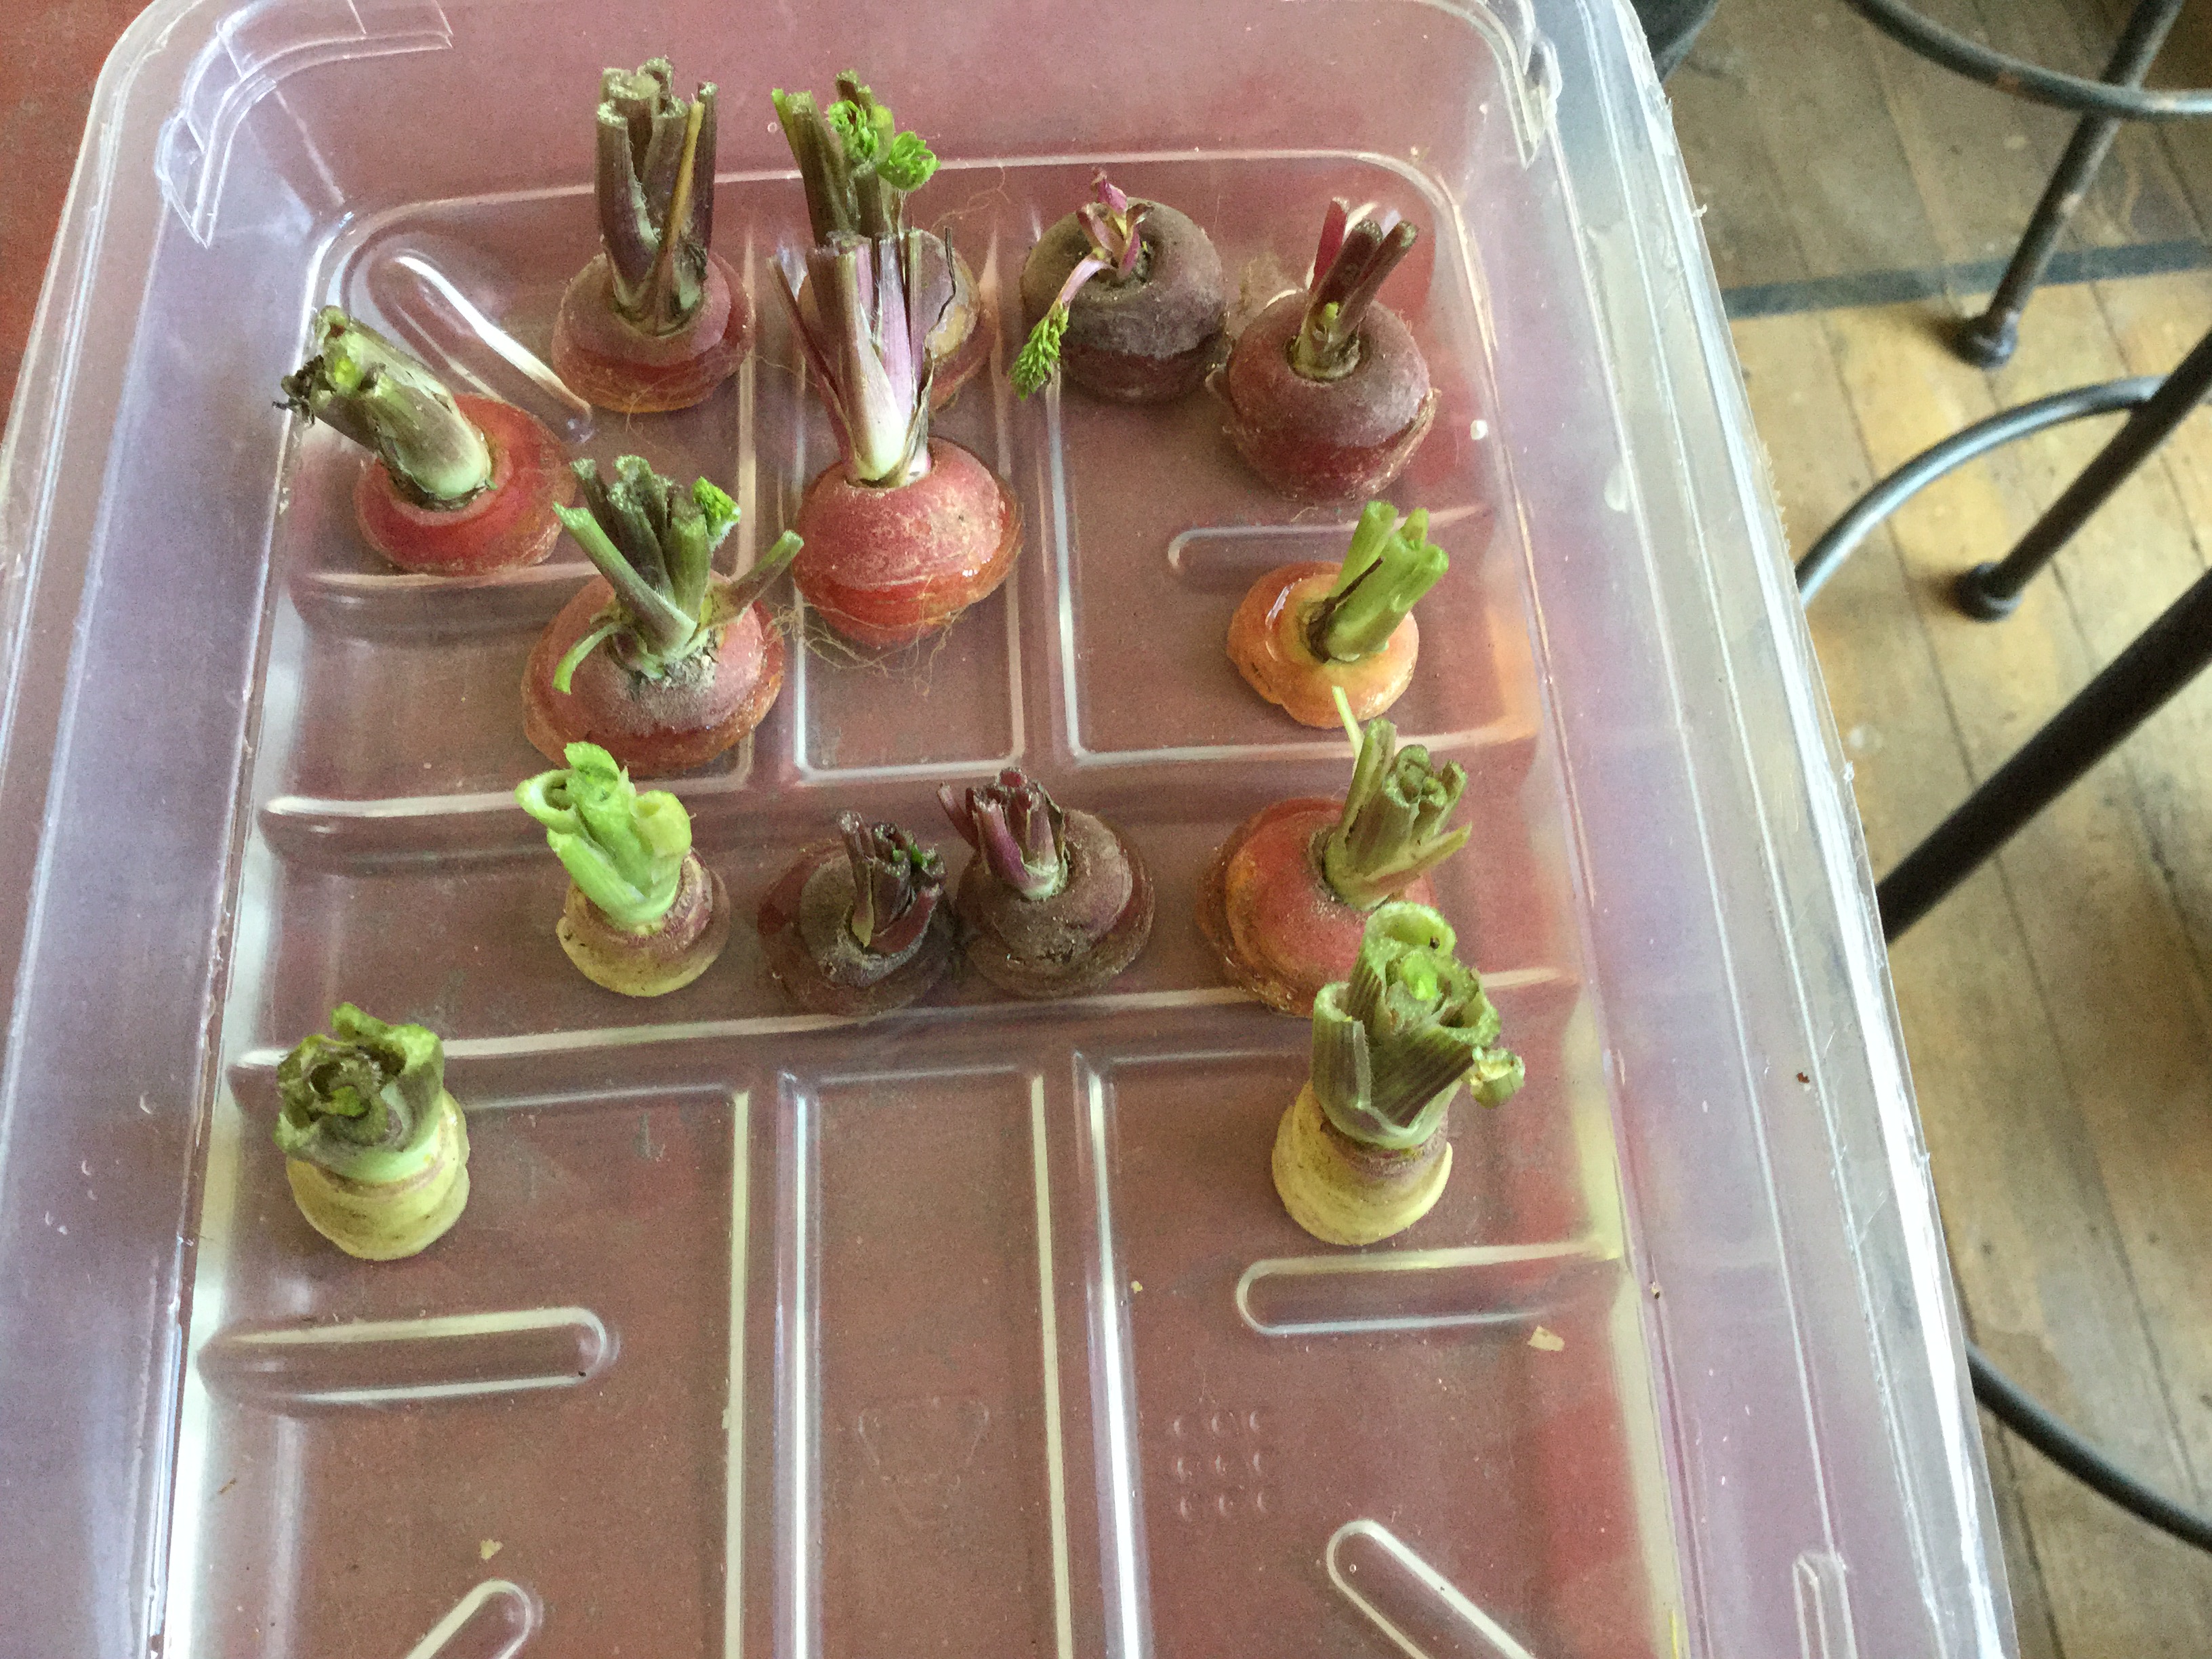
The last pic is colored carrots, why would you buy expensive seeds when you can do this? Ok it takes a few weeks of patience to see flower heads but worth it in the end.
Warracknabeal Community Garden
The Warracknabeal Community Garden (WCG) asked me to help out getting their garden off the ground late last year and now I can show the progress with the first beds being prepared with the assistance of the Secondary College year nines.
There have been many meetings and lots of planning and finally the first raised beds are in. Over the next four Saturday mornings there will be working bees to fill them and plant.
Master Gardener Bruce (MG) and myself have talked long and hard over what should go where and with what level of difficulty we should start from.
We got some brassica seedlings and peas and carrots and held a short discussion on seed planting and the relevance of “tilth” and seed size, a word kids have never heard of!

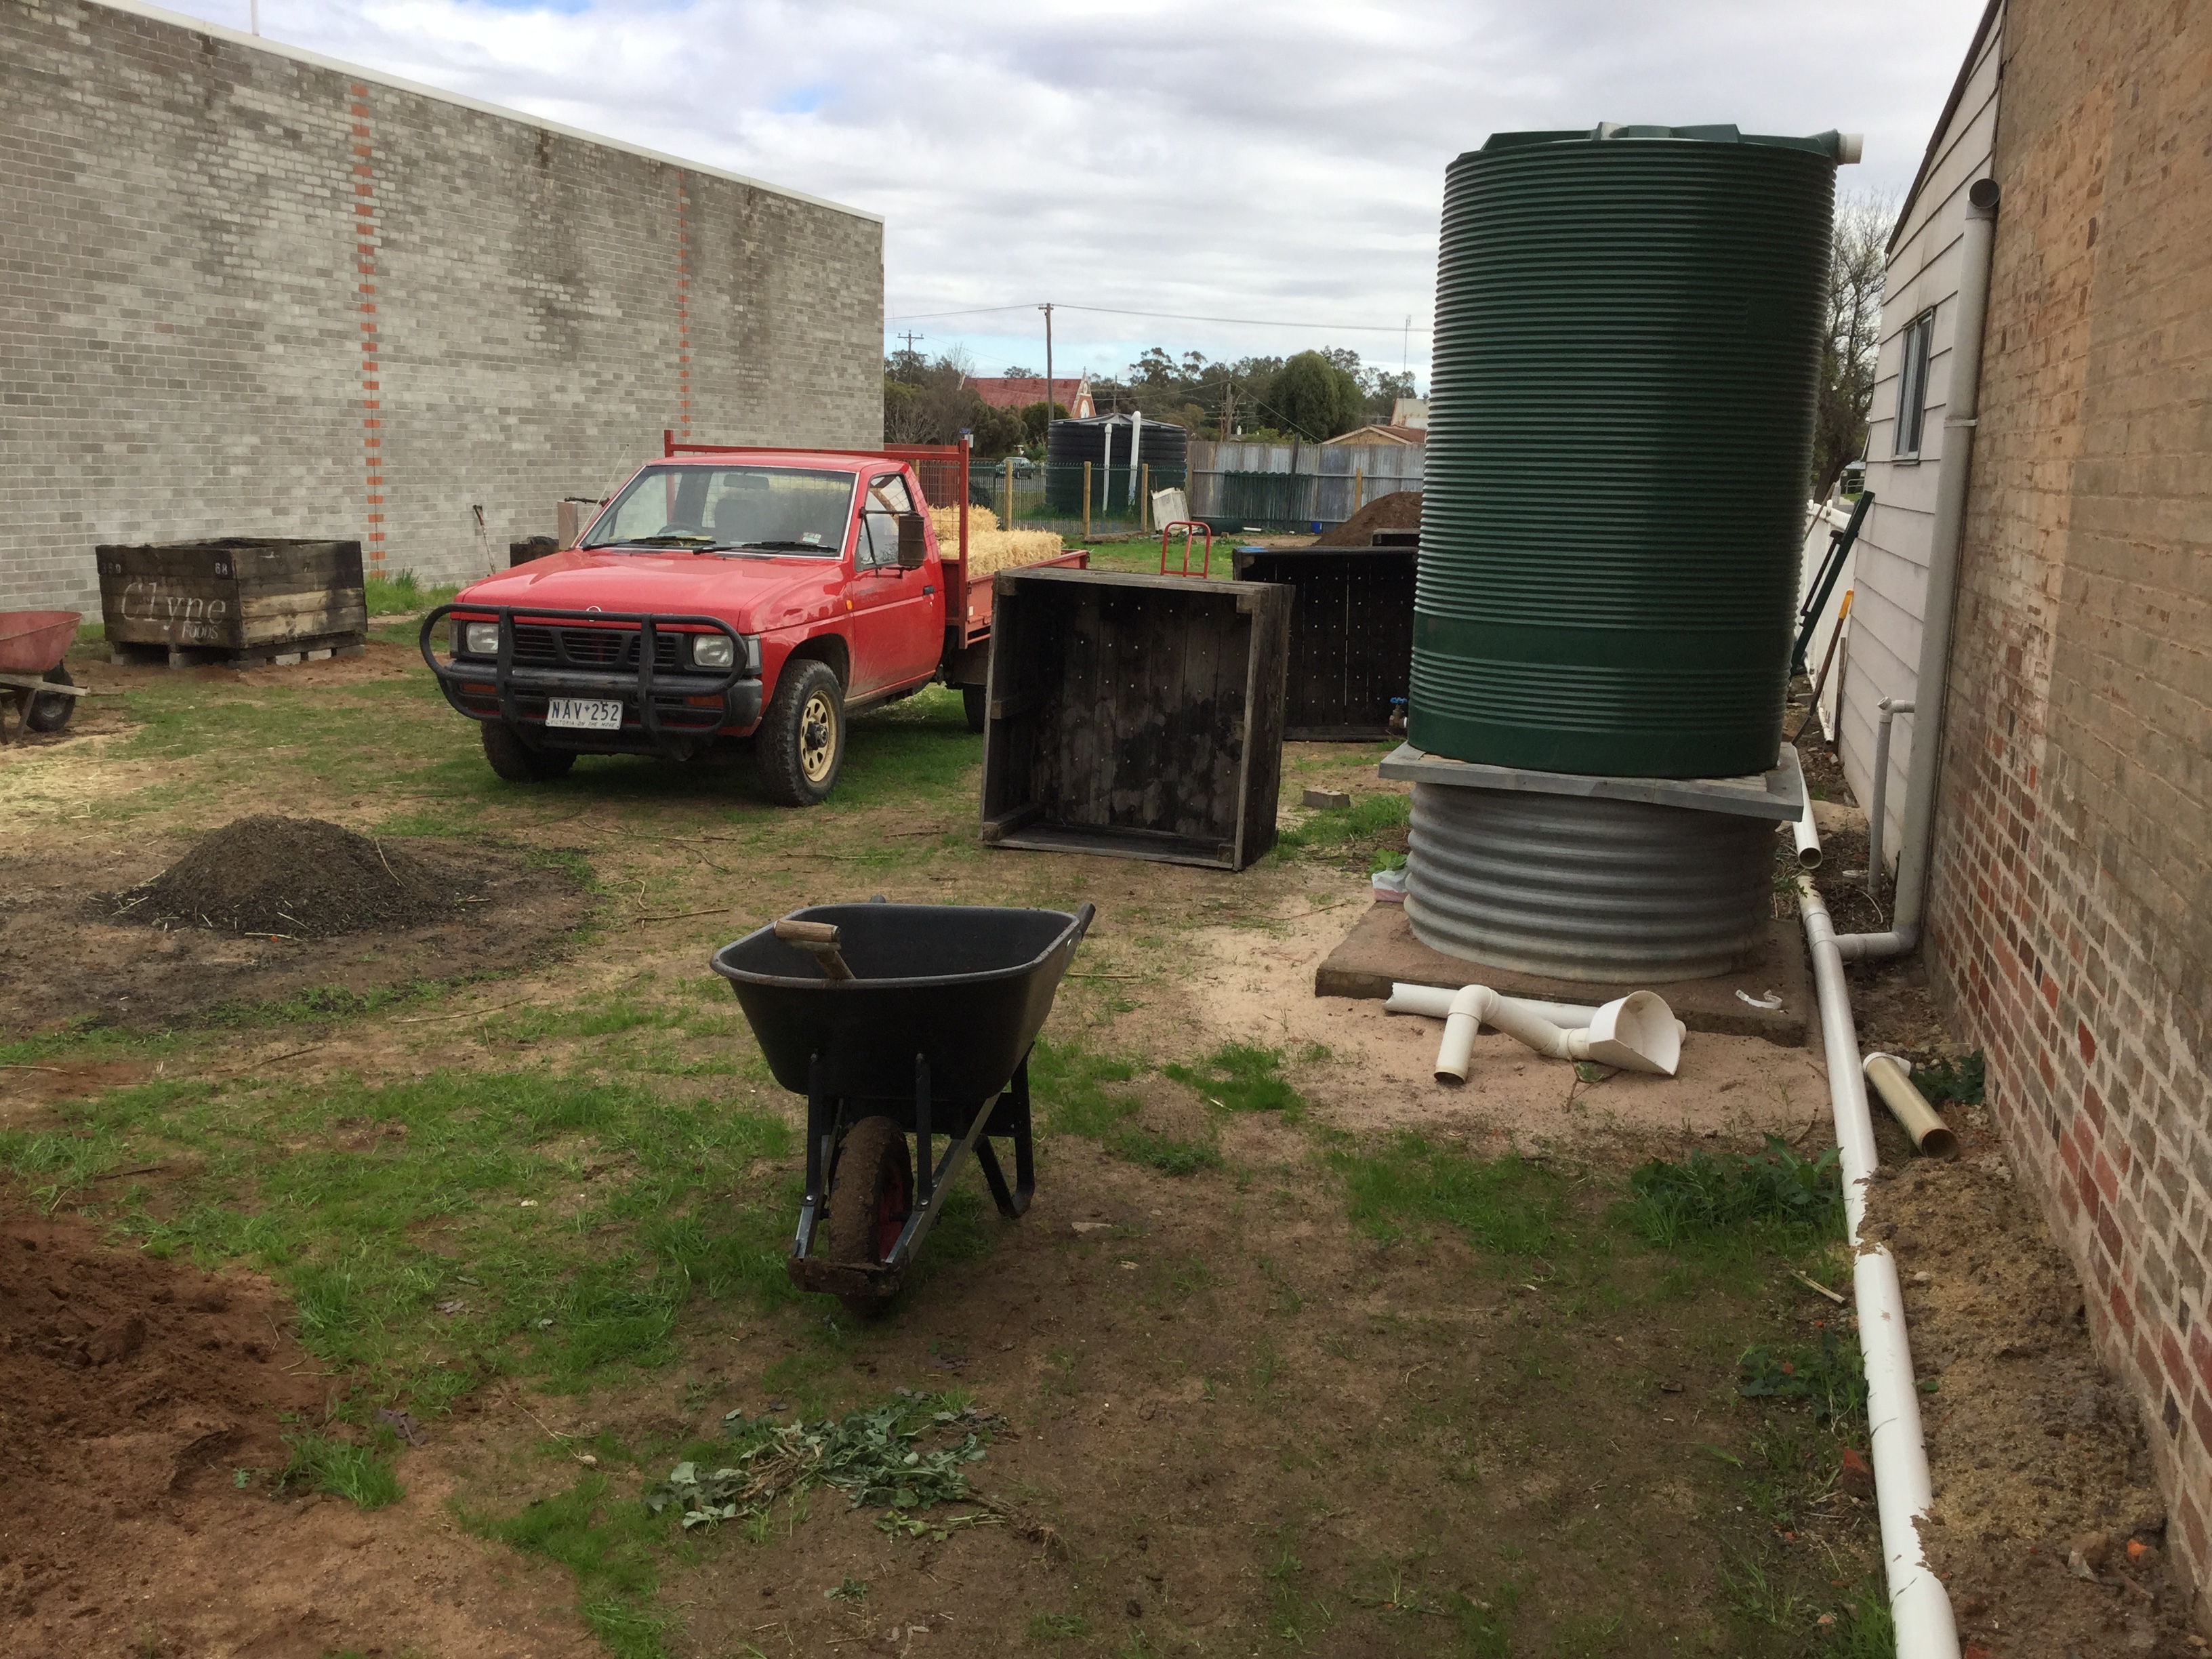

The MG ute ready to off load the next straw bales for another raised bed at the entrance. Second one shows the fruit transportation crates bought ready to have geotec stapled in over the drainage holes. The tank was donated and has been plumbed into the shop next door letting the Warracknabeal CG use that water. From the back of the plot in pix 3 and 4 look toward the main street showing the donated pool fencing erected by Mr. Inkster, a local farmer and quiet achiever.

The first bed made by the WCG MG with one course of fencing wire around to keep shape. Planted by the Warracknabeal Secondary Kids inter-spaced with peas and row of multi colored carrots. Heather H donated to protective cover.

Janelle I’s handy work on the North wall advertising to one and all whats going on and when! Get involved!
The garden has a weekly working bee with a focus on opening day some time soon.
This is what it looked like six months ago, a green field site…
 And the new fence and gates installed!!!
 Bruce Hein’s creation from fruit boxes, now filled with an apricot and herbs
 The new shed attached to the newly laid donated pavers.
  Straw bale beds are thriving…
 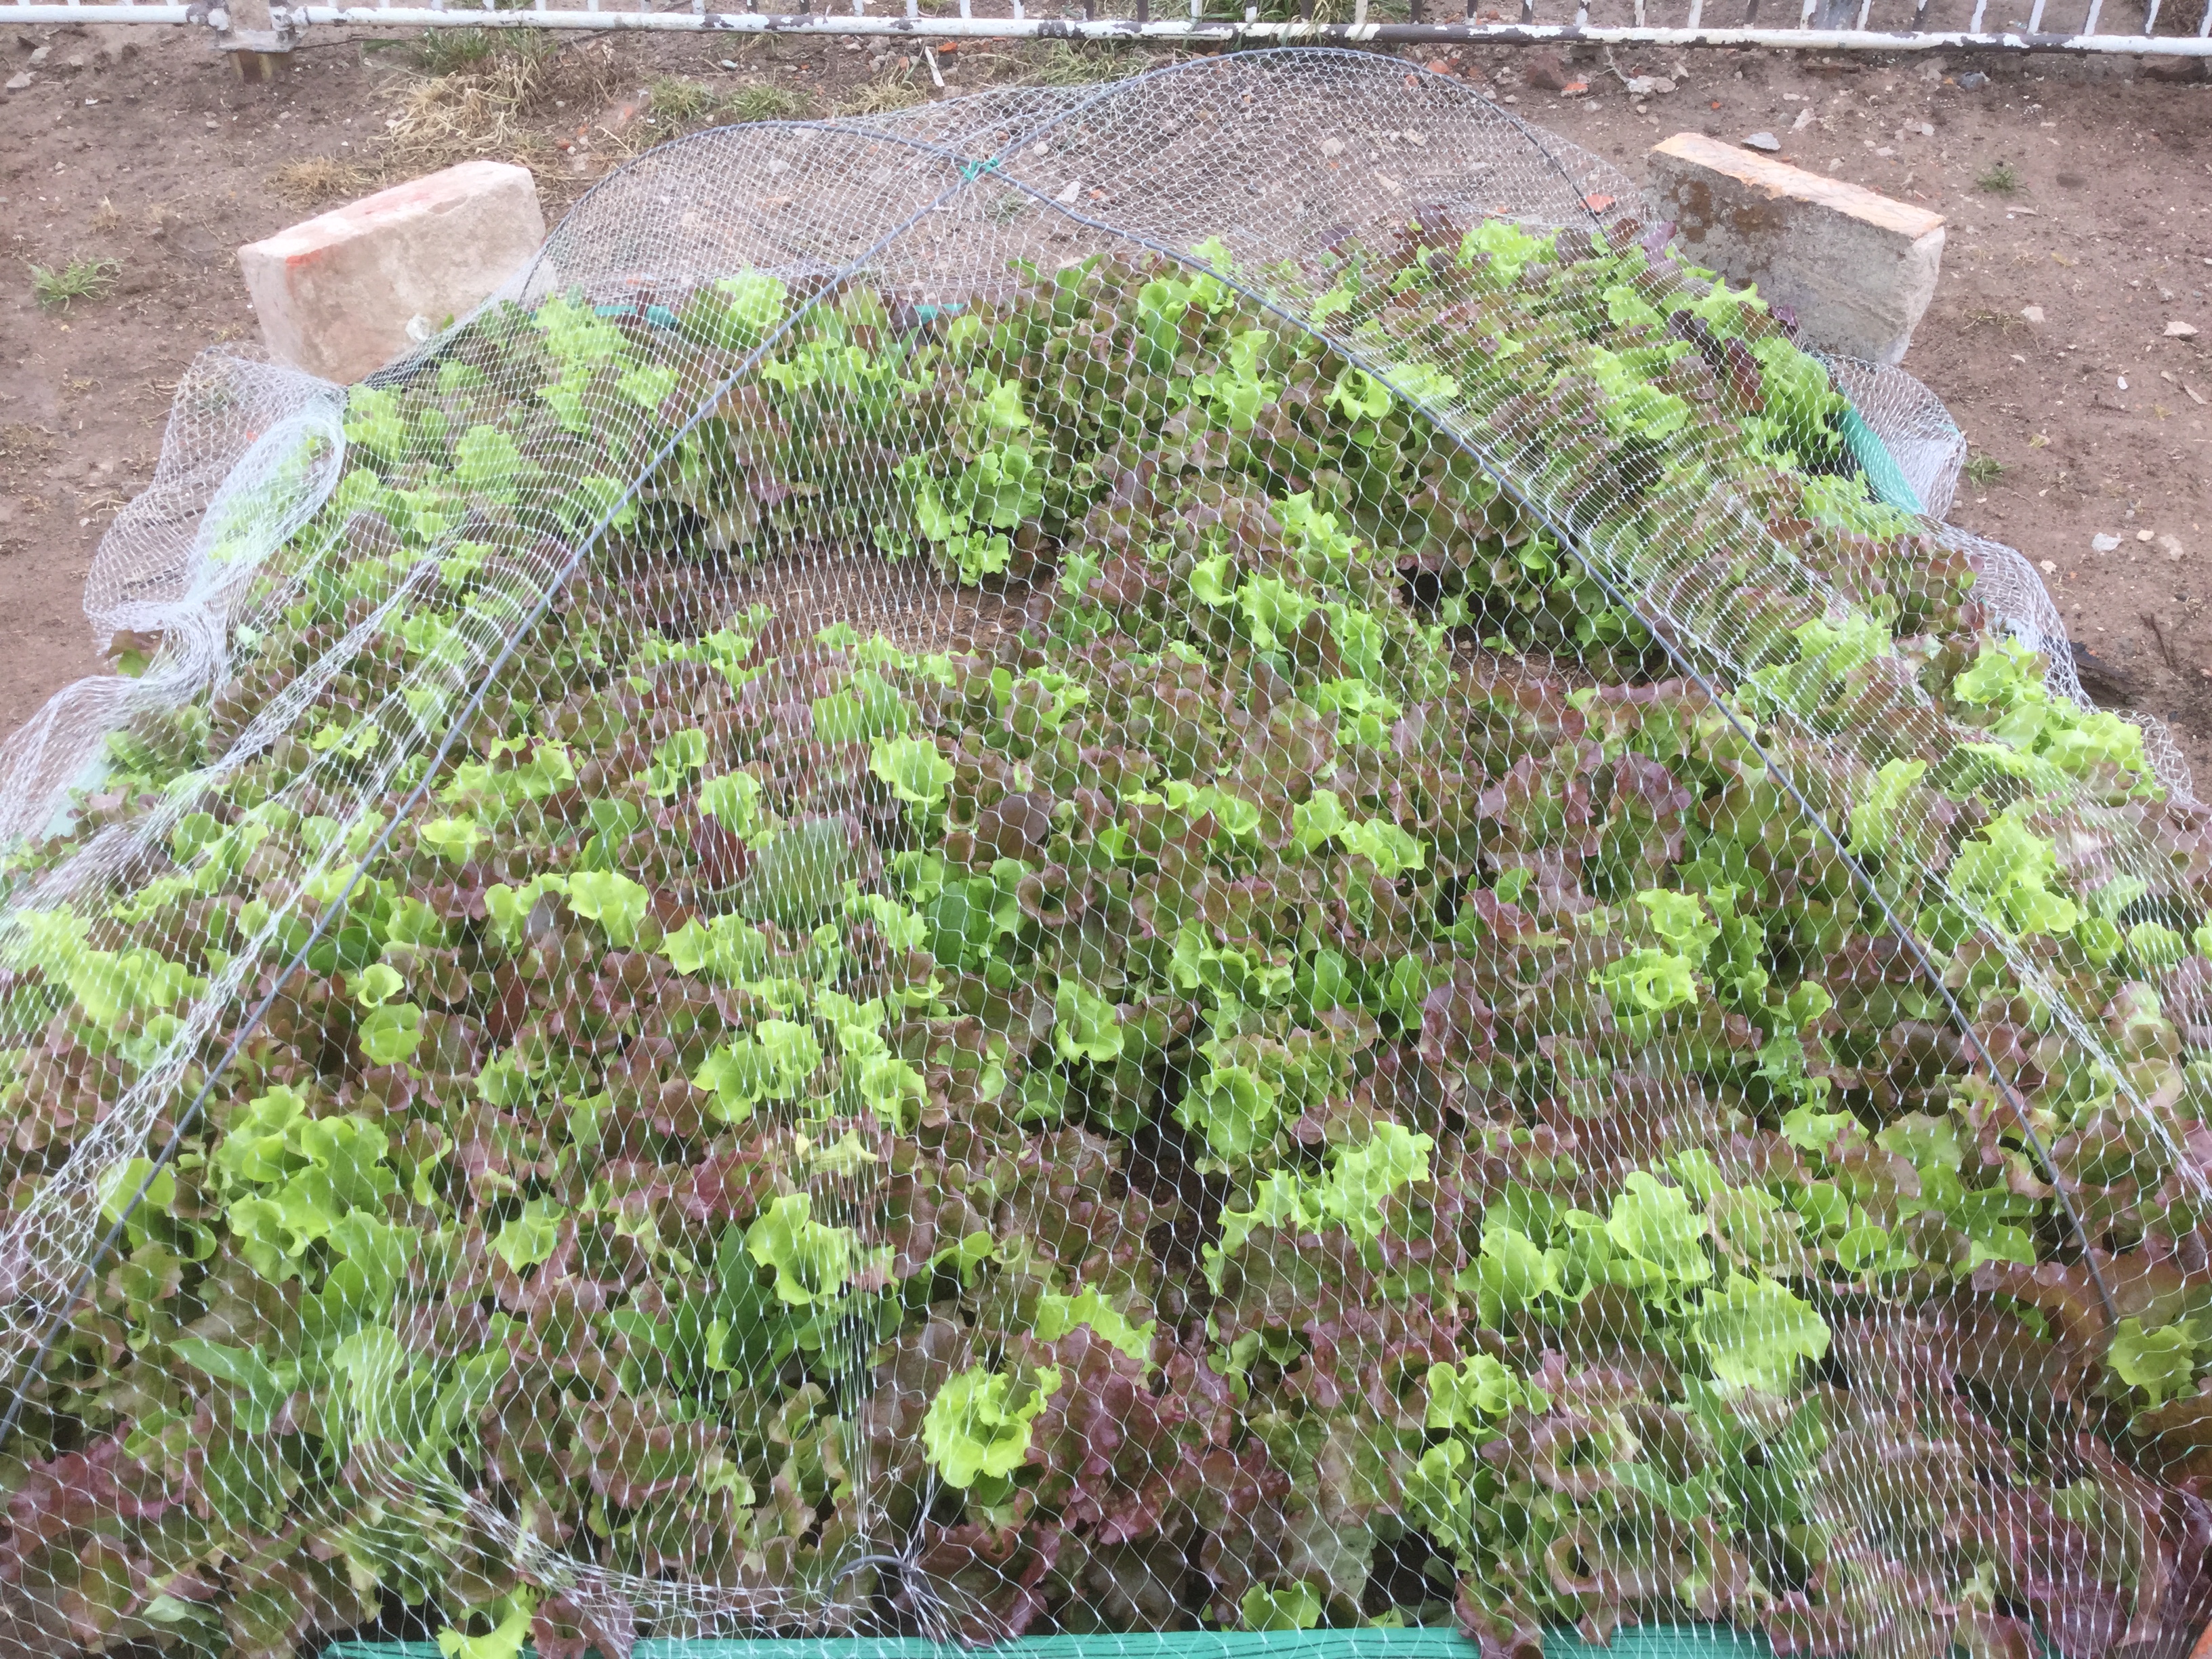 Lettuce galore!
 Donated info stand planted…
  Looking west across all the beds.
  Seed planting workshop success…
  Members painting the boxes and lining them with geotech.
Working bees are held every Saturday morning from 9:30am, see you there!!!
Growing season 2015 begins
All the planning and measuring is done.
Bed prep is done.
Plumbing and drippers done.
Now the work begins…

From the NE corner looking south. Bed 1 of 48 next to the tire corner post. All plumbed and wired up to the controller which has its own shed.

Made from recycled tin and 4×2 hardwood from our extensive wood pile of salvaged timber and old sheds on the property.
The wood heap is in the wrong location on the place and needs to be moved but I’m not touching it till the weather gets real cold. That way if there is a Joe Blake in there I stand a better chance of surviving the encounter!

Poly and 13 strand control wire together in the trench. The first Tee goes of left to 12 beds and right to the next 12 beds. The second Tee takes off to plumb the next 24 beds at the last Tee. The feeder lines are buried to allow vehicular movement around each of the 4×12 bed groups wit 5m track allowance.

The controller I’ve had for a few years and decided based on the fact I had it I would create the whole 48 bed project. Added to this was the talk recently locally there was thought of creating a Food Festival based on local producers. So why not become one too! Combined with our facilitating with other local Community Gardens and work with schools veggie gardens it was time to get really serious and ramp up the scale of committment and production.
This Lake Crest 48 station controller LED screen was not showing full resolution unless being looked at from directly below. I contacted the maker who promptly sent be a replacement and board! Unbelievable! No quibbling over warranty or replacement cost! Nothing! I have become an unabashed spruker for Lake Crest Controllers needless to say.

Each 12 bed set is isolated with a ball valve, individual solenoids are also able to be manually isolated to enable weeding or disking in.

Looking now at the first photo but a month later after 2 inches of rain over a three week period. NE corner looking south. The location for this 48 bed planting has not been used for any growing for about 100 years. It has had building, pig sty’s, barn, machinery shed, tracks and trees on it over that time but no growing. That means every week known to the Wimmera has now germinated and wants to take over. Stinging nettle, marshmallow, amsinckia, barley grass, skeleton weed, cape weed and the list goes on. While wanting to be as organic as possible some glyphosphate had to be used to get on top of the situation.
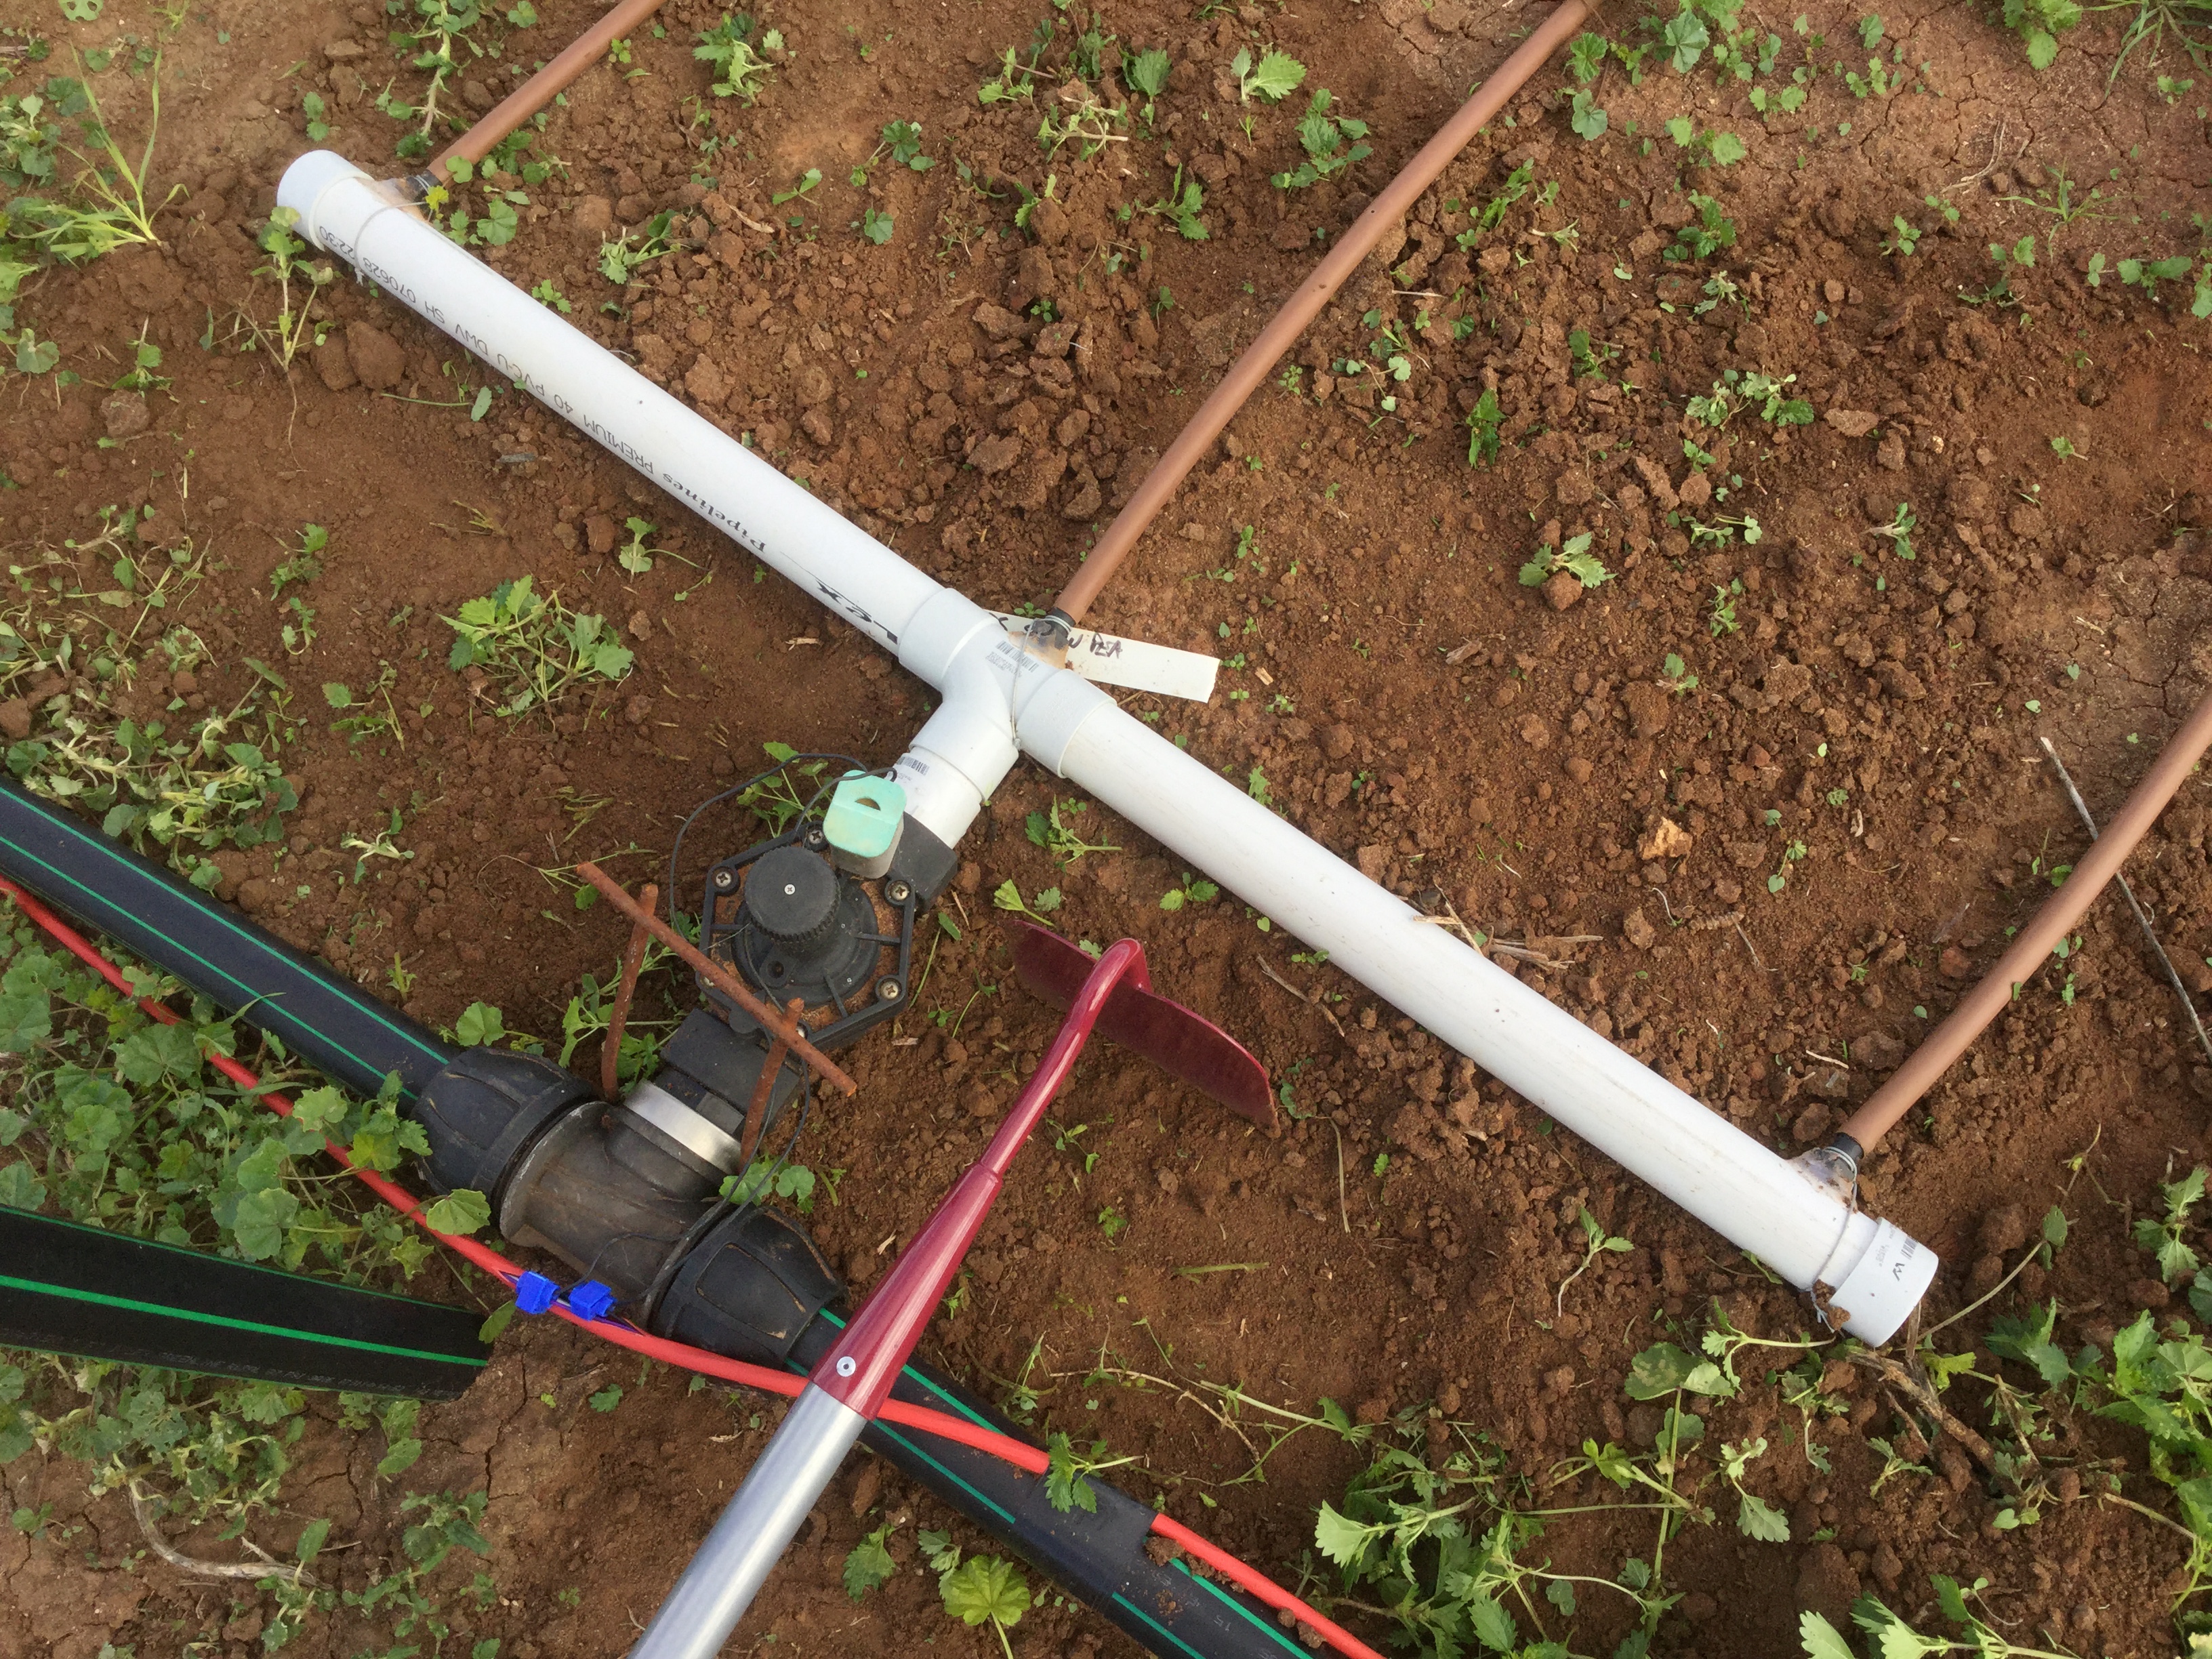
Close up of a solenoid with the black manual isolation knob on top, PVC tee and three directors connected to Drip Eze 13mm dripper line from Toro with regulated output of 3 lt per hour. Each bed is 23m long and about 1m wide, dripper spacing vary from 30cm to 50cm.

To keep on top of what is where is the controller room white board and companion planting chart, the best one I have ever used! Drop me a line and I’ll send you one for nothing. No more searching around for a comprehensive guide, this one has it all with no BS!
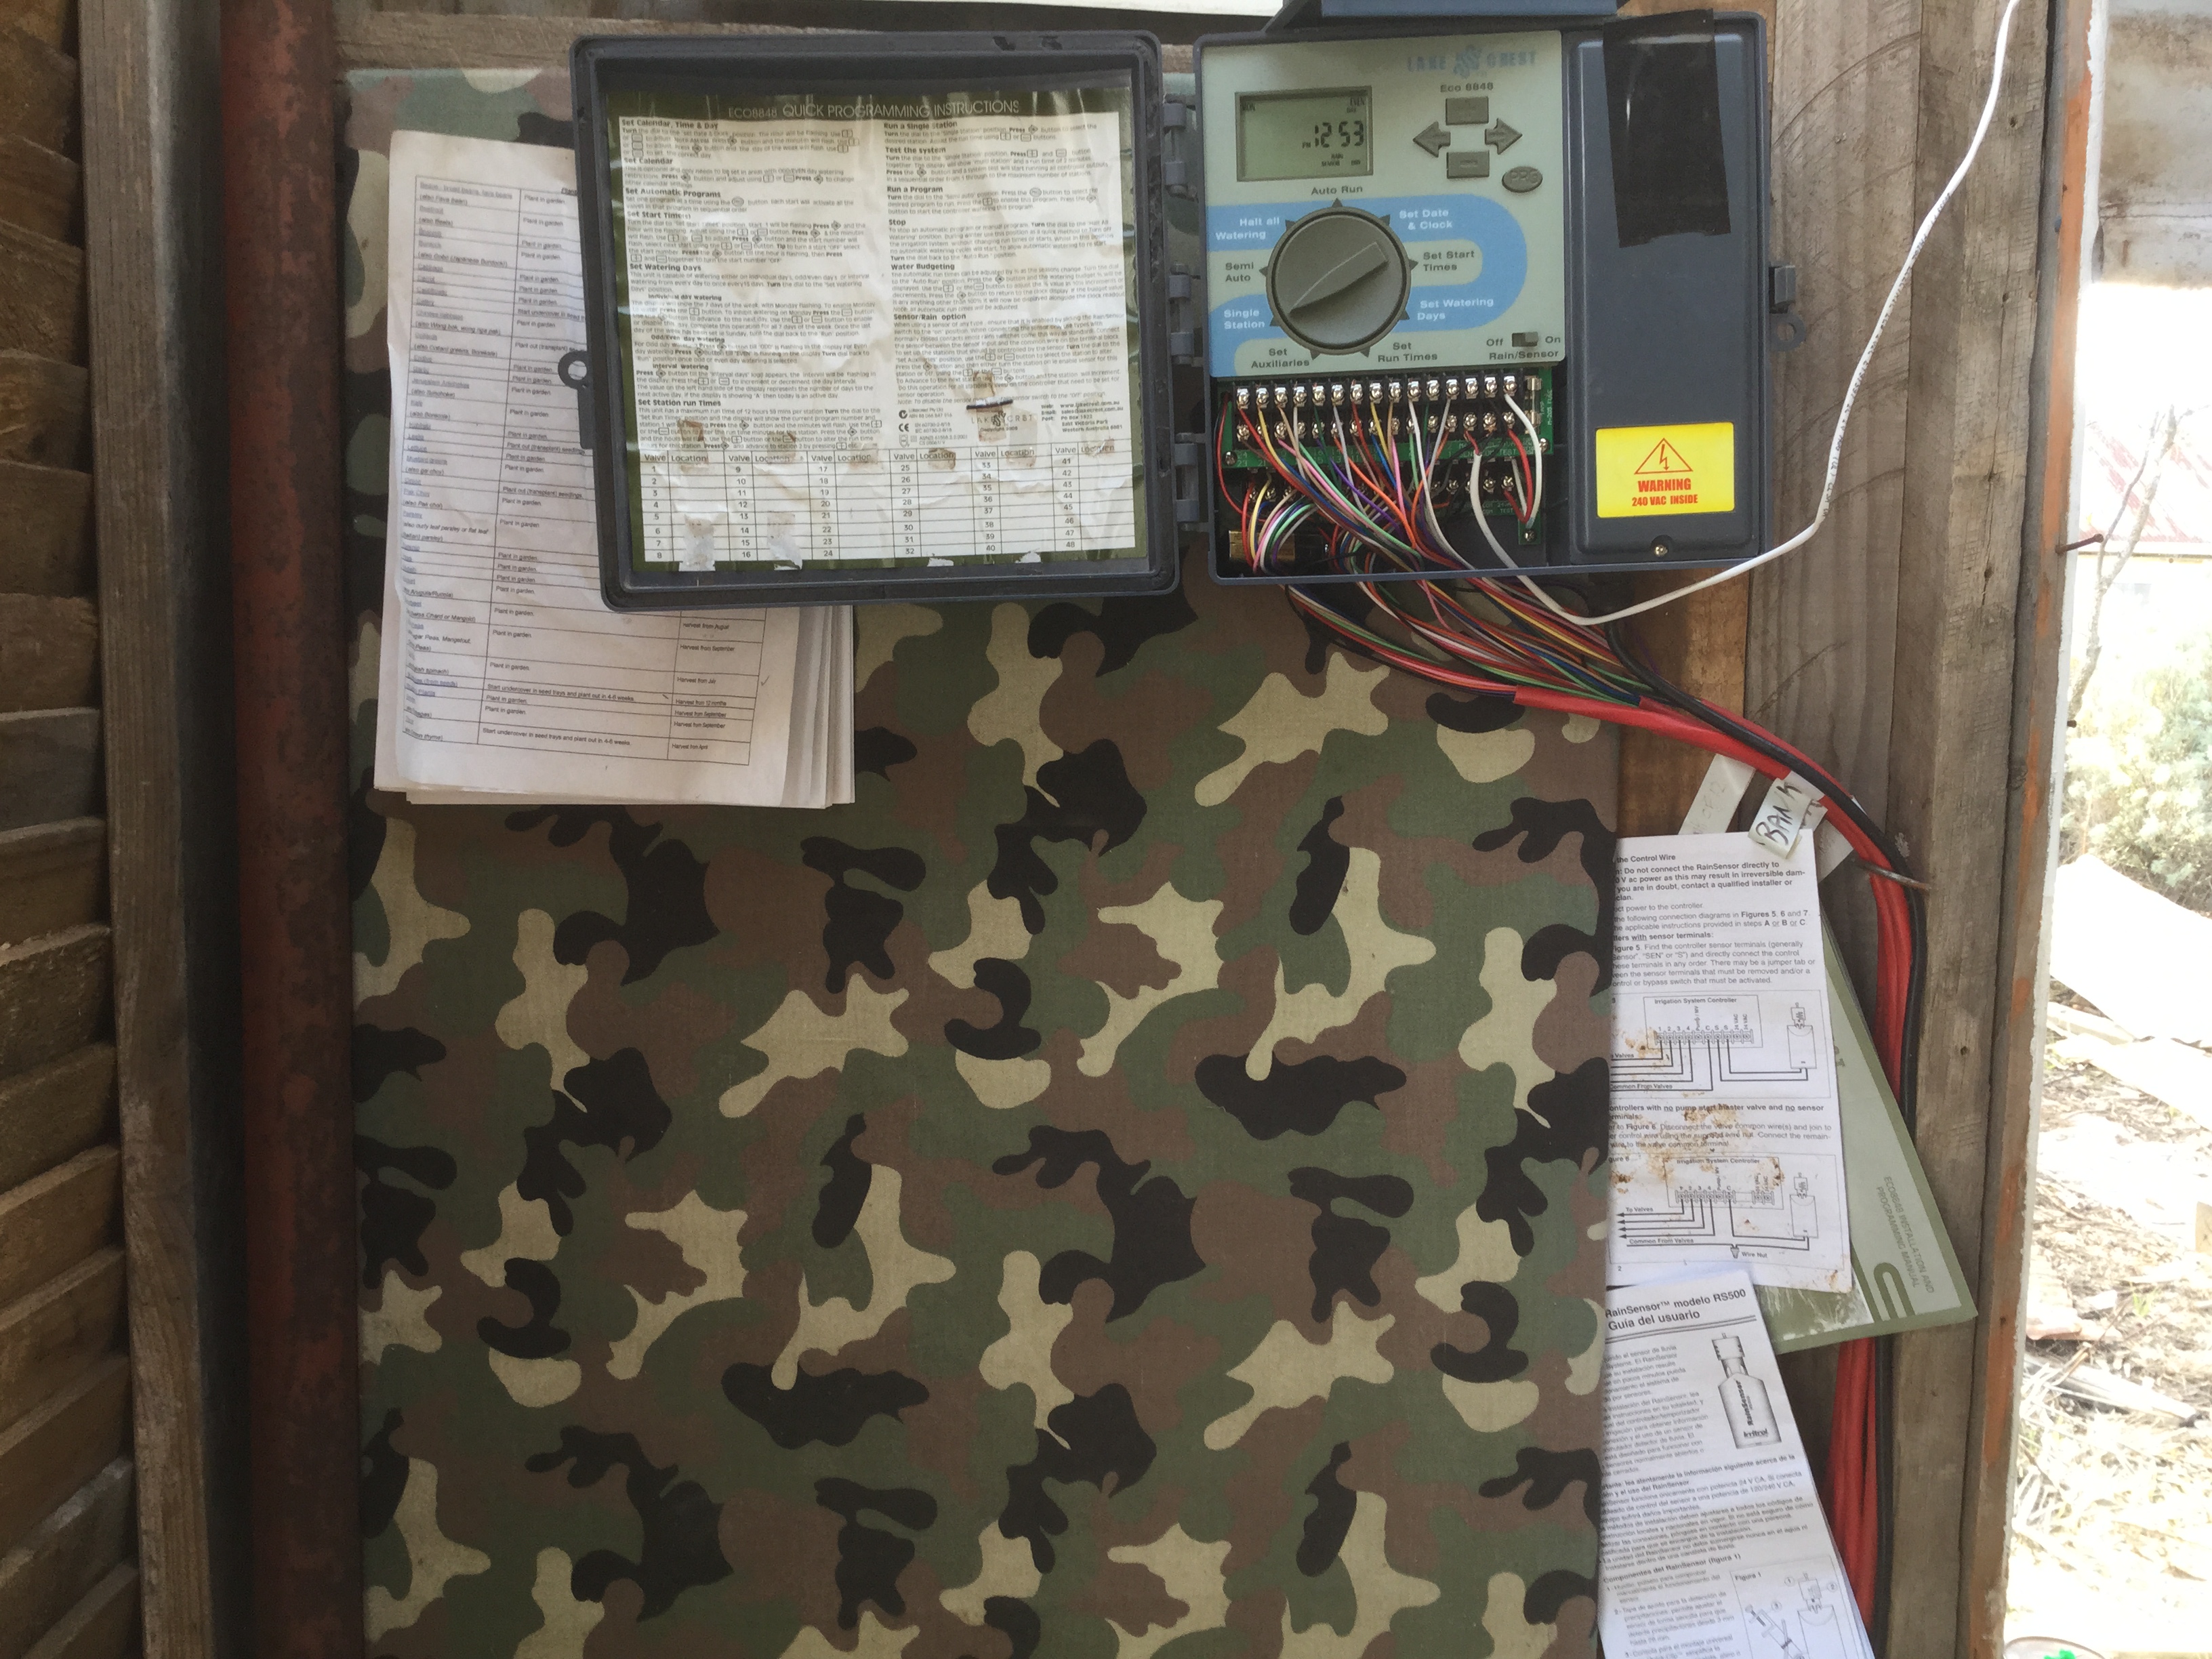
Controller board with instructions for handy reference as well as a yearly planting seasonal planner from Gardenate. Sign up with them for the best AU planting notes for your region.
Update later when it rains……………..
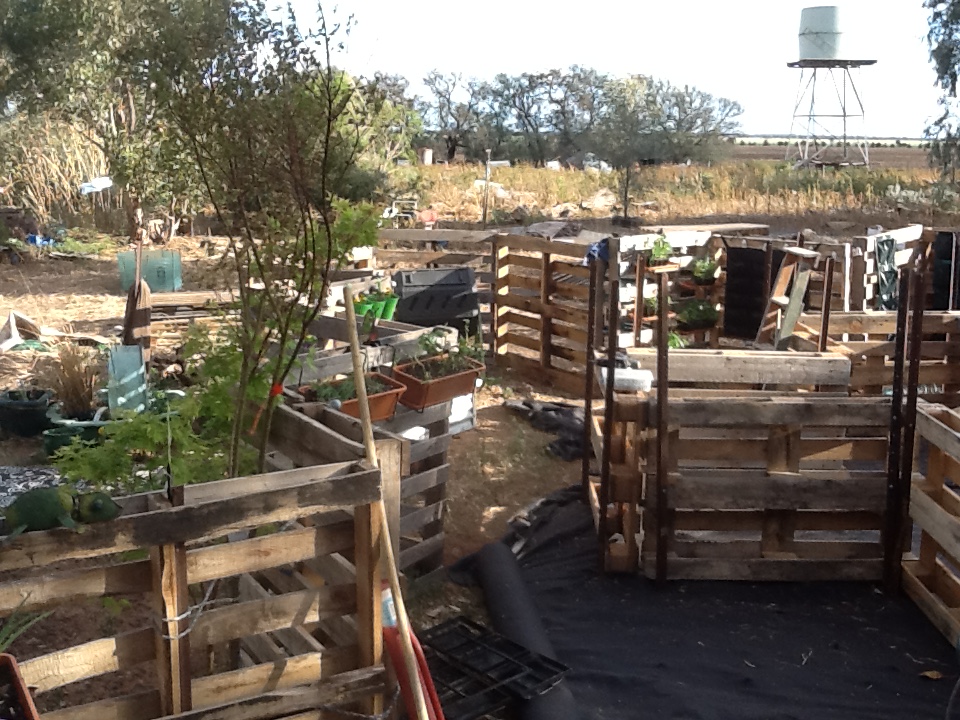
La Vergne’s pallet garden is filled and growing.
Got it done, finally! My wife has wanted a functional proper sized raised bed pallet garden for planting in spring. I have been collecting pallets from around the area for some time and a build up of similar types was finally occurring. It is very difficult to build with different sizes, shapes and strengths so you have to wait till enough of one type accumulate.
Now that has happened her garden could happen.
First we laid out three strips of geotech over the racked ground to level the site and remove sticks and stuff that might pierce it allowing roots through from two close by eucalyptus trees. Then 12 pallets in a cross shape were laid out and leant them against each other to determine exactly where to place it in her garden space. It had to fit close to the pallet wall but not too close and still give enough room for the Japanese styled solitude garden next door.
Once in place two star post were driven in and tech screwed solid. After the initial shape was made a lining of builders plastic 500mm wide was stapled in place along the upper portion of the bed and a geotech strip again 500mm wide behind the plastic and long enough to drape over the ground forming a barrier to letting any soil under the wall.
Pallet wall and east arm of the pallet cross.
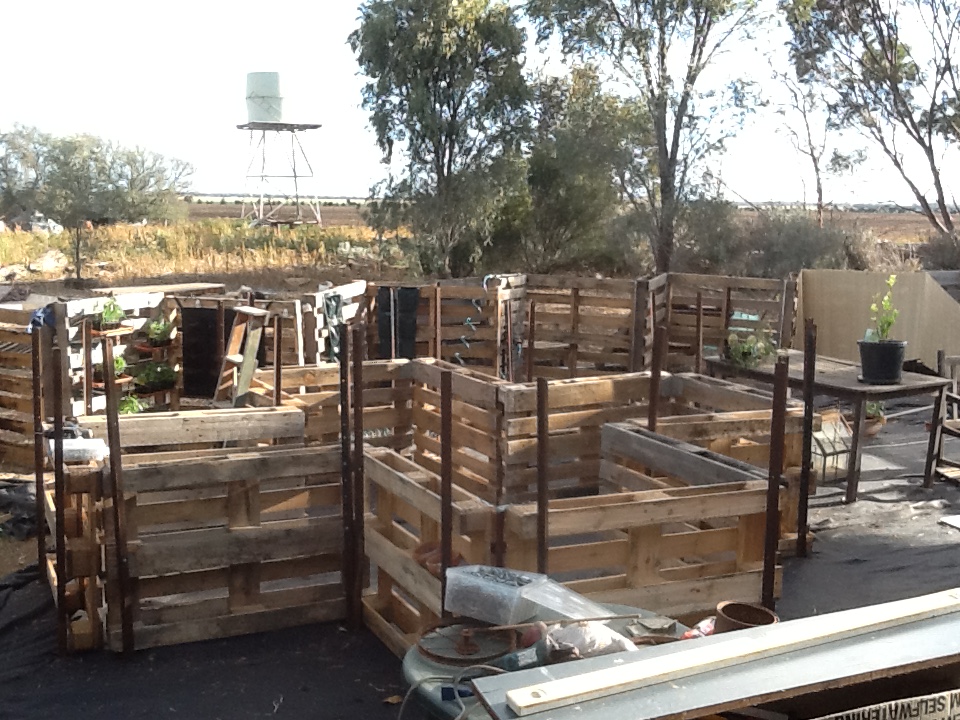
The pallet cross and south pallet wall.

Western part of her garden showing basic siting of her three tiered pond, stone pagoda and napping Buddah.
The house from where this pic was taken protects the area from driving hot summer winds and the tank and wormwood hedge with bamboo screens trap most of the damaging westerly winds we get. This spring has been the windiest in my lifetime with damaging wind one day a week at least. Our bush food planting behind the tank are yet to really establish and assist in keeping the winds down so we just have to live with it for now.
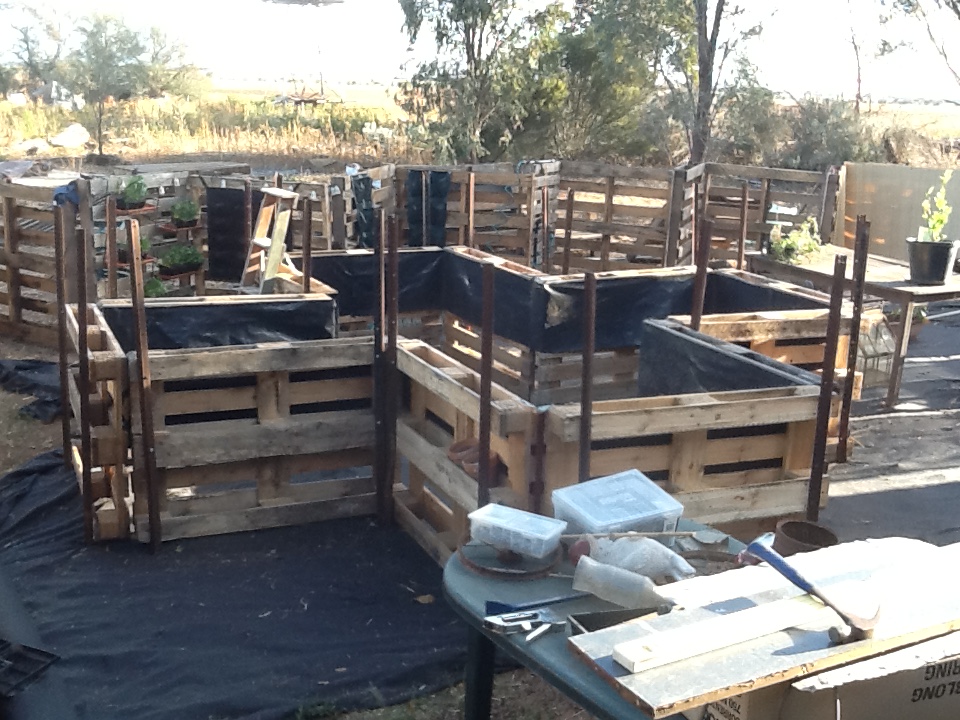
Builders plastic done with the strip of geotech next to get stapled.

Dirt in with Lachlan spreading it out and tamping down.
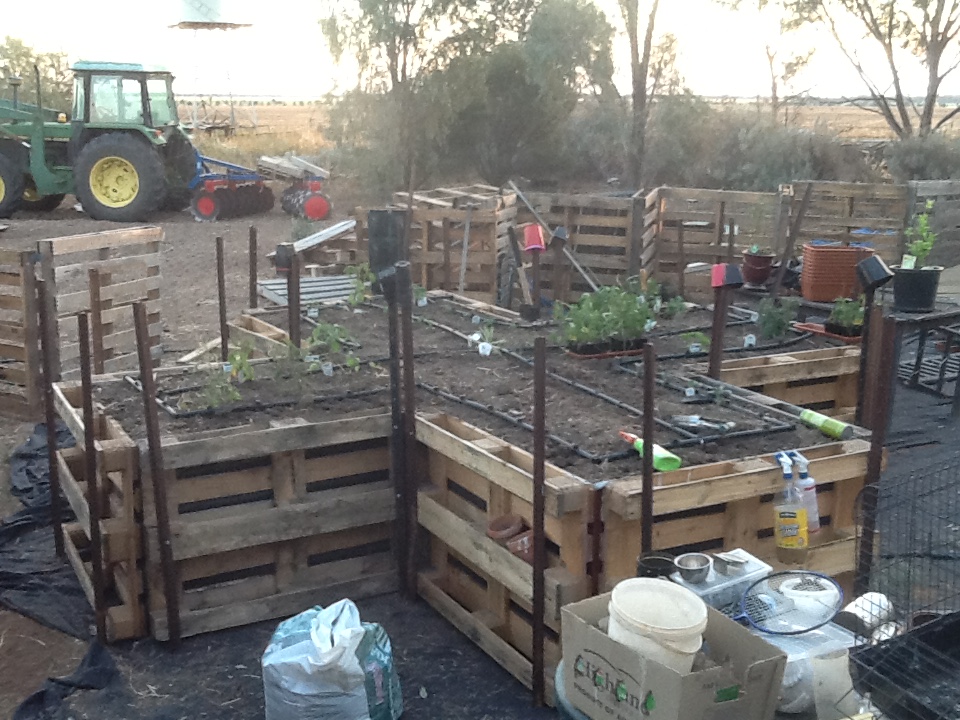
Finished bed with dripper system in place, plants she wanted in and alls well.
Now to tackle the earwig problem…
Earwigs are not a pest problem till they get up in numbers so much that their regular diet is depleted and they start chewing on things you would prefer they leave alone. Like cherries, young tree leaves, strawberries and even rhubarb leaves which I hope they get a gut ache from.
They leave some things totally alone but ravage others to the point of destruction, like the pot marigold on the left. They hide underneath the pots in all three in equal numbers but only eat the one plant.


This young pear has been stripped of all new leaves, so I started an experiment with two goals.
- To find a way of deterring them from certain plants.
- To find a natural way of trapping then eradicating them.
I made a spray mix of Tabasco sauce, detergent and hot chilli sauce. Strained through muslin and sprayed onto leaves of a tree being torn to shreds. The result being the leaves sprayed were not touched but those below were still being eaten.

As shown here the top is untouched while the two lower branches are eaten, the left branch totally stripped. Note the new shoots at the top are untouched by earwigs and not affected by the hot sauce spray.
That part of my mission is complete. Now to the next challenge.
I placed old blankets, sheets of tin, wood and lino strips in the orchard between trees to provide shelter for the earwigs during the day. The worst one was the tin sheets as it got too hot and nothing stayed beneath it for long. The others all worked well with the best being an old cupboard door as shown below.

Not many shown here as its not easy to flip a door and get the Ipad up to shoot it. Suffice to say it works and now I had to find a way of killing them on the spot.
During one of my workshops that I hold around the place, an older lady was telling me how her mum used soap to kill a lot of bugs she didn’t want in her veggie garden. This was back in the days before off the shelf pesticides were available. Her method was to cut a small piece of soap off a bar, place it in a bottle of water and shake to dissolve the soap piece. She then poured it onto any infestations and re-covered them. Evidently the soap breaks down the insects skin and kills then. So I tried it with the only soap still around from those days, Velvet Soap.

I caught some earwigs and gave them a light spray, within an hour they were dead. Now every morning after the first coffee I patrol the traps or hides and squirt any beasties found there and re-cover. I have found more drop-tail lizards/skinks, scorpions and centipedes in the garden as a result. Not keen on the last one as they can get very large, up to 20cm long and dark olive body with red legs. Nasty!
Will post more of the garden once fully complete…
Still working on the scoria base, other projects/priorities keep getting in the way, but this shot shows the lush growth of tomatos, eggplant, chives, strawberries, afro and italian parsley, kale, mini cabbage, zucchini, rhubarb, yarrow and other herbs.

The only additives to the soil was some home made potting mix and a monthly spray of seaweed extract. Some close ups…


There are problems though in LG’s Cross Garden, here is one…

His/Her name is Heckle. There were two we saved from a fallen nest, the other was Jekyll. Jekyll didn’t make it but Heckle makes up for that. Heres his/her contribution to gardening…

Childs bracelet, gutted green tomatos, marbles, golf balls, brass bath plug, small bottles, belt buckle, wire slingshot, molten aluminium, old key set, solar light bulb cover, blue stones and glass and brass cutlery. The solar lights are now denuded of covers completely. This is the best find so far…
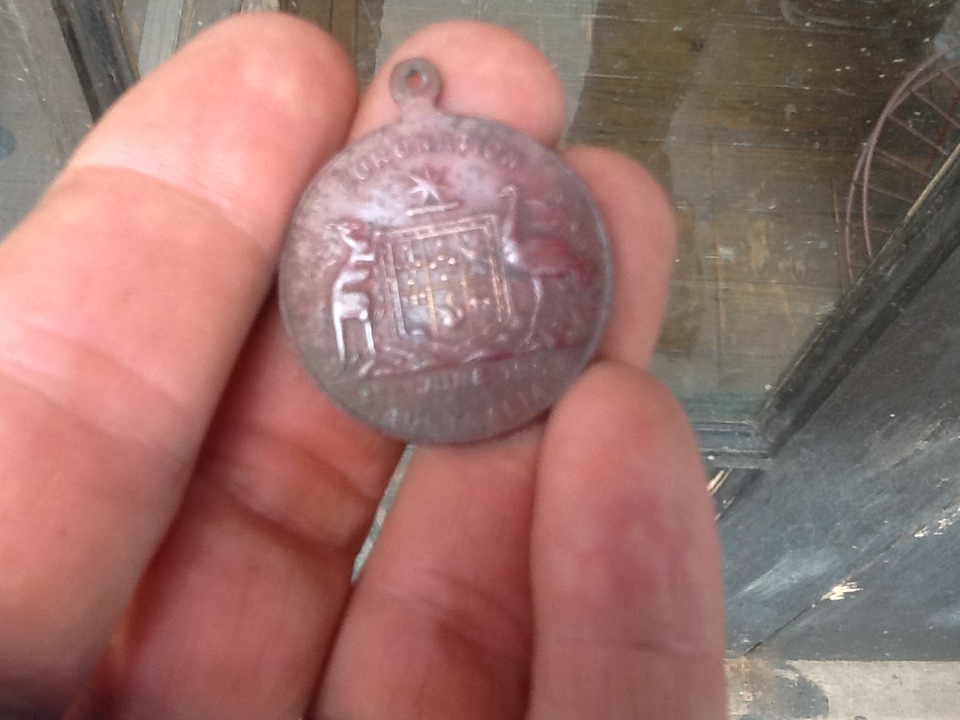
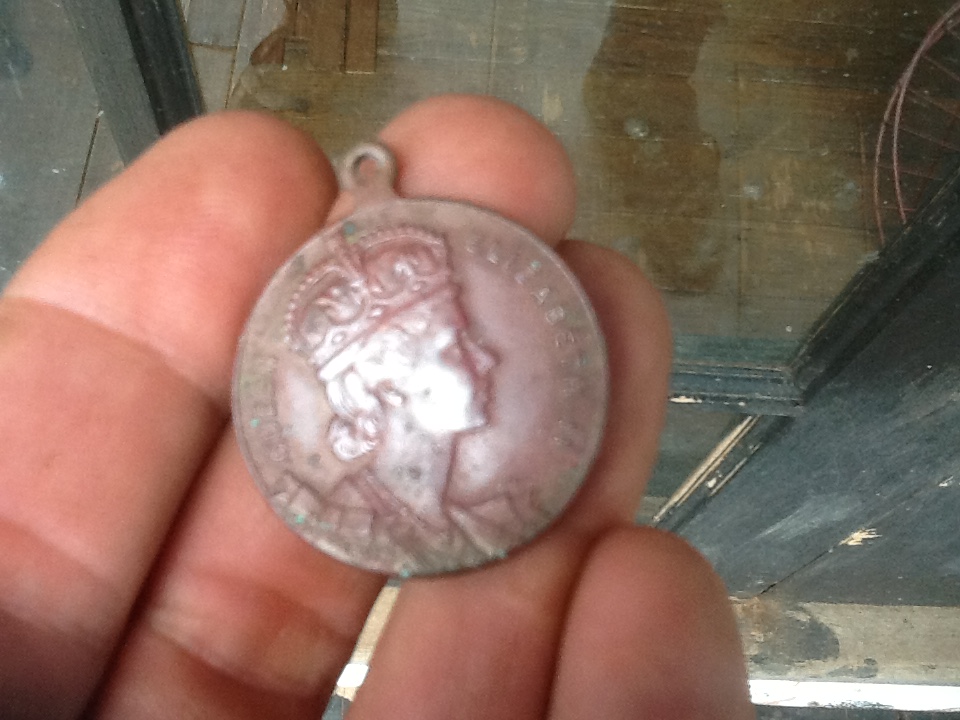
A 1953 coronation medal! Buffed it up a bit and showed Father who reckoned it was on of his siblings who lost it way back when. He also said there is an engagement ring in the vicinity that was lost when one of his sisters was playing with Nannas ring. Hope he finds it!
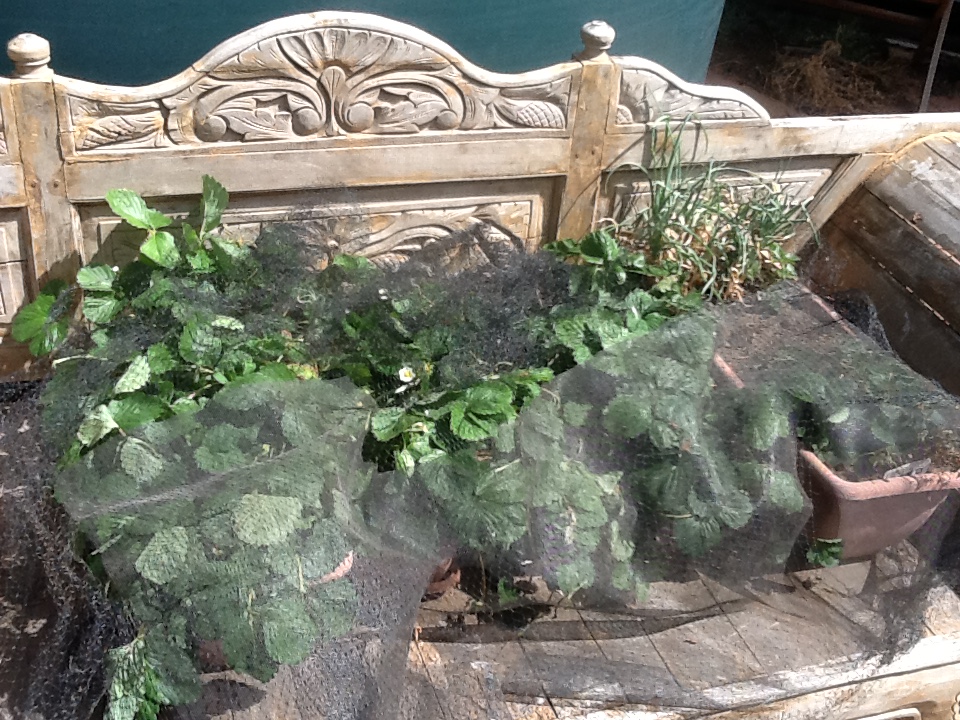
Any ripe red tomatos Heckle claims as his/hers so they have to be picked early and strawberries are now covered with bird netting which foils him/her.

Might have to rethink gardening methods with Heckle around…
Started a seed library for real now, you interested?
The Garden of Earthy Treasures has now opened a Heirloom Vegetable seed library with over 280 varieties cataloged to date and approximately 8,000 seeds. Anyone can join and add to the collection and then be entitled to withdraw any type of seed of the same volume or less.

This is one of two fridges and a chest freezer for other seed needing the lower chill factor.
As changes are made we will keep you informed…
January 2015 update.
We have added a database of all seeds collected with details on source, amount, planting notes and any other relevant info.
We have also concreted our loaning criteria so those of you who have contributed already have your seeds fully protected.
Policy is as follows…
- All seed is to be heirloom variety. No hybrid types at all.
- What you put in you can get out in other types of seed either in one lot or many smaller lots. eg. depositor puts in 100g of lettuce seed so can take out 100g of one plant or 10 lots of 10g of any assorted seed or any combination there of.
That’s it! Keeping it simple but if you think there should be any additions let me know and I’ll consider them.
March update.
Thanks to the new members and now another 145 varieties is store! Looking at having another fridge installed to take more seed and am working on a database to detail member details and their contributions.
Keep them coming!
July update.
Just finished adding another 93 varieties to the fridge and planted out most of the brassicas, see my other post.
Have decided against taking species and varieties that are likely not to do well here, tropical plant seeds are a no go.
Have sourced second fridge to take the extra seed and been through the database. The seed older than 2013 will be donated to Community Gardens in the area.
Strawberry tips
My strawberry collection is getting larger every year with runners galore. So many I have come up with a simple wire pin that is not lost in the ground like others do.
Start with a 3 inch piece of soft wire, bend in the middle, twist one turn at the bend while holding the ends still and you have a wire pin with a grip loop on the top making it easy to locate when cutting the runner loose after it has rooted.
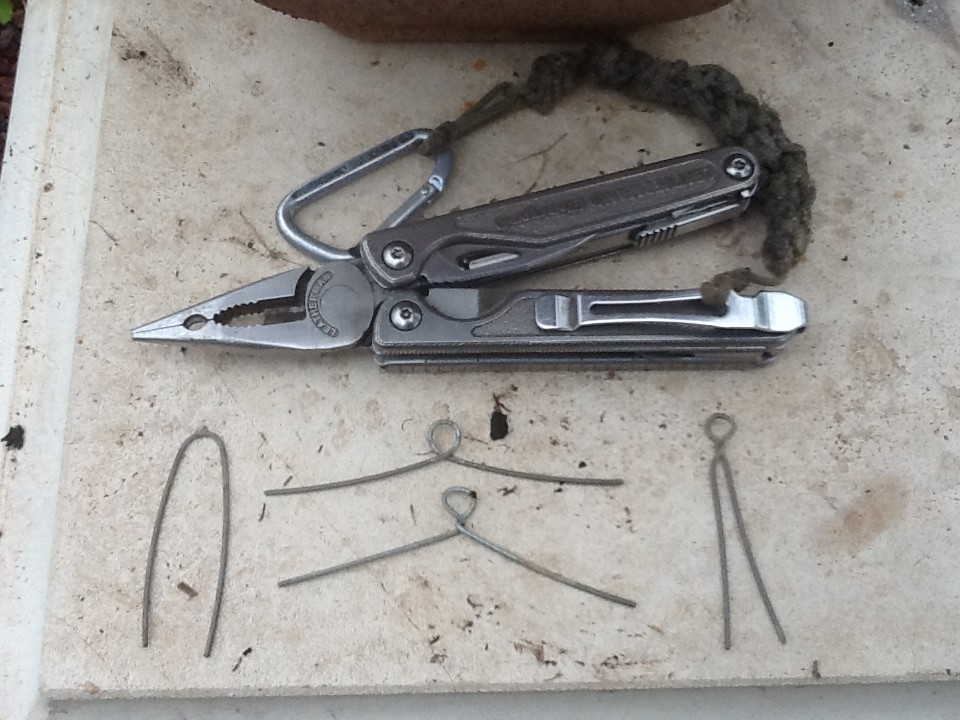
Pic of before during and after.
This last growing season the Torries went off the charts when sending out runners while the others in my collection didn’t. This year (2014 Oct) all have been given the same mulch and feed so I will compare growth rates between Hokowase, Kunawase, Torrie, Chandler Red, Red Gauntlet, Phenomenal, Lowanna, Alinta, Meliodora, Pink, Amsterdam Rose, Kamu, Cambridge Rival, Sweetheart, Tioga, Blondie and one other with no name that I know of that the seeds on the fruit actually germinate! Be happy for anyone to suggest what it is!

This almost ripe one has sprouted its seeds and the green one below is even more pronounced.
Will let them continue and see what happens…
New chook house from second hand materials.
School holidays are a boon when you want a bigger project started which has turned out to be an education for the boys. They have learnt small things like how to de-nail salvaged wood and bigger picture things like how to orient a building to maximize heat retention in winter and utilize cool draughts in summer.
Building the chook run was a challenge as wire and myself do not have a happy relationship. Simply put I hate wire in any form. It does not do what I want it to do and seems to follow its own path thumbing its nose at me. Still it is up and functional with a dripper line around the outside watering Jerusalem artichokes on the south side and berries on the north.
The wood mainly comes from leftover wood used to pack piping from the installation of the Wimmera Mallee Pipline, salvaged timber from the transfer station, steel posts from an old pig sty, galvanised roofing iron and nails from a windbreak fence that succumbed to wind, an old wire grain field bin, scrap netting and weld mesh from the farm rubbish heap.
The site was chosen as it has some elevation to ensure good drainage and mud free living for the chooks. Any manure and nesting material is close to the veggie beds and excess vegetation from the beds is easily thrown over the fence to them to scratch through.
Lachlan, Gordon and myself constructed it with advice from Father and took a month to complete.

Showing construction method used and one of the two nesting box inspection and egg collection windows.
Floor, door, windows and three walls up. Roof trusses made up and ready to go on with old gal roofing iron and nails. All recycled from stuff around the farm. Veggie beds are between the chook shed and barn in the background with the tractor.


Lachlan and Gordon making the brick and mud stepping stones. They had to measure the distance from the chooks shed door to level ground, work out how many steps, cut the steps into the gradient and mud cement them in place. Did a good job and looks great at night with solar lights next to each one.
Detail of run fence with dripper line and solar light. All our pots and trays are stored in the run so bugs move around at night and take cover in the morning. When chooks get fed you turn over the pots letting the birds do a clean up. Earwigs historically have been a big problem here with slugs running a close second. Will see what changes.
Last middle pic shows the chook run with summer shade hut. Also leaves one dry spot in the run in winter. Next door is the aquaponics where any excess plant material gets thrown over to the chooks for them to pick thru. Terradome in background with the breeding tanks for the Silvers and Yabbies.

In the height of winter the marshmallows are over six feet tall and provide the best wind protection during our frosty nights. Was going to lop them off but I couldn’t have planted a better windbreak as it turns out. The runoff from the roof and highly matured soil have given them a huge boost. Other marshmallows around the farm are only four foot tall like around the strawberry plot.

Yabbie breeding tanks
Image Posted on Updated on


Female Tanks
Paired yabbs in tanks remain here until the female lays eggs which attach to her swimmerets and are then fertilised by the male. Once the eggs colour changes indicating they are viable the male is removed back to his bachelor pad tank. Once the eggs hatch and fall from the tail below the wire mesh floor the female is then moved to her holding tank to rest. When the young yabbs get bigger they are halved and moved to another tank. This continues fortnightly till about five yabbs occupy one tank where they grow out to serving size. They are then cold packed and freighted to final destination/restaurant.
- ← Previous
- 1
- 2
- 3
- Next →

You must be logged in to post a comment.